• Home
  • Suggest A DIY
  • DIY Newsletter

Craft Gossip

Independent craft blog since 2007

  • About CraftGossip
  • Our Network
    • Bath & Body Crafts
    • Candle Making Ideas
    • Crochet Ideas
    • Cross Stitch
    • Edible Crafts
    • Felting Patterns
    • Glass Art
    • Home & Garden Ideas
    • Indie Crafts
    • Jewelry Making
    • Kids Crafts
    • Knitting Patterns
    • Lesson Plans
    • Needlework
    • Party Ideas
    • Polymer Clay
    • Quilting Ideas
    • Recycled Crafts
    • Scrapbooking
    • Sewing Patterns
    • Card Making
    • DIY Weddings
    • Not Craft Ideas
  • Giveaways
  • Roundups
  • Store
  • Search

Glow-In-The-Dark Duct Tape Safety Slapbands

September 29, 2013 by Vikram Goyal

I was so excited when 3M offered me the opportunity to come up with a simple craft for Halloween using their duct tape! I automatically was drawn to their glow-in-the-dark duct tape options and began thinking of ideas.

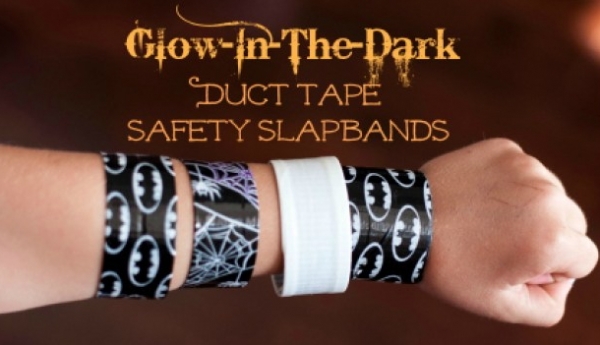
Being a mom of 4, the night of Halloween can make a mom nervous with kids running all over the place in the dark. I thought it might be nice to use the glow in the dark duct tape to make fun slap bracelets as an added layer of protection and safety.  This would also make a fun and simple Halloween party craft!

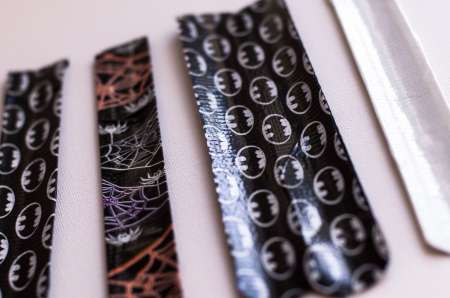
3M Offers three different types of Glow In The Dark Halloween Duct Tapes:

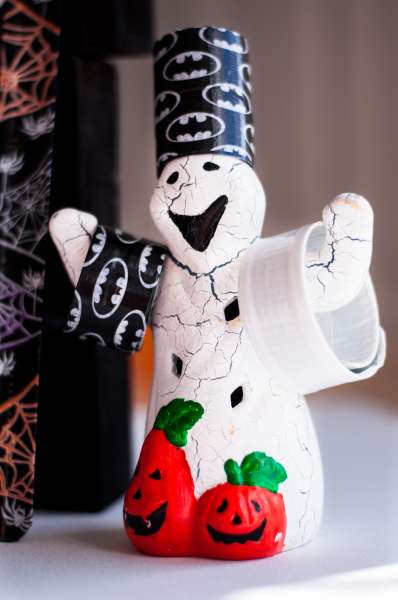
Batman, Spiders and Spiderwebs, and Solid Glow

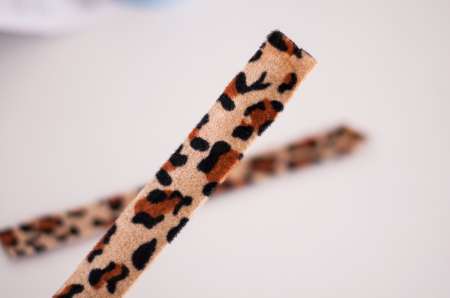
To make these super simple Slapbands you will need:

  • 3M Glow in the Dark Halloween Duct Tape of your choice from Scotch® Color & Pattern Duct Tape website
  • Slap Bands from Dollar Store or Online
  • Scissors

3M also included an amazing pair of their scissors and I must say, they work wonderfully to cut through duct tape!

Instructions:

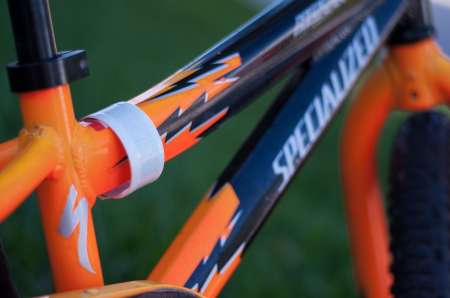
1.Grab your slap bands and peel off the layer of material they have included on the band. The cheap ones are barely glued on and come off easily. You will be left with a piece of thin metal.

Open the slapbands

3M duct tape slap bands

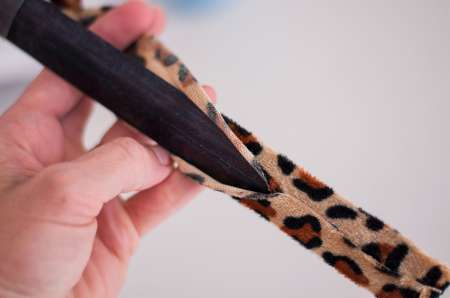
2. Measure out a piece of duct tape and lay the rounded side on top. This will be your bottom layer of the bracelet where you can have seams. Its important to make sure you do this side first as to not have your duct tape edges on the top.

3M-Duct Tape Slapbands-9

3M Duct Tape

3M Duct Tape Measure

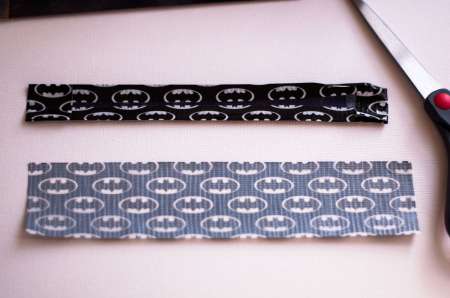
3. Wrap the duct tape around, or if it is a skinny duct tape, you can just leave it flat and create a rectangle bracelet. The choice is yours. I did it both ways and they all work out fine!

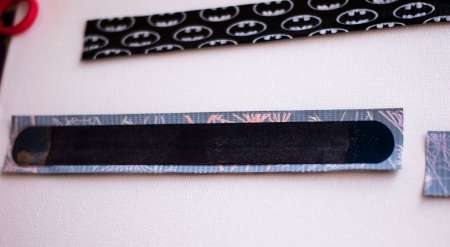
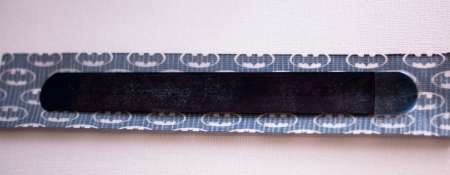
4. Cut a second piece and carefully place the duct tape directly on top of your bottom piece so you don’t have any overlapping sticky edges.

Overlay duct tape

5. If you want a rounded end slap band, here is where you will cut your edges to match up with the end of the slap band. Otherwise, just leave a square edge.

6. If you have older kids and they want a more edgy cool look, you can double up your slap bands and use thick duct tape…my oldest daughter loved the look of it!

Slapbands

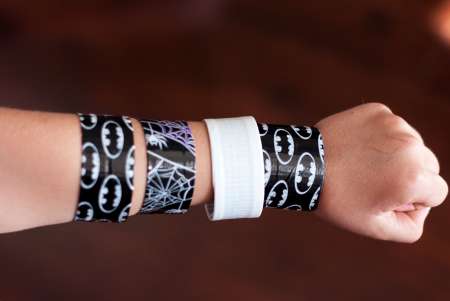
7. Now you are ready to practice slapping the band on your arm, or your bicycle, or your trick-or-treat pumpkin or bag…or a ghost!

Slapband on bike

Duct Tape Head on Figure

My kids had a great time helping me with this project and can’t wait till Halloween!

Thank you to 3M for providing such awesome materials for this craft!

SideNote: The all white glow duct tape glows the best! But the Batman and Spider Duct Tape is way cooler!!

This project was written by Kristen Stephens – our ex-lesson plans editor.

colors & patterns, duct tape, tape , scotch duct tape, scotch tape

This post is a collaboration with Scotch® Color & Pattern Duct Tape, but words and opinions are my own.

Read These Next

  • How To Start Jewelry Making: Beginner Tools,…
  • DIY Taylor Swift Bracelets and Ideas: Craft Your Own…
«
»

Comments

  1. beth engelmann says

    October 7, 2013 at 12:47 pm

    I love this craft! I write a column for our local paper in Chicago and would love to include it in my halloween column. Would that be ok? I would credit your site and link back and credit the designer ~ please just let me know as Id also love a high res photo to include as well my deadline is this wednesday 10/9/12 at 10 AM. Thanks so much!

  2. Yun Kelly says

    October 13, 2013 at 2:09 pm

    This is a great idea!! They would make great favors for a Halloween party as an alternative to more candy. 🙂

Have you read?

Stitch Your Favorite Fruit on a Sweater

The other day I saw a post from Pinterest about trends for summer and it said one of them was “cultivating whimsy.” 

Well, I don’t know where Pinterest has been all this time, but we’ve been cultivating whimsy here at Craft Gossip for a long time. I love sharing projects that are a little different, things that make you smile when you see them, and will make you smile when you knit them and wear them or use them. 

Such it is with the Tutti Frutti tee knitting pattern from Bea Creative Knits. 

This cute little baby tee is worked top down in the round with contiguous shoulder construction to shape the sleeve caps. There are short rows for the neckline and folded hems with picot edging at the hemline, neckline and edges of the sleeves. 

All of this would be great on its own, but then there’s the addition of a super cute fruit icon, which is added with duplicate stitch. There are a lot of options, including strawberry, banana, orange, cherries, watermelon, lemon, blueberries, kiwi, peach, dragon fruit, apple and pear, so it’s likely you can add on your favorite fruit. 

It is offered in eight sizes, to fit a bust measurement ranging from 28-30 inches (71-76 cm) to 56-58 inches (142-147 cm). The design is meant to be worn with around 6.3 inches/16 cm of negative ease, but you can choose the fit you prefer. There’s also optional bust and waist shaping included in the pattern if you want to make it even curvier.

This is considered an advanced beginner or intermediate project because of all the skills involved, but it’s sure to be a lot of fun even if some of these techniques are new to you.

Grab a copy of the pattern for yourself form Bea Creative Knits on Etsy. 

[Photo: Bea Creative Knits]

RSS More Articles

  • Everything You Need to Know About Embroidery Hoops
  • Needle Felting Fairy Tutorial by Santa Meada
  • Printable Stickers for Journals and Planners – Self Care
  • Stitch Your Favorite Fruit on a Sweater
  • 12 Color Wheel Inspired Scrapbook Layouts
  • Crafts With Old Bricks: Creative Ways To Upcycle Leftover Bricks
  • How To Make A Milk Mache Molding Compound
  • The 5 Outlet Placement Mistakes You Don’t Want to Make
  • Celebrate the Spirit of the Southwest with These Stunning Indian Navajo Tribal Quilt Patterns
  • Pricing Handmade Sewing Items Without Undervaluing Yourself

Copyright © 2026 · CraftGossip | Start Here | Contact Us | Link to Us | Your Editors | Privacy and affiliate policy