• Home
  • Suggest A DIY
  • DIY Newsletter

Craft Gossip

Independent craft blog since 2007

  • About CraftGossip
  • Our Network
    • Bath & Body Crafts
    • Candle Making Ideas
    • Crochet Ideas
    • Cross Stitch
    • Edible Crafts
    • Felting Patterns
    • Glass Art
    • Home & Garden Ideas
    • Indie Crafts
    • Jewelry Making
    • Kids Crafts
    • Knitting Patterns
    • Lesson Plans
    • Needlework
    • Party Ideas
    • Polymer Clay
    • Quilting Ideas
    • Recycled Crafts
    • Scrapbooking
    • Sewing Patterns
    • Card Making
    • DIY Weddings
    • Not Craft Ideas
  • Giveaways
  • Roundups
  • Store
  • Search

9 Crafts For Your 18″ American Girl Dolls

January 30, 2015 by Larissa Coleman

If you have a little girl in your home, you have probably heard of the popularity of the 18″ American Girl Dolls.  There are so many to choose from that you can have them look almost exactly like your own little one, and have matching clothes as well.

Each of these 18inch dolls or American girls can also come with its own wardrobe, accessories, and furniture.  All of this can add up to be quite expensive when purchasing it from the retail store, but if you channel your inner crafter, you can make any of this (plus more) on your own and save a lot of money.

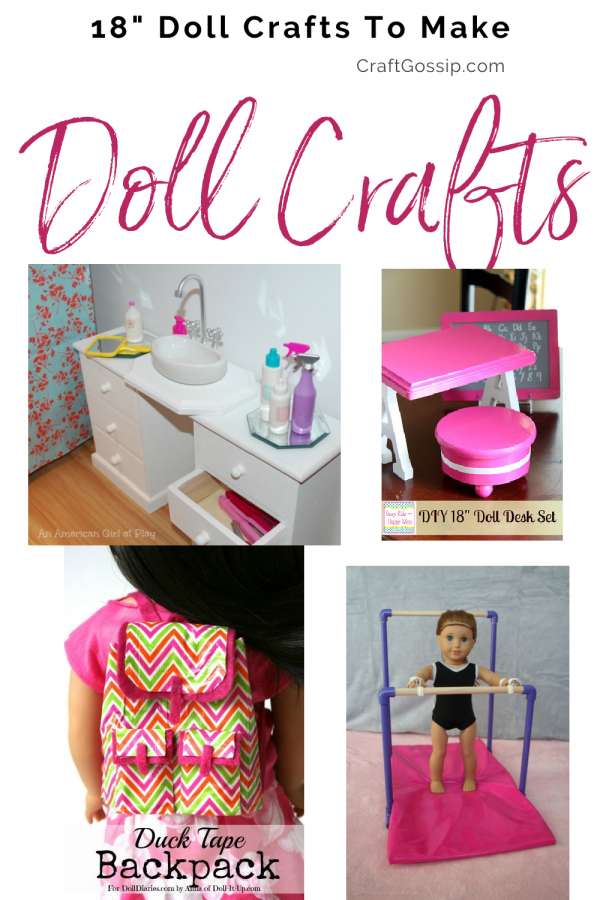
Here are just 9 ideas we found to get you started in making clothes for your American girl dolls.  Some of these patterns are perfect for kids to make clothing for their own dolls or for adults to help to make outfits for the dolls too. You can make holiday outfits and costumes too.

tablet

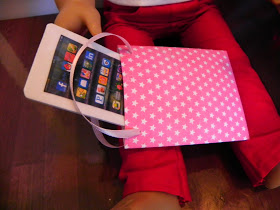
1- Tablet DIY from Fun With AG Fan

bathroom

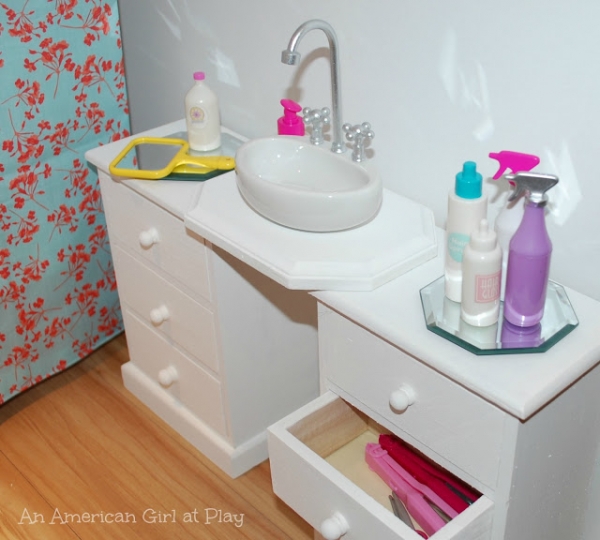
2- Bathroom from American Girl Doll At Play

bed

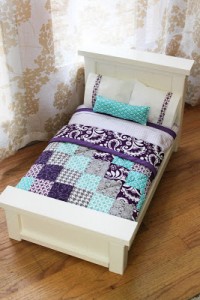
3- DIY Doll Bed from From Dahlias To Doxies

school

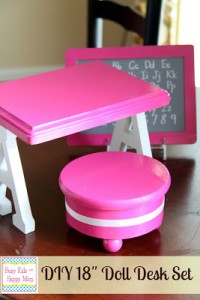
4- School Furniture from Busy Kids Happy Mom

backpack

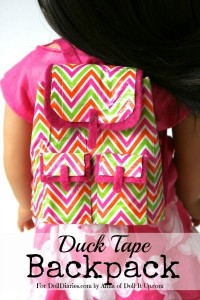
5- Duck Tape Backpack from Doll Diaries

bars

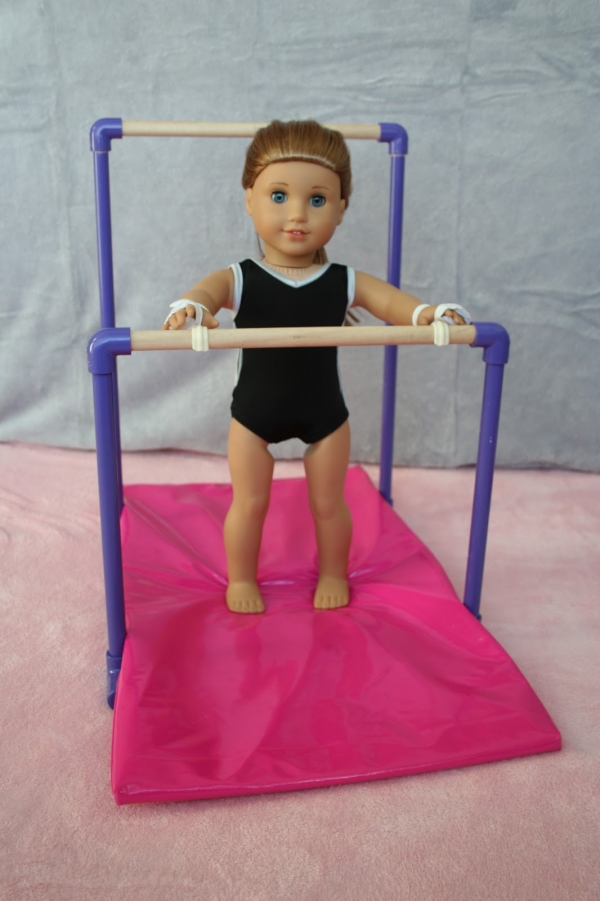
6- Uneven Bars from Arts and Crafts For Your American Girl Doll

music

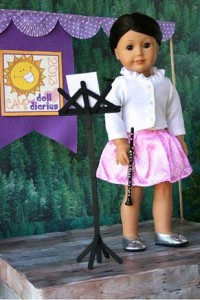
7- Music Stand from Doll Diaries

button

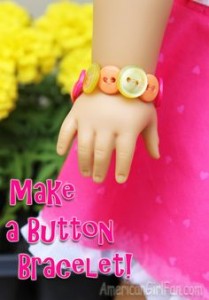
8- Button Bracelet from American Girl Fan

tent

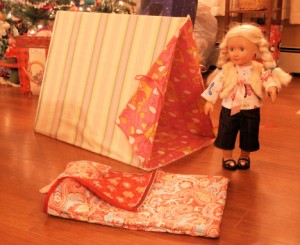
9- Tent and Sleeping Bag from The Frugal Crafter

Read These Next

  • Am I Ready To Start Wholesaling My Crafts?
  • How To Start Jewelry Making: Beginner Tools,…
«
»

Have you read?

DIY Herbal Vapor Rub Balm – A Natural Vicks-Style Decongestant for Cold and Flu Relief

When someone in the house starts sniffling, you just know it’s going to make the rounds. That’s when I reach for this homemade herbal vapor rub—our family’s go-to chest balm for easing congestion, coughs, and that heavy-headed sick feeling.

Made with gentle yet powerful essential oils, this balm works just like the classic Vicks rub (but without the synthetic stuff). It’s safe, effective, and smells like a eucalyptus grove with a hint of grandma’s medicine chest—in the best possible way!

Whether you’re treating a toddler’s sniffles or trying to head off a man cold, this DIY vapor rub will be your winter wellness MVP.

Why You’ll Love This Natural Decongestant Balm

  • No petroleum or nasties – A clean, green homemade Vicks alternative 
  • Gentle enough for kids – With optional adjustments for littlies 
  • Nourishing balm texture – Melts into skin without being greasy 
  • Essential oils – Provide cooling, clearing, and comforting support 
  • Customizable – Make it stronger for adults or extra-gentle for babies 

Ingredients

Base:

  • 1/4 cup coconut oil (or olive oil for a softer balm) 
  • 2 tbsp shea butter or mango butter 
  • 2 tbsp beeswax pellets 

Essential Oil Blend (for adults):

  • 10 drops eucalyptus essential oil 
  • 8 drops peppermint essential oil 
  • 6 drops rosemary essential oil 
  • 4 drops tea tree essential oil 
  • 4 drops lavender essential oil 

Optional for kids under 5:
Replace eucalyptus and peppermint with fir needle and cedarwood atlas, and halve the total essential oil amount.

How to Make Your Own Vapor Rub

  1. Melt the base:
    In a double boiler (or a bowl over simmering water), gently melt the coconut oil, shea butter, and beeswax together. Stir until smooth and liquid. 
  2. Cool slightly:
    Remove from heat and let cool just a few minutes—enough that it’s no longer scalding hot but still liquid. 
  3. Add essential oils:
    Stir in your essential oil blend. Don’t add them too early or the heat will evaporate their goodness. 
  4. Pour into tins or jars:
    Carefully pour into a small glass jar or metal balm tin. Let cool completely before putting the lid on. 
  5. Label & store:
    Store in a cool place away from sunlight. Balm will keep for up to 6 months. 

How to Use Your Herbal Chest Rub

  • For chest and back: Rub a small amount onto chest, upper back, and soles of the feet during cold or flu season. 
  • For steam relief: Add a pea-sized amount to a bowl of steaming water, cover your head with a towel, and inhale. 
  • For headaches: Dab a touch on temples and neck (use caution and avoid eyes). 

Mum Tips

  • Patch test first if you’re unsure about sensitivities. 
  • Keep a tiny jar in your handbag during winter for on-the-go sniffles. 
  • For a nighttime version, add a few drops of Roman chamomile or lavender for extra sleep support. 


RSS More Articles

  • 3 FREE Peony Flower Frames to Print or Cut
  • 15 Crochet Messy Bun Hat Patterns For Ponytails, Buns And Bad Hair Days
  • Easy Felt Food Pancakes for Kids – A Sweet Pretend Play Craft for Classrooms and Home
  • Knitting Stylish Stuff from Your Stash Book Review
  • Etsy Feature – City Street Pottery Roller with Handle
  • Designer Spotlight: Silverberry Designs
  • Sewing Pattern Saturday Review: The Juniper Dress PDF Sewing Pattern
  • Crochet Siamese Cat – Emotional Support Kitty
  • Easy Fourth of July Ribbon Wreath – No-Sew Patriotic Door Decor
  • Book Review: 200 Sanity-Saving Tips, Tricks, and Hacks for Quilters

Pick Your Blog

  • Sewing
  • Knitting
  • Quilting
  • Crochet
  • Home & Garden
  • Recycled Crafts
  • Scrapbooking
  • Card Making
  • Polymer Clay
  • Cross-Stitch
  • Edible Crafts
  • Felting
  • Glass Art
  • Indie Crafts
  • Kids Crafts
  • Jewelry Making
  • Lesson Plans
  • Needlework
  • Bath & Body
  • Party Ideas
  • Candle Making
  • DIY Weddings
  • Not Craft
  • Free Craft Projects

Copyright © 2026 · CraftGossip | Start Here | Contact Us | Link to Us | Your Editors | Privacy and affiliate policy