• Home
  • Suggest A Craft
  • DIY Newsletter

Craft Gossip

The largest independent craft review site since 2007

  • About CraftGossip
  • Our Network
    • Bath & Body Crafts
    • Candle Making Ideas
    • Crochet Ideas
    • Cross Stitch
    • Edible Crafts
    • Felting Patterns
    • Glass Art
    • Home & Garden Ideas
    • Indie Crafts
    • Jewelry Making
    • Kids Crafts
    • Knitting Patterns
    • Lesson Plans
    • Needlework
    • Party Ideas
    • Polymer Clay
    • Quilting Ideas
    • Recycled Crafts
    • Scrapbooking
    • Sewing Patterns
    • Card Making
    • DIY Weddings
    • Not Craft Ideas
  • Giveaways
  • Roundups
  • Store
  • Search

Ways to Join New Yarn without Weaving in Ends

January 25, 2024 by Sarah White

Lots of knitters hate weaving in yarn ends, so it’s popular to wonder if there are ways to join in new yarn that don’t involve having to weave in ends when the knitting is done. Here’s a quick look at three of the most popular options and how to do them.

>> Do you know about A New Yarn That Protects Your Products From Odor, Bacteria, and Allergens! <<

First, you can tie the yarn ends together using a knot that’s known in the yarn world as the magic knot. It’s super strong, easy to do, and theoretically you can tie it, trim the yarn ends super close to the knot and never worry about it again. I usually leave a little bit of a tail when I do this just in case, but I don’t think I’ve ever had a knot come undone when I did it properly.

This is the way to make a magic ball, where you take all your tiny yarn leftovers and join them together to knit with. Knotions has a tutorial for how to do it.

If you’re working with wool or other natural, feltable fibers, my favorite way to join a new ball of yarn is what’s known as the felted join (or, if you want to be more dramatic, spit splicing, since you can do it with saliva instead of water). Basically you separate out the plies a little bit on the end of the new yarn and the old yarn, add a little water and rub the ends together between your hands until they sort of felt together.

I’m working on an intarsia vest right now that has about 20 different balls of yarn across the width of it and the only way I can handle it is by working with a piece of yarn about as long as my arms and using the felted join to make it back into a continuous strand. If you want to know how to do this, check out the tutorial at Brooklyn Tweed.

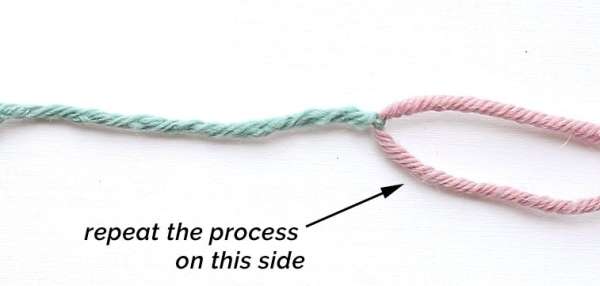
Another good option is known as the Russian join, which has the benefit of being able to be used on any kind of fiber. You need a yarn needle to work it, but once you know how it’s pretty quick and easy to do. Sheep and Stitch has a good photo tutorial of how this one works.

Of course if you’re working a sweater or a hat or something with an inside, you can sometimes just leave your tail ends hanging and not worry about it.

What do you do when you join new yarn? Do you like weaving in ends? I’d love to hear your thoughts!

[Photo: Sheep and Stitch]

An Easy Way to Weave in Yarn Tails as You Knit

Great Ways to Weave in Ends

Read These Next

  • Weaving Projects to Make With Kids
  • 30 Sewing Projects Using Up-cycled Neckties
«
»

Have you read?

DIY Tic-Tac-Toe Flannel Board – Fun and Portable Game

Looking for an easy and enjoyable sewing project that doubles as a fun, interactive game? This DIY Tic-Tac-Toe Flannel Board tutorial is the perfect blend of crafting, sewing, and classic family fun! Whether you’re making it for kids, grandkids, or even yourself, this project is a wonderful way to combine creativity with entertainment.

This handmade Tic-Tac-Toe set is ideal for road trips, quiet time at home, or even as a thoughtful gift. The soft flannel material allows the game pieces to stay in place without slipping, making it perfect for travel. Plus, it’s completely reusable—no need for paper or chalk, just grab your felt X’s and O’s and play over and over again!

This tutorial walks you through the entire process, from selecting your fabric and cutting the board to stitching the perfect game grid. If you love scrap-busting projects, this is a great way to use up fabric leftovers while creating something practical and fun.

Not only is this a simple sewing project, but it’s also a fantastic way to encourage screen-free play and family bonding time. Whether you’re a seasoned sewer or a beginner looking for an easy project, this tutorial will guide you every step of the way.

So grab your fabric, thread, and let’s sew up a game that brings joy to everyone!

Check out the full tutorial here!

Tutorial: Chicken bean bags for juggling or other toss games

Tutorial: Sew a carrying case for your DS Lite games

Starfish Felt Fishing Game – Free Sewing Pattern

RSS More Articles

  • DIY Tic-Tac-Toe Flannel Board – Fun and Portable Game
  • Knit a Sweet Hood Covered with Flowers
  • Cross Stitch for the Beach
  • 25 Genius Ways to Repurpose Old Chairs Into Something Beautiful and Useful
  • Discover the ultimate collection of 22 Positive Quilt Patterns
  • 25 Crochet Flower Patterns For Spring
  • Etsy Spotlight: A Moo-velous Make for Highland Cow Lovers
  • FREE Floral and Butterfly Wreath Open Cut Die Download
  • Sunday Shout Out- Pattern Bundle
  • Upcycled Pallet Planter and Privacy Screen For Your Garden

Pick Your Blog

  • Sewing
  • Knitting
  • Quilting
  • Crochet
  • Home & Garden
  • Recycled Crafts
  • Scrapbooking
  • Card Making
  • Polymer Clay
  • Cross-Stitch
  • Edible Crafts
  • Felting
  • Glass Art
  • Indie Crafts
  • Kids Crafts
  • Jewelry Making
  • Lesson Plans
  • Needlework
  • Bath & Body
  • Party Ideas
  • Candle Making
  • DIY Weddings
  • Not Craft
  • Free Craft Projects

Copyright © 2025 · CraftGossip | Start Here | Contact Us | Link to Us | Your Editors | Privacy and affiliate policy