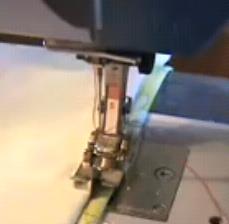
 A blind hem is actually a fairly simple hem to create on your sewing machine. Jennifer from Window-Valence-Patterns.com shows how to do it in a video tutorial. Go to the video tutorial.
[via Picking Up Threads]
Independent craft blog since 2007
A blind hem is actually a fairly simple hem to create on your sewing machine. Jennifer from Window-Valence-Patterns.com shows how to do it in a video tutorial. Go to the video tutorial.
[via Picking Up Threads]
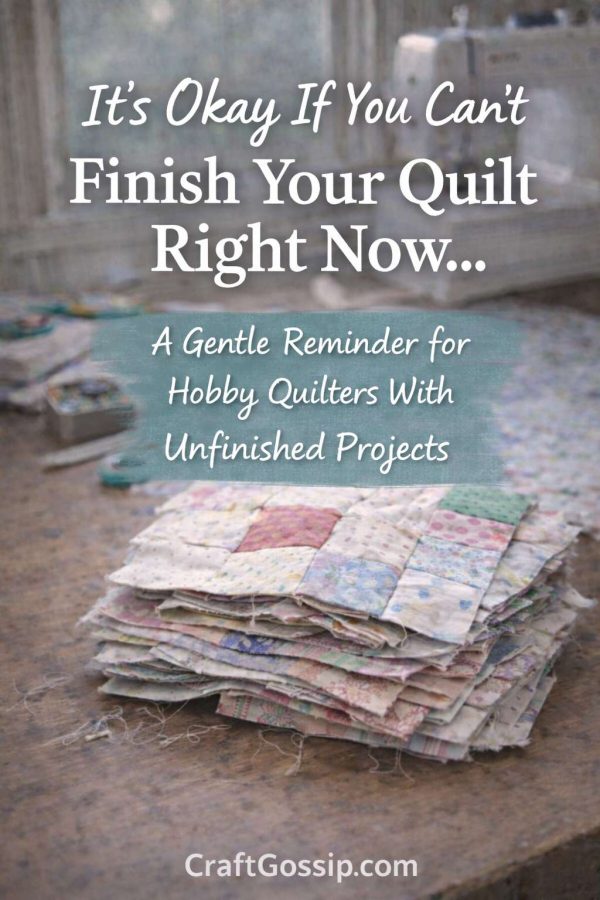
If you have an unfinished quilt folded neatly in a cupboard… or tucked into a project bag… or spread across your sewing table for the last six months — this is for you.
Let’s say it clearly:
It’s okay if you can’t finish your quilt right now.
In the world of quilting, we celebrate finishes. We photograph bindings. We admire perfectly quilted lines. But we rarely talk about the emotional side of unfinished quilting projects — the guilt, the overwhelm, the loss of motivation.
And if you’re a hobby quilter juggling family, work, energy, and real life? Quilting is not just a craft. It’s a commitment.
So let’s unpack this gently.
A quilt is not a quick craft.
Even a “simple” quilt involves:
That’s a lot of creative energy.
When you start a quilt, you’re signing up for a multi-stage project that can span weeks or months. And if life shifts — which it does — your quilting momentum can stall.
Losing motivation to finish a quilt does not mean you lack discipline.
It means you’re human.
Many hobby quilters experience what I call “quilt burnout.”
You begin excited.
You fall in love with the fabric.
You imagine the finished quilt draped beautifully somewhere in your home.
And then somewhere around the basting stage… enthusiasm fades.
This happens because:
Quilting is supposed to be joyful. If a project starts feeling heavy, it’s okay to step back.
Stepping away is not quitting.
One of the biggest fears hobby quilters have is this:
“If I put this away, I’ll never come back to it.”
But creative motivation comes in seasons.
Sometimes you need:
There are quilts that sit for six months… a year… sometimes longer… and then one day you feel ready again.
Skill grows.
Patience grows.
Energy returns.
Putting a quilt aside can actually give it the space it needs.
Unfinished Objects — lovingly called UFOs in the quilting community — carry more emotion than we admit. Have Orphan blocks? Check out these projects.
They can trigger:
But here’s the truth:
Having unfinished quilting projects does not make you disorganized, lazy, or inconsistent.
It makes you creative.
Creative people start things. Starting is part of the process. Exploration is part of the hobby.
Sometimes the joy was in the beginning.
And that’s allowed.
If you’re not ready to finish your quilt right now, try reframing it.
Instead of stuffing it into a bag with frustration:
This changes the energy from “unfinished failure” to “paused project.”
You’re not abandoning it.
You’re preserving it.
Some quilters feel guilty starting something new before finishing something old.
But creativity doesn’t always move in straight lines.
Starting a new quilting project can:
Often, finishing something small helps you return to the larger quilt with fresh energy.
You are allowed to follow your inspiration.
Quilting is not a productivity contest.
It’s not a race.
It’s not a performance.
It’s not a measure of worth.
Some seasons are for big quilts.
Some seasons are for simple patchwork.
Some seasons are for organizing fabric and drinking tea in your sewing room.
And some seasons are just for resting.
Your quilt will wait.
It does not judge you.
It does not measure your value.
It does not expire.
You don’t need a finished quilt to prove you belong in the quilting community.
You are a quilter because you create.
Because you choose fabric.
Because you sew.
Because you dream up projects.
Even if they aren’t finished yet.
Especially if they aren’t finished yet.
So if you needed permission today to pause, pivot, or pick up something new…
You have it.
And when you’re ready, that quilt will still be there — waiting patiently for the next stitch.
Tell me honestly — how many unfinished quilting projects are in your sewing space right now?
No judgment here. Only understanding.