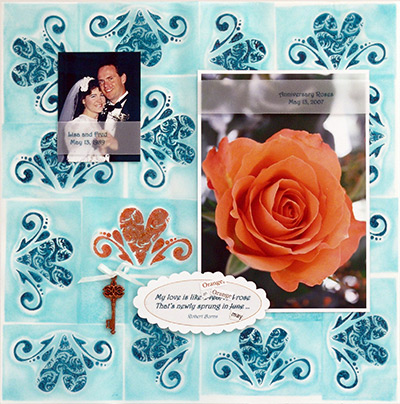
Learn to make this lovely background suitable for a wedding page by following the instructions on the Ranger site. Click here to go to tutorial.
Have you read?
Free Quilt Pattern: Haunted House Row Quilt
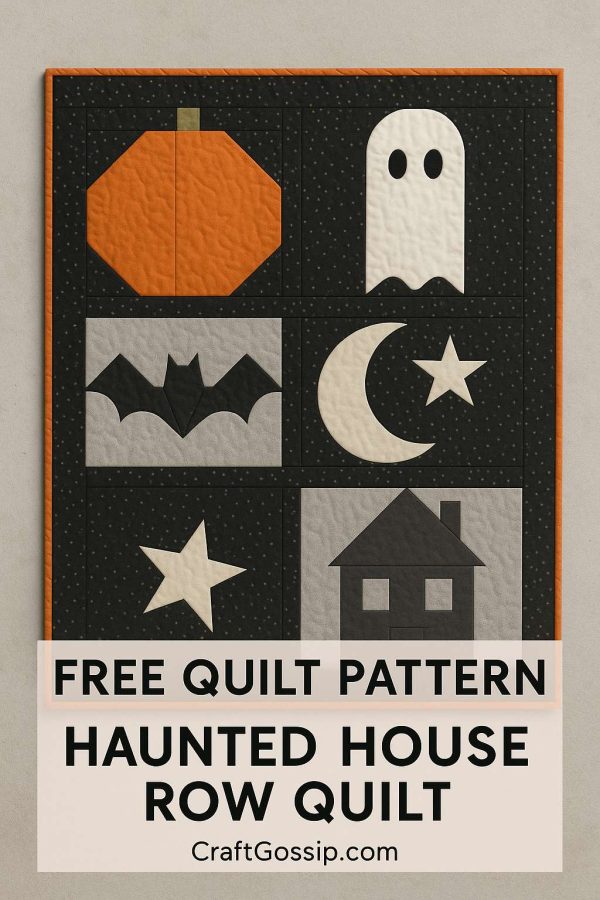
There’s something magical about October evenings—candles glowing, a chill in the air, and just the right excuse to curl up under a spooky-themed quilt. This Haunted House Row Quilt is made up of simple, playful rows—pumpkins, ghosts, bats, moons, and haunted houses—that can be stitched together into a wall hanging, table runner, or even a full throw quilt. Each row is beginner-friendly, so you can piece just one or keep going until you’ve got a quilt worth cackling over.
Quilt Sizes
- Wall Hanging: 30″ × 40″ (3 rows)
- Lap Quilt: 50″ × 60″ (5 rows)
- Twin Quilt: 70″ × 90″ (7 rows, repeat blocks or add more rows)
Materials
- Fat quarters or scraps in orange, black, purple, gray, and green
- 2–3 yards of background fabric (black or low-volume gray/white for contrast)
- Batting and backing fabric (see size chart above)
- Thread in coordinating colors
Row Designs
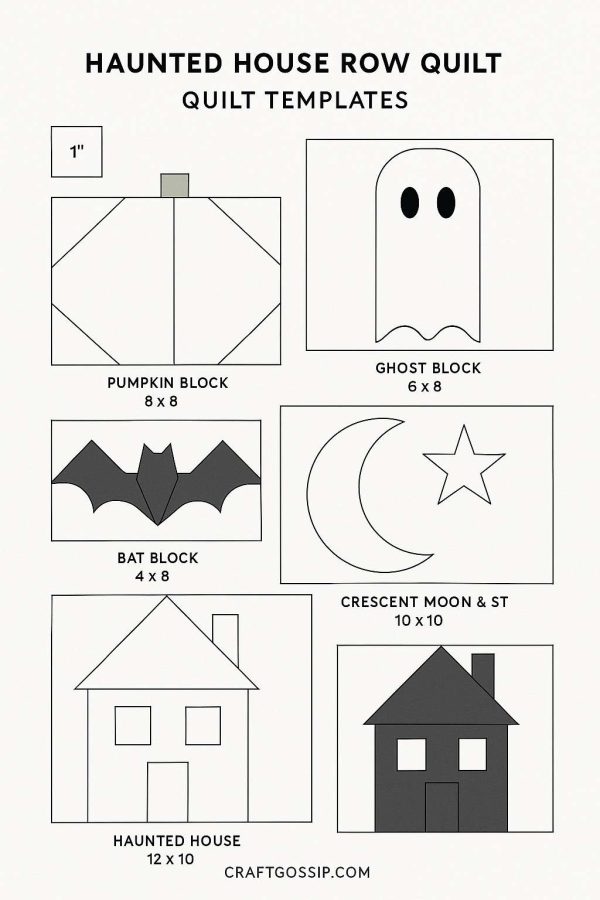
Row 1: Pumpkin Parade
- Block size: 8″ × 8″ pumpkins with stems
- Technique: Half-square triangles + rectangles
- Layout: 5–6 pumpkins across
Row 2: Ghost Row
- Block size: 6″ × 8″
- Technique: Simple rectangles with curved or zigzag base (appliqué eyes optional)
- Layout: 5–7 ghosts floating across the row
Row 3: Bats in Flight
- Block size: 4″ × 8″
- Technique: Flying geese blocks with added triangles for “wings”
- Layout: A row of bats swooping across the night sky
Row 4: Crescent Moon + Stars
- Block size: 10″ × 10″
- Technique: Drunkard’s Path curves (for the moon) or appliqué, with small star blocks as fillers
- Layout: 3–4 moons per row
Row 5: Haunted Houses
- Block size: 12″ wide × 10″ tall
- Technique: Simple house block with peaked roof and square windows (appliqué windows optional in yellow fabric for a “glowing light” effect)
- Layout: 3–4 houses with background sashing in between
Assembly
- Sew each row separately. Focus on accurate piecing and pressing seams to keep rows straight.
- Square up each row to the same width (add background strips if needed).
- Join rows with sashing (2″ wide strips recommended) to separate the designs and add visual breathing room.
- Add outer borders (optional) for extra size and frame the quilt.
- Layer, quilt, and bind. Straight-line quilting works beautifully on this design, or try free-motion bats and spiderwebs if you’re feeling adventurous.


