• Home
  • Suggest A DIY
  • DIY Newsletter

Craft Gossip

Independent craft blog since 2007

  • About CraftGossip
  • Our Network
    • Bath & Body Crafts
    • Candle Making Ideas
    • Crochet Ideas
    • Cross Stitch
    • Edible Crafts
    • Felting Patterns
    • Glass Art
    • Home & Garden Ideas
    • Indie Crafts
    • Jewelry Making
    • Kids Crafts
    • Knitting Patterns
    • Lesson Plans
    • Needlework
    • Party Ideas
    • Polymer Clay
    • Quilting Ideas
    • Recycled Crafts
    • Scrapbooking
    • Sewing Patterns
    • Card Making
    • DIY Weddings
    • Not Craft Ideas
  • Giveaways
  • Roundups
  • Store
  • Search

Tutorial: Pencil clutch with button closure

May 9, 2009 by Anne Weaver

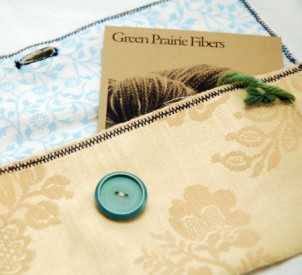
pencilclutchIf you never seem to be able to lay your hands on a pencil when you need one, then this free pattern is for you.  Craft Leftovers shares a free pattern for a pencil clutch.  You can make on in less than half an hour.  Go to the free pattern.

Technorati Tags: sewing, tutorial, pencil, pen, clutch, pouch
«
»

Have you read?

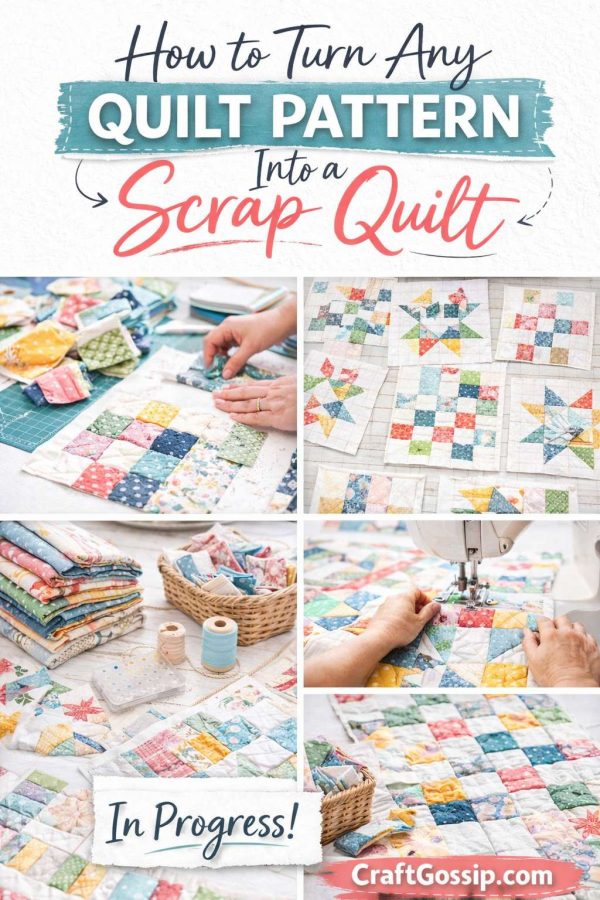
How to Turn Any Quilt Pattern Into a Scrap Quilt (Without It Looking Messy)

There comes a moment in every quilter’s life when the scrap bin starts judging you.

It’s overflowing. It’s slightly chaotic. And yet… you can’t throw any of it away because “that tiny floral might be perfect one day.”

If you’ve ever wondered how to scrapify a quilt pattern, or how to turn a regular quilt design into a cohesive scrap quilt, this guide is for you.

Because yes — you can turn almost any quilt pattern into a scrap quilt.

And no — it doesn’t have to look chaotic.

What Does “Scrapifying” a Quilt Pattern Mean?

Scrapifying simply means taking a standard quilt pattern — one that usually calls for specific fabrics — and replacing those fabrics with a mix of coordinating scraps.

Instead of:

  • Fabric A 
  • Fabric B 
  • Fabric C 

You use:

  • Multiple small cuts within one color family 
  • Assorted low-volume prints 
  • Mixed tone-on-tone scraps 

The structure stays the same.

Only the fabric selection changes.

Step 1: Choose the Right Quilt Pattern to Scrapify

Not every quilt pattern responds equally well to scrappy treatment.

The easiest quilt patterns to turn into scrap quilts are:

  • Log Cabin blocks 
  • Irish Chain quilts 
  • Rail Fence quilts 
  • Half-Square Triangle layouts 
  • Star block quilts 
  • Nine Patch quilts 

Why? Because they have repetition and structure.

The more structured the block, the better it handles variety.

If you’re a beginner, start with a simple block quilt layout. Avoid complex appliqué or highly detailed modern designs for your first scrap conversion.

Step 2: Decide What Stays Consistent

This is the secret to a beautiful scrap quilt.

When you scrapify a quilt pattern, something must stay consistent.

You can keep consistent:

  • The background fabric 
  • The block center 
  • The sashing 
  • One repeating color 
  • The value (light or dark balance) 

If everything changes, the quilt feels chaotic.

If one element repeats, the quilt feels intentional.

For example:
Make all star centers navy.
Keep all backgrounds white.
Use the same grey sashing between blocks.

That one repeating anchor ties the whole quilt together.

Step 3: Control Color Flow (Instead of Using Everything at Once)

When turning a quilt pattern into a scrap quilt, resist the urge to use every fabric immediately.

Instead:

Option A: Scrap Within a Color Family

Example: All blues for one block unit.

Option B: Rainbow Scrappy

Assign one color per block row.

Option C: Controlled Scrappy

Mix prints, but limit to 5–7 dominant colors.

This keeps the design cohesive and prevents visual overload.

Step 4: Pay Attention to Value (Light vs Dark)

Value matters more than print.

You can mix florals, geometrics, polka dots, and stripes — but if all the fabrics are medium tone, the quilt will look flat.

When scrapifying a quilt pattern:

  • Pair lights with darks 
  • Add contrast in block units 
  • Step back and squint at your layout 

If the shapes disappear when you squint, you need more contrast.

This one trick alone makes a scrap quilt look professionally designed.

Step 5: Use a Design Wall (Or the Floor)

Before sewing everything together, lay it out.

Walk away.
Come back.
Rearrange.

Scrap quilts require visual editing.

Sometimes two fabrics sit next to each other and fight. Separate them. Spread colors evenly. Balance heavy prints across the quilt.

This is where the magic happens.

Step 6: Add Sashing If Needed

If your scrapified quilt starts looking busy, add sashing.

Solid sashing:

  • Creates breathing space 
  • Separates strong prints 
  • Adds polish 
  • Makes the quilt look modern 

White, cream, soft grey, or even black sashing can completely transform a busy scrap layout into a cohesive design.

Example: How to Scrapify Popular Quilt Patterns

Let’s break it down practically.

Scrapifying a Log Cabin Quilt

Instead of two solid fabrics:

  • Make the light side scrappy light prints 
  • Make the dark side scrappy darker prints 

Keep the center square consistent.

Instant scrappy charm — zero chaos.

Scrapifying a Star Quilt Pattern

Use:

  • Scrappy star points 
  • Consistent background 
  • Repeating center color 

The star shape stays crisp while the fabric mix adds personality.

Scrapifying a Rail Fence Quilt

Use multiple strips within the same color family for each block.

For example:
Block 1: Assorted blues
Block 2: Assorted greens
Block 3: Assorted reds

It looks intentional instead of random.

Scrapifying a Nine Patch Quilt

Make:

  • Corner squares scrappy 
  • Center square consistent 

Or reverse it.

Nine patch quilts are forgiving and ideal for scrap conversion.

Common Scrapifying Mistakes to Avoid

If your scrap quilt feels “off,” check for these issues:

  • No consistent background 
  • Too many high-volume prints 
  • All fabrics same value 
  • No repeated color anchor 
  • Skipping layout testing 

Scrap quilts need editing.

They’re creative — but they still need structure.

How to Make Scrap Quilts Look Modern

If you prefer a modern scrap quilt look:

  • Use lots of negative space 
  • Stick to low-volume backgrounds 
  • Limit color palette 
  • Use bold graphic blocks 
  • Keep block layout clean and minimal 

Modern scrap quilts often look curated rather than busy.

Best Beginner Quilt Patterns to Scrapify

If you’re new to scrap quilting, start here:

  • Rail Fence 
  • Checkerboard 
  • Simple Grid Layout 
  • Nine Patch 
  • Half-Square Triangle quilts 

These are easy to control visually and build confidence fast.

Why Scrap Quilting Is Worth It

Scrap quilts tell stories.

Every fabric piece came from something — a baby quilt, a dress, a project that didn’t quite work out.

When you turn a quilt pattern into a scrap quilt, you’re not just saving fabric.

You’re layering memory into structure.

And honestly? Those quilts often become the ones we reach for the most.

If your scrap bin is staring at you right now, consider this your permission slip.

Pick a simple quilt pattern.
Choose one thing to keep consistent.
Start stitching.

You don’t need perfection.

You just need intention.


RSS feed: More Articles More Articles

  • How to Cross Stitch on Paper
  • Emotional Support Ollivander Octopus Free Crochet Pattern
  • Charity Crochet Pattern: Vintage Baby Bunting Cocoon
  • How to Make a Fun Fold Halloween Card
  • Freebie Friday – Vintage Halloween Candy Wrappers (Printable Ephemera)
  • Free Felting Tutorial Friday: Firm Felting with Armature
  • Five Senses Crafts and Activities for Preschool
  • Knit a Sweet Blanket with a Pocket for Treasures
  • Cute Halloween Scrapbook Mini Album
  • Breast Cancer Care Package In A Jar – A Thoughtful Pink Ribbon Gift You Can Make In Minutes

Pick Your Blog

  • Sewing
  • Knitting
  • Quilting
  • Crochet
  • Home & Garden
  • Recycled Crafts
  • Scrapbooking
  • Card Making
  • Polymer Clay
  • Cross-Stitch
  • Edible Crafts
  • Felting
  • Glass Art
  • Indie Crafts
  • Kids Crafts
  • Jewelry Making
  • Lesson Plans
  • Needlework
  • Bath & Body
  • Party Ideas
  • Candle Making
  • DIY Weddings
  • Not Craft
  • Free Craft Projects

Copyright © 2026 · CraftGossip | Start Here | Contact Us | Link to Us | Your Editors | Privacy and affiliate policy