Who says geekiness isn’t stylish? If you’re a lover of computers, science fiction, comic books, glasses and all the other sterotypical elements of a geek, don’t miss this hand-picked collection of geek-turned-chic inspirations for your wedding day featured at Bridal Musings!
Have you read?
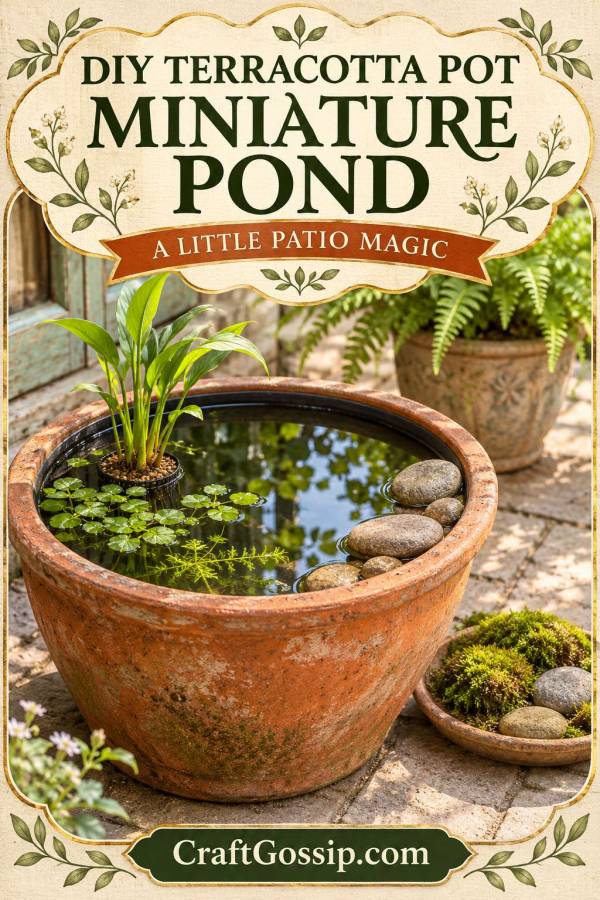
DIY Terracotta Pot Miniature Pond: A Mossy Little Water Garden for Your Patio
There’s something about a tiny water garden that makes you stop and look. It might be the reflection of a leaf, a little patch of moss around the edge, or simply the fact that an ordinary flowerpot has become something rather unexpected. Give me a weathered terracotta pot and a quiet corner of the patio, and I can already picture where my next cup of coffee is happening.
A DIY terracotta pot miniature pond is a lovely project when you want that garden-pond feeling without digging up the lawn. You can keep it simple with one aquatic plant and a few stones, or add mossy planting around the outside for a little woodland character. It’s particularly appealing if you enjoy fairy gardens but fancy something with living greenery and a reflective water surface.
The detail that makes all the difference, though, is how you hold the water. Terracotta is porous. That’s useful for some planting projects, but it means a flowerpot doesn’t automatically become a reliable pond just because you cover the drainage hole.
My preferred beginner approach is to use the terracotta as a decorative outer pot, with a watertight insert inside. You still get that lovely earthy finish, while keeping the water reservoir separate from the moss and soil around it. Here’s how to plan and assemble that version.
Can You Make a Miniature Pond in a Terracotta Pot?
Yes, but you need a watertight reservoir. An unglazed pot can absorb water through its walls as well as lose it through the drainage hole.
The simplest option is a rigid, pond-suitable container that fits inside the terracotta pot. A flexible pond liner is another possibility, especially for an awkward shape. If you choose a coating instead, check that the manufacturer explicitly approves it for continuous immersion and the intended pond use; a general craft varnish isn’t a substitute.
This guide uses an insert. It also treats the finished project as a small planted water feature, without fish.
What You Need
- A sound terracotta pot with enough width to arrange plants and stones
- A watertight insert suitable for a planted pond
- One or two compact aquatic plants to start
- Aquatic planting baskets and aquatic planting medium, if required
- Washed pond gravel and a few smooth, stable stones
- Clean rainwater, where available
- A stiff brush and water for cleaning
- An optional shallow planting tray, legally sourced living moss and suitable moss-growing medium
- Optional weatherproof miniature decorations for the dry area beside the pond
For a first project, I’d look for an outer pot around 35–45cm wide, then shop for the insert before buying plants. The usable water depth matters more than the pot’s outside measurements. The RHS guide to garden water habitats suggests 20–30cm of water depth for a container pond accommodating a few plants.
A small saucer can make a pretty water display, but it gives you much less room for planting and needs closer attention as the water evaporates.
How to Make a DIY Terracotta Pot Miniature Pond
Choose Its Home Before Filling It
Set the pot on firm, level ground where you can easily reach it for maintenance. Morning light with shelter from fierce afternoon sun is a useful starting point in a hot garden; match the final position to your plants’ needs.
Keep it away from lawn fertiliser runoff and places where pets might knock it over. Water is heavy: every litre adds about a kilogram before you count the pot and stones. Use a suitably rated support if placing it above ground level.
Even a small pond needs a location that prevents unsupervised access by young children.
Clean and Inspect the Pot
Brush off loose soil and rinse the terracotta. Check for cracks, crumbling edges and any residue from its previous use.
Because the outer pot isn’t your water reservoir, its drainage hole can remain open. Make sure it can still drain; you don’t want rainwater collecting unseen between the insert and the terracotta.
Fit and Test the Insert
Choose an insert that sits securely inside the pot without being wedged in under pressure. Its rim should remain accessible so you can inspect and remove it.
Fill it with water and leave it overnight before adding plants. Check underneath and around it for leaks. This is also a useful rehearsal for the finished water level.
Avoid packing loose soil into the space between the containers. Keep that area clear enough to inspect, drain and clean.
Arrange the Stones and Plant Supports
Rinse gravel and stones before adding them. Use only enough to create the arrangement you need; filling most of the bowl with rocks leaves very little water.
If a planting basket needs raising, use a broad, stable support. Avoid precarious stacks that could slip against the insert.
For an outdoor pond accessible to wildlife, provide a secure route from the water to the rim and a route down outside. The Natural History Museum’s small pond guide demonstrates this with logs and stones.
Add Plants at Their Labelled Depth
Choose plants specifically sold for aquatic use. A fern that enjoys humid air isn’t automatically happy with its roots permanently underwater.
Ask a local aquatic nursery for compact plants suited to your climate and the actual depth of your insert. Start sparingly, with perhaps one small marginal plant and another suitable aquatic plant if space allows.
Read planting-depth instructions carefully: they may describe the distance between the water surface and the top of the planting medium. Use aquatic planting medium where needed, rather than ordinary fertilised potting mix.
Fill Slowly and Adjust the Layout
Add clean rainwater gently so you don’t disturb the planting medium. If using mains water, ask your aquatic nursery about appropriate conditioning for your local water supply and intended pond life.
Keep the water below the insert’s rim and leave the wildlife exit usable. Rearrange anything unstable before you finish.
Take a photograph now. It’s surprisingly helpful when you’re deciding whether that extra stone improves the arrangement or simply makes it crowded.
How to Add Moss Without Making a Muddy Mess
A mossy finish is optional, and I’d keep it separate from the water reservoir.
Place a shallow, removable planting tray beside the pot and arrange purchased living moss on a growing medium recommended by its supplier. A few stones can help it look like a little mossy bank. Keep loose material from washing into the pond.
The important catch is that a watertight insert won’t feed moisture through the terracotta to the moss. You’ll need to maintain the moss separately and choose a position that suits it. A dry, sun-baked patio may suit your pond plants better than your moss, so be prepared to adjust the arrangement.
This approach gives you the woodland look without relying on a coating of mud to stay attached to a vertical pot. Start with a small mossy patch rather than promising yourself an entire living green jacket.
Miniature Pond Decorating Ideas
For a woodland feel, combine weathered terracotta, moss beside the base and a single fern in its own separate pot. A tiny ceramic mushroom on the dry side adds charm without taking over.
For a quieter courtyard look, skip the figurines and use a few pale stones against upright aquatic foliage. Leave open water visible so the reflections become part of the design.
If you love colour, use our CraftBits DIY drip paint pots as inspiration for separate companion planters. Keep decorative paints and craft coatings away from the pond water.
Our CraftGossip broken-pot fairy gardens also offer ideas for a miniature landscape beside your pond. Use stable pieces with no exposed sharp edges.
Keeping Your Mini Pond Looking Lovely
Check the water frequently, especially during hot or windy weather. Top up as needed, remove fallen leaves and trim declining plant material before it collects in the water.
Keep plants from swallowing the whole arrangement. I’d rather see one healthy plant reflected in open water than a tiny pot packed so tightly that you can’t tell there’s a pond underneath.
The RHS container pond guide has useful planting and aftercare advice. It also advises letting wildlife arrive naturally rather than moving pond water, frogspawn or animals from elsewhere.
What About Mosquitoes?
Standing water needs attention, particularly in warm climates. Brisbane City Council’s mosquito advice explains that container-breeding mosquitoes can use small amounts of stagnant water.
Inspect the pond and any hidden water around the insert regularly. If you find larvae, seek locally approved control advice suitable for a planted pond. A little solar fountain shouldn’t be treated as a guarantee against breeding, especially when it stops overnight.
If you won’t be able to maintain standing water, make a dry miniature garden instead.
Common DIY Mini Pond Questions
Why does the water level keep dropping?
Check the insert for leaks, then consider evaporation and splashing. Moss, soil or fabric bridging the rim can also draw water out. Bare terracotta used without a liner or insert adds another route for water loss.
Can I put goldfish in it?
Keep this small project fish-free. A planted display pot doesn’t provide the space or managed conditions of a properly designed fish pond. A miniature ceramic fish on the dry edge can supply the whimsy.
Does it need a pump?
You can make a planted container pond without one. A pump adds movement, but also needs cleaning, sufficient water depth and maintenance. Choose plants and care routines appropriate to your setup either way.
Why is the water going green?
Review sunlight, decaying material and any soil or fertiliser entering the water. Remove debris and excess algae, and seek advice if the problem persists. Don’t reach for household cleaners.
A DIY terracotta pot miniature pond doesn’t need an elaborate fairy village to feel special. A sound container, a well-chosen plant and a small patch of open water are plenty to begin with. Put it somewhere you’ll notice it, keep the upkeep manageable, and leave a little room beside it for your cup of tea.

