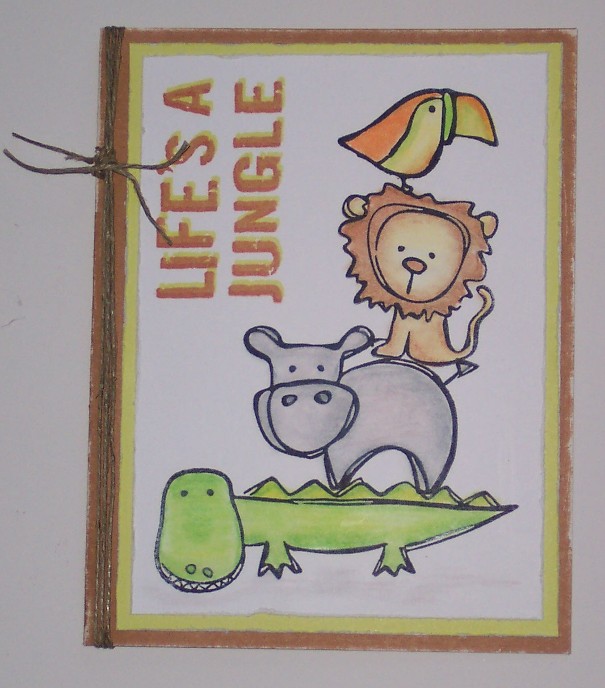
image by Heather Hobrook
One of my favorite coloring techniques is using colored pencils and blending them with odorless mineral spirits. It gives a really smooth, soft look and makes for wonderful shading, shadowing and blending.
I recommend the Gamsol brand of mineral spirit put out by Inky Antics, it comes in a bottle with a sponge applicator top so it’s very easy to use. But you can also buy other brands of odorless mineral spirits (Mona Lisa makes one) in art supply stores or the fine art section of your local craft store. Make sure you store it in an air tight container though as it can easily evaporate. You’ll also need some good quality art pencils, ones that have a high wax content, I prefer Prismacolor Pencils; some blending stumps; and some high quality smooth white cardstock. If this technique is not giving you the desired results try changing cardstocks, it can make a big difference with this technique.
First you want to stamp your image with a permanent or waterproof ink (like Staz-On) and then color your image with the pencils, I like to start with my darker colors around the edges and then add lighter tones going inward, then rub the tip of your stump onto the sponge applicator on the Gamsol bottle and then in small circular motions blend your colors together with the stump, careful not to over blend, you want to pull the colors together without muddying them into one color. You can also use one single color and use the mineral spirit to pull the color out and make it lighter. On the sample I made above on the bird you can see I blended orange, yellow and green together but in the hippo I only used one color of grey but used the mineral spirits to lightened it and get different shades of that one color.
Inky Antics has a nice tutorial on their site also.
I hope you give this fun technique a try for yourself.
-Heather