• Home
  • Suggest A DIY
  • DIY Newsletter

Craft Gossip

Independent craft blog since 2007

  • About CraftGossip
  • Our Network
    • Bath & Body Crafts
    • Candle Making Ideas
    • Crochet Ideas
    • Cross Stitch
    • Edible Crafts
    • Felting Patterns
    • Glass Art
    • Home & Garden Ideas
    • Indie Crafts
    • Jewelry Making
    • Kids Crafts
    • Knitting Patterns
    • Lesson Plans
    • Needlework
    • Party Ideas
    • Polymer Clay
    • Quilting Ideas
    • Recycled Crafts
    • Scrapbooking
    • Sewing Patterns
    • Card Making
    • DIY Weddings
    • Not Craft Ideas
  • Giveaways
  • Roundups
  • Store
  • Search

Sewing Subscription Boxes: Are They Worth It? Here’s What You Need to Know!

December 1, 2025 by Anne Weaver

If you love sewing but find yourself stuck in a creative rut—or simply enjoy getting surprise goodies in the mail—then a sewing subscription box might be just what you need. But with so many options out there, how do you know which one is worth your money? That’s where Heather Handmade’s guide to 20 Amazing Sewing Subscription Boxes comes in.

This roundup is an absolute goldmine for anyone looking to explore new fabrics, patterns, and sewing supplies without the hassle of shopping around. Whether you’re a beginner looking for easy projects or an experienced sewist in search of high-quality materials, this list has something for everyone.

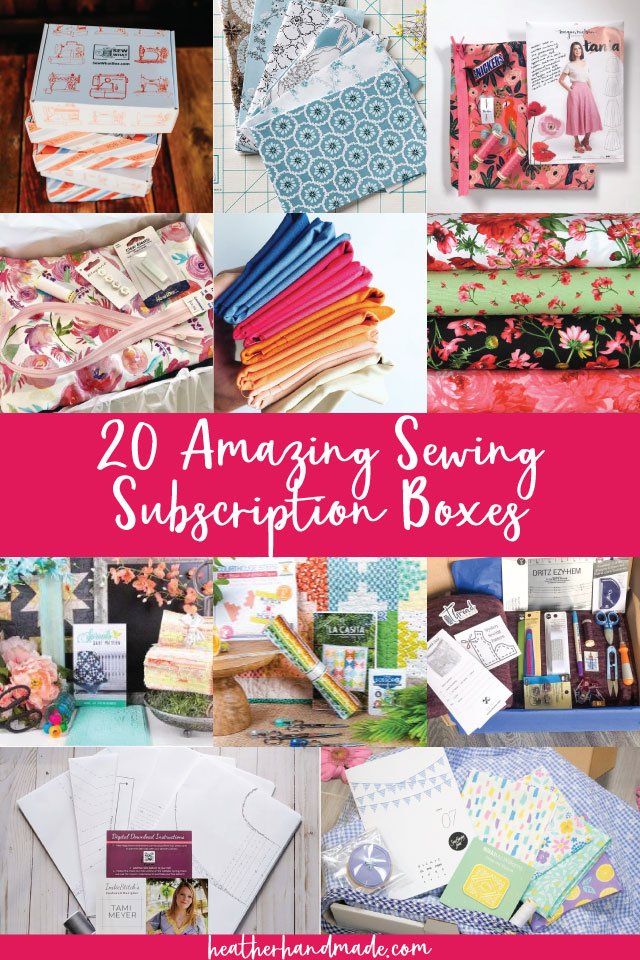
Each subscription box offers a unique experience—some focus on quilting, while others deliver garment fabrics, sewing patterns, or even fun mystery projects. One of the best things about a sewing subscription box is the element of surprise. It’s like getting a little gift to yourself every month, packed with inspiration and creativity.

Heather breaks down each option, giving you the details on what to expect, the price range, and who it’s best suited for. Whether you’re into modern designs, classic sewing projects, or experimenting with new techniques, there’s a box that matches your style.

So, if you’re curious about which sewing subscription box is right for you, check out the full list here: 20 Amazing Sewing Subscription Boxes. You just might find your next favorite sewing indulgence!

Read These Next

  • Am I Ready To Start Wholesaling My Crafts?
  • How To Start Jewelry Making: Beginner Tools,…
«
»

Have you read?

How to Wet Felt Using Recycled Wool Scarves

There’s something magical about breathing new life into old wool scarves. Maybe it’s that soft merino one with a tiny moth hole, or a thrift-store find that’s just a bit too itchy to wear — either way, they’re perfect for felting.

If you’ve ever wanted to try wet felting but thought you needed fancy equipment or piles of wool roving, think again. You can create stunning felted textures, accessories, and even art pieces using nothing more than recycled wool scarves, warm water, and a little soap.

This is real felting — hands-on, creative, and beautifully imperfect — and it’s one of the best ways to upcycle something you already have.

Why Use Recycled Wool Scarves for Felting?

Recycled wool scarves are already halfway felted — they’re woven or knitted, made of natural fibers, and soft enough to shrink and fuse under warm water and friction. That makes them ideal for beginners who want to experiment with texture and transformation without investing in new materials.

Bonus: Every scarf tells a story. Maybe it was your grandmother’s, or a flea-market treasure — when you felt it, you’re not just crafting; you’re preserving something in a new form.

What You’ll Need

You probably already have everything you need at home:

  • A 100% wool scarf (check the label — avoid acrylic or polyester blends) 
  • Warm water (not boiling) 
  • A bar of mild soap or dishwashing liquid 
  • Bubble wrap or a bamboo mat (a clean towel works too) 
  • Plastic bag or cling wrap (for rolling) 
  • Old towel (for drying and cleanup) 

Optional: bits of wool roving or yarn scraps if you want to add decorative layers.

Preparing Your Scarf

Before felting, wash your scarf gently in warm water to remove any oils or finishes that might prevent felting. Don’t use fabric softener — it actually stops the fibers from bonding.

If you want a more dramatic transformation, cut your scarf into panels or smaller sections. Thinner wool scarves will felt faster than chunky ones.

Step-by-Step: How to Felt Your Scarf by Hand

1. Set Up Your Workspace

Lay down a towel to protect your surface. Place bubble wrap (bubble side up) or a bamboo mat on top.

2. Wet the Wool

Lay your scarf flat and sprinkle or spray warm, soapy water over it. You want it damp but not dripping.

3. Add Friction

Using your hands, gently rub the surface in small circular motions. You’ll feel the fibers start to tighten. If you’re using a woven scarf, you might see the weave pattern soften and blur — that’s felting magic happening.

Tip: For more even results, roll your scarf inside the bubble wrap or towel, then roll it back and forth 50–100 times, unrolling and rotating it every few minutes.

4. Check the Progress

Unroll your scarf and inspect the texture. You’re looking for shrinkage, soft edges, and a slight fuzziness. If you want more firmness, continue rolling and rubbing.

Each scarf behaves differently depending on the wool type and weave — part of the fun is seeing how it evolves.

5. Rinse and Dry

Once you’re happy with the texture, rinse your felted scarf in cool water until the soap is gone. Press (don’t wring) to remove excess water, then roll it in a towel and lay flat to dry.

Creative Ways to Transform Your Felted Scarf

Once your scarf has been felted, the possibilities are endless. Here are some favorite ways to give it a second life:

  • Cut into felt sheets for crafting – perfect for ornaments, appliqué, or small purses. 
  • Sew into a cozy clutch or zippered pouch. 
  • Turn into wrist cuffs or bookmarks by cutting narrow strips. 
  • Add embroidery or needle-felted designs to the newly textured surface. 
  • Create a wall hanging by layering felted panels together. 

Each piece has its own texture and color pattern, so no two scarves ever felt the same way twice.

Troubleshooting Common Issues

Scarf not felting enough?
Some “wool” scarves are treated to resist shrinkage. Try using hotter water and rougher friction (rub between bubble wrap or against a bamboo mat).

Shrunk too much?
That’s normal! Turn it into something smaller — a patch, coaster, or felted bracelet.

Uneven texture?
Fold your scarf in half, re-wet, and roll again to even out the fibers.

Remember: imperfections add charm. A slightly uneven finish looks beautifully organic.

Why This Project Is Perfect for Beginners

  • No expensive supplies needed. 
  • Uses recycled materials (great for eco-conscious crafters). 
  • Hands-on and meditative — you feel the wool change under your fingers. 
  • Every result is unique — your scarf becomes art, not just fabric. 

This is slow crafting at its best — mindful, sustainable, and creative.

Bonus: Layering for Artistic Texture

If you want to take things up a notch, try laminating pieces of wool roving, silk fibers, or yarn onto your scarf before felting. As the fibers shrink together, they bond permanently — giving a painterly, nuno-felted texture without needing a silk base.

Use thin layers for delicate effects or thicker patches for bold contrast.

Wrap Up

Wet felting with recycled wool scarves is the perfect mix of art and sustainability. You’re reducing waste, saving money, and learning the fundamentals of felting — all while creating something gorgeous and deeply personal.

So next time you find an old wool scarf hiding in your winter drawer, don’t toss it — felt it. With warm water, soap, and a little patience, you’ll turn it into something even better than before.


RSS More Articles

  • Sewing Pattern Saturday – Wide Leg Jumpsuit PDF Sewing Pattern Review
  • Plan This Fun Lego Challenge for a Group of Kids or Just One
  • 10 DIY 4th of July Wreaths To Dress Up Your Front Door
  • Patriotic USA Letters – Free Crochet Pattern
  • How to Make Keto Granola Bars (Low Carb, No Sugar and Actually Delicious)
  • How to add Detailed Stitching to Your Handmade Cards
  • Designer Spotlight: Unique Stitch Crafts
  • Free Dotted Lines Embroidery Pattern Review
  • Peyote Stitch Pendants And Necklaces: 10 Seed Bead Jewelry Projects To Make
  • Choose Your Own Brioche Knitting Adventure with this Shawl Knitting Pattern

Pick Your Blog

  • Sewing
  • Knitting
  • Quilting
  • Crochet
  • Home & Garden
  • Recycled Crafts
  • Scrapbooking
  • Card Making
  • Polymer Clay
  • Cross-Stitch
  • Edible Crafts
  • Felting
  • Glass Art
  • Indie Crafts
  • Kids Crafts
  • Jewelry Making
  • Lesson Plans
  • Needlework
  • Bath & Body
  • Party Ideas
  • Candle Making
  • DIY Weddings
  • Not Craft
  • Free Craft Projects

Copyright © 2026 · CraftGossip | Start Here | Contact Us | Link to Us | Your Editors | Privacy and affiliate policy