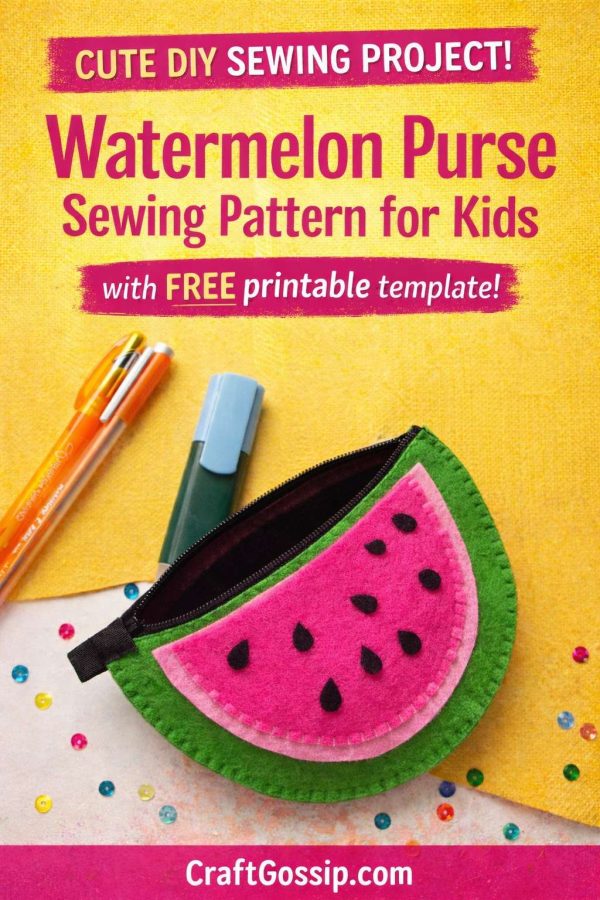
This easy sewing pattern is ideal for beginners, kids, tweens, and first-time sewers. The step-by-step tutorial walks you through creating an adorable watermelon-shaped zipper pouch that’s small, practical, and fun to make. It’s a great confidence-building project that can be finished in one sitting.
Watermelon Pouch
Supplies Needed:
- Felt fabric in green, light pink, hot pink, and black
- Needle and thread (or sewing machine)
- Scissors
- Zipper
- Pencil
- Printed template for cutting the pattern pieces

Instructions:
Step (1)
Print and cut out the patterns from the template. Trace the patterns on the selected felt fabric and
cut them out nicely.

Step (2)
Place the zipper on a flat surface with its right side facing up. Place the 2 large semi circle pieces on
both sides of the zipper; aligning the straight sides of both pieces on both sides of the zipper. Match
any one end of the zipper with the semi circle pieces; we can trim the other end later if necessary.

Step (3)
Prepare needle and thread. Overlap about half cm of the straight parts of the semi circle pieces with
the zipper. Stitch the semi circle pieces and the zipper together by simply doing running or flat
blanket stitch along the overlapped parts.

Step (4)
Keep 1 cm extra and then cut off extra zipper length if necessary. This is the main body part of the
pouch.

Step (5)
Take small semi circle piece and gather the seed patterns. Prepare needle with black thread.

Step (6)
I worked cross stitches to attach the seed patterns with the small semi circle piece. After attaching
all the seed patterns on the small semi circle pieces tie 2 tight knots at the back side of the piece and
cut off extra thread.

Step (7)
Place the zipper attached piece, seed attached small piece and the medium semi circle piece on a
flat surface.

Step (8)
Place the medium semi circle piece on the front part (green semi circle piece) of the main body part.
Alight the straight parts of both pieces (front semi circle and medium semi circle).

Step (9)
Now place the seed attached semi circle piece on the medium semi circle piece; align its straight
part with the previous pieces as well.

Step (10)
You can stitch the medium and the small (seed attached piece) pieces individually but I worked a
single line of flat blanket stitch along the curved side of the small piece and hence attaching all 3
pieces (front, medium and small) together. Tie a knot and cut off extra thread after the stitch is
complete.

Step (11)
Fold the main body part into half; keeping the zipper on the middle and matching the semi circle
son both sides of it. Prepare needle and thread; start stitching from any one side, adjacent to the
zipper.

Step (12)
It is best to work flat blanket stitch to close the side of the main body part of the pouch. Simply
work flat blanket stitch from one side to the other side.
Step (13)
Tie 2 tight knots and cut off extra thread after the stitch is complete.
Step (14)
Take a piece (5 cm x 2.5 cm) of felt fabric and fold it into half along its width. Cover 1 cm along the
side of the open end of the zipper under the fold of the 5 cm felt piece; fold the felt piece into half
lengthwise and match the end with its other end.

Step (15)
Use needle and matching thread to stitch the 5 cm felt piece with the pouch. Tie a knot and cut off
extra thread after the stitch is complete.

Step (16)
And done!

