
image by DiBona Designs
DiBona designs is currently offering their lovely artsy stamps at 50% off, click here to see them all.
-Heather
Independent craft blog since 2007
image by DiBona Designs
DiBona designs is currently offering their lovely artsy stamps at 50% off, click here to see them all.
-Heather
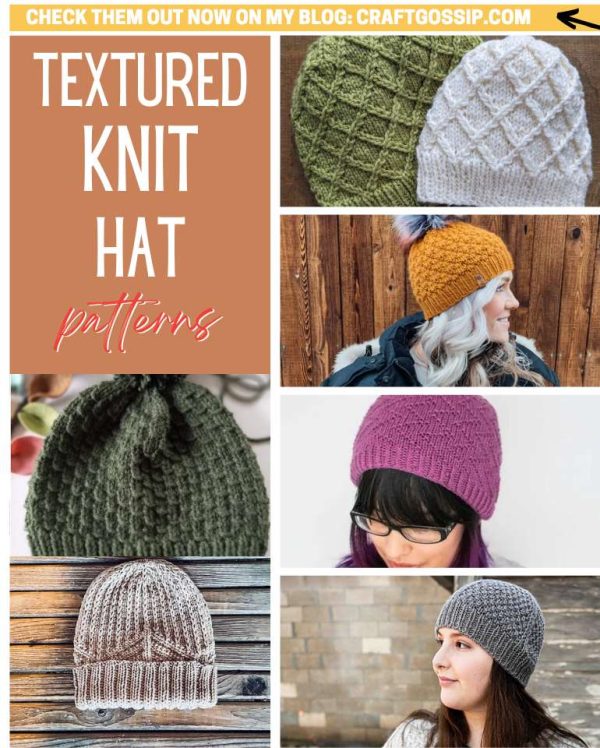 There are all sorts of knitting techniques you can use on hats, but some of my favorites are textured stitch patterns or cabled hats worked in a single color. Check out these great textured hat knitting patterns and find your next fall favorite.
The K?pekapeka hat from The Practice of Fibre was the one that got me started thinking about textured hat knitting patterns. This one has a simple zig-zag pattern worked with purls. This hat uses centered double decreases for shaping to help keep the pattern going as you finish the top of the hat. It uses worked weight yarn.
Little Totz Designs has this simple knit hat that uses worsted weight yarn and an allover knit-purl stitch pattern that’s easy to memorize. This one would be a great first hat in the round pattern if that’s something you haven’t tried before.
The Fia Beanie from Honey and Grace Fiber Co is another simple stitch pattern that’s full of texture. It calls for bulky yarn so it should stitch up in no time in this great textured diamond design.
Kalurah Hudson’s Cindersmoke hat is an interesting stitch design that uses double moss stitch and bands of slipped stitches throughout the pattern, which is where the decreases are worked, keeping the rest of the pattern as established. It uses bulky yarn and is sized for adults, and you can find it on Ravelry.
Benjamin Matthews has such pretty designs that often turn out to be simpler to knit than they look. The Snow Carved Beanie (find it on Ravelry) for example only uses knits, purls and slipped stitches, but it has a design that looks almost like cables. The pattern uses worsted weight yarn and has a foldover brim for extra warmth.
While I wanted to keep the focus in this roundup on simple stitch patterns, basic cables are not that much more difficult than regular knitting, and the lattice pattern on this CrissCross Hat form the Purling Princess is so charming I couldn’t resist sharing. This hat comes in three sizes (baby, child and adult) and uses worsted weight yarn. It would be a great gift to knit if you’re thinking about that.