• Home
  • Suggest A DIY
  • DIY Newsletter

Craft Gossip

Independent craft blog since 2007

  • About CraftGossip
  • Our Network
    • Bath & Body Crafts
    • Candle Making Ideas
    • Crochet Ideas
    • Cross Stitch
    • Edible Crafts
    • Felting Patterns
    • Glass Art
    • Home & Garden Ideas
    • Indie Crafts
    • Jewelry Making
    • Kids Crafts
    • Knitting Patterns
    • Lesson Plans
    • Needlework
    • Party Ideas
    • Polymer Clay
    • Quilting Ideas
    • Recycled Crafts
    • Scrapbooking
    • Sewing Patterns
    • Card Making
    • DIY Weddings
    • Not Craft Ideas
  • Giveaways
  • Roundups
  • Store
  • Search

Rustic DIY Wedding Signs

April 10, 2012 by Kimberly Jones

Point the way to your wedding with a rustic sign you can make yourself! Get the tutorial created by photographer Lucy Greenhill at Adore by Chloe.

From the vows you exchange to the decor that adorns your chosen venue, each element holds the potential to carry a piece of your heart. One such detail that can beautifully convey the essence of your day is a rustic wedding sign—a charming and personal touch that not only points the way but also adds a warm and inviting touch to your festivities.

Crafted by your own hands, a rustic wedding sign captures the DIY spirit while offering a functional and aesthetically pleasing element that guides your guests and encapsulates the ambiance of your celebration. To guide you through this creative endeavor, the talented photographer Lucy Greenhill has generously shared her tutorial at Adore by Chloe, empowering you to craft a sign that is uniquely yours.

The process begins with selecting the perfect piece of wood—a canvas that will carry your message. This wood, weathered and textured, serves as a symbol of rustic beauty, embodying the charm and allure of the countryside. Next, your choice of paint color becomes a brushstroke that infuses your sign with your chosen color palette, tying it harmoniously to the rest of your decor.

As you move forward with the tutorial, each step becomes a stroke of creativity that brings your sign to life. Whether you opt for hand-painted letters or stencils, the act of spelling out your message transforms the wood into a canvas of sentiment. With each stroke, you’re not just creating a sign—you’re weaving a tale of love, laughter, and celebration.

Adding the final touches—a flourish of greenery, delicate florals, or a touch of ribbon—infuses your rustic sign with a touch of nature’s elegance. Every element you incorporate has the power to evoke emotions, capturing the essence of your relationship and the spirit of your upcoming union.

In the end, as you place your completed sign at your wedding venue, you’re not just providing directions; you’re extending an invitation to your guests to join in the magic of your day. The rustic sign becomes more than just a pointer—it’s a storyteller, sharing your journey, and inviting your loved ones to celebrate your love story.

So, if the idea of creating a meaningful and charming detail for your wedding appeals to you, look no further than the rustic wedding sign. With Lucy Greenhill’s tutorial as your guide, you have the opportunity to craft a piece that is as beautiful as it is personal. As you walk down the path of crafting this sign, know that you’re not just creating an object—you’re crafting a memory, a symbol of your love, and a warm welcome to all those who will be part of your special day.
 

«
»

Have you read?

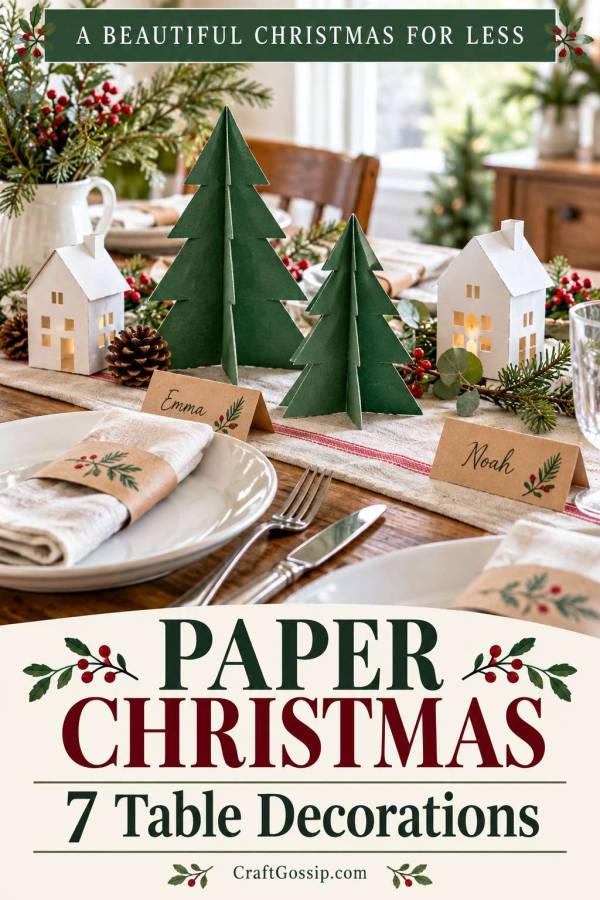
Christmas on a Budget – 7 Christmas Table Decorations You Can Make from Paper to Save Money

Before buying Christmas table decorations, open the paper drawer.

Leftover gift wrap, scrapbook offcuts and plain cardstock can become name cards, little trees and festive table details.

You do not need a cutting machine or a coordinated craft kit. A pair of scissors, a ruler and a little patience will cover most of these projects.

Paper is particularly useful when you want a colour-pop Christmas table on a small budget. Repeat one or two colours across a few simple decorations and the setting starts to feel coordinated.

Pick two or three projects rather than trying to make all seven.

Gather your supplies first

Look for:

  • Cardstock or clean, suitable packaging card.
  • Wrapping-paper scraps.
  • Plain paper.
  • Scissors and a ruler.
  • A pencil and a writing pen.
  • Existing paper glue or double-sided tape.

Card works best for standing decorations. Thin wrapping paper is better for covering a card base.

Make a sample before cutting enough pieces for every guest.

1. Folded name cards

Cut cardstock into rectangles measuring approximately 10 × 8 cm.

Mark the halfway point along the 8 cm sides, then fold to create a standing card with a face approximately 10 × 4 cm.

Write the name before adding embellishments.

A small drawn star or a narrow paper strip is plenty. Check that the name is readable from the guest’s seat.

Saving tip: use the plain side of suitable card and cover unwanted printing only where necessary.

2. Paper napkin bands

Cut paper strips approximately 4 cm wide.

Wrap one around a folded napkin to find the required length, including a small overlap. Secure the ends with tape or glue.

Make the bands loose enough to slide off without tearing.

Use one paper across all settings or repeat a shared colour through different patterns.

Saving tip: gift-wrap offcuts are useful here because the napkin supports the paper.

3. Slot-together paper trees

Draw a symmetrical tree shape with a flat bottom and cut two identical pieces from sturdy cardstock.

On the first tree, cut a slit from the top to the midpoint. On the second, cut from the bottom to the midpoint.

Slide the shapes together at right angles. Adjust the slit width gradually to suit the card thickness.

Test that the tree stands before cutting the rest.

Saving tip: two or three trees can be enough for a small display.

4. A miniature Christmas village

Our paper Christmas town tutorial provides a more detailed project with houses and trees.

Use one colour for a simple village or limit yourself to two coordinating shades.

Allow the glue to dry thoroughly before moving the buildings.

Saving tip: display the village on a sideboard if your dining table needs every centimetre for lunch.

5. Paper angel napkin holders

These paper angel napkin holders make a traditional Christmas detail.

Test the template size with one napkin before preparing a full set. Decorate the card with suitable fabric or paper scraps.

Saving tip: use the same base colour while allowing small differences in the paper covering.

6. Flat paper stars

Draw or trace a simple star onto card.

Cut it out, cover it with paper if needed and add a guest’s name. Place it beside the plate or attach it to a napkin band.

Keep decorative paper away from uncovered food and damp dishes.

Saving tip: a few larger stars are easier to tidy and store than dozens of tiny pieces of confetti.

7. A paper-star wreath

Our paper-star wreath tutorial uses covered card shapes arranged on a ring.

Hang it near the table using a suitable fixing. This gives the dining area a focal point without taking serving space.

Saving tip: use the same paper on the wreath and name cards to connect the room.

Keep all paper decorations away from flames, heat and wet surfaces. Pack dry pieces flat where possible and label the box for next year.

The paper scraps you nearly discarded might be all the Christmas colour your table needs.

RSS feed: More Articles More Articles

  • 12 Christmas Cross Stitch Patterns for Cat Lovers
  • Easy Christmas Fabric Gift Basket Sewing Pattern (Perfect for Beginners)
  • 10 Easy Margarita Recipes for Taco Nights, BBQs and Summer Gatherings
  • IKEA KALLAX Room Divider DIY: Create a Cosy Corner With Storage and Style
  • 5 Christmas Sweater Knitting Patterns Worth Casting On
  • Wet Felting with a Hand-Held Sander – My Honest Experience (and Safety Tips You’ll Actually Use)
  • How to Make Cross Stitch Christmas Gift Tags With Small Fabric Scraps
  • Thanksgiving Turkey Scrapbook Layouts to Gobble Up
  • 10 DIY Angel Jewelry Tutorials For Christmas
  • Crochet Christmas Dove Ornaments With a Printable Gift Poem

Pick Your Blog

  • Sewing
  • Knitting
  • Quilting
  • Crochet
  • Home & Garden
  • Recycled Crafts
  • Scrapbooking
  • Card Making
  • Polymer Clay
  • Cross-Stitch
  • Edible Crafts
  • Felting
  • Glass Art
  • Indie Crafts
  • Kids Crafts
  • Jewelry Making
  • Lesson Plans
  • Needlework
  • Bath & Body
  • Party Ideas
  • Candle Making
  • DIY Weddings
  • Not Craft
  • Free Craft Projects

Copyright © 2026 · CraftGossip | Start Here | Contact Us | Link to Us | Your Editors | Privacy and affiliate policy