• Home
  • Suggest A DIY
  • DIY Newsletter

Craft Gossip

Independent craft blog since 2007

  • About CraftGossip
  • Our Network
    • Bath & Body Crafts
    • Candle Making Ideas
    • Crochet Ideas
    • Cross Stitch
    • Edible Crafts
    • Felting Patterns
    • Glass Art
    • Home & Garden Ideas
    • Indie Crafts
    • Jewelry Making
    • Kids Crafts
    • Knitting Patterns
    • Lesson Plans
    • Needlework
    • Party Ideas
    • Polymer Clay
    • Quilting Ideas
    • Recycled Crafts
    • Scrapbooking
    • Sewing Patterns
    • Card Making
    • DIY Weddings
    • Not Craft Ideas
  • Giveaways
  • Roundups
  • Store
  • Search

Project: Pin Wheel Card

July 22, 2009 by Vikram Goyal

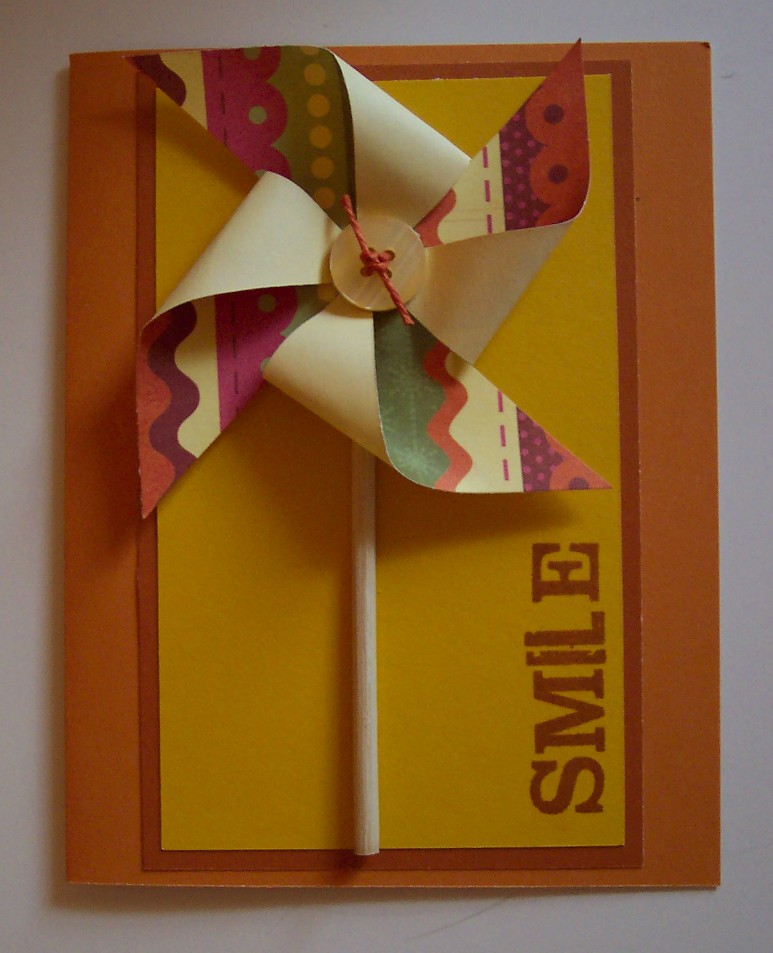
image by Heather Holbrook

image by Heather Holbrook

I wanted to share with you the instructions for this fun Pin Wheel Card I made recently.
 
Supplies:
cardstock: yellow, rust, orange
double-sided pattern paper 3″x 3″
button
string
small dowel, stick or skewer 3 1/2″ long
“smile” stamp (from Close To My Heart “April Word Puzzle” set)
rust ink pad
large glue dots
foam squares
 
Directions:
-cut orange cardstock in half and fold in half for card base
-trim rust cardstock to 5 1/4″ x 3 1/4″ and trim yellow cardstock to 5″ x 3″ and adhere both to card base
-stamp “smile” word with rust ink onto yellow cardstock
-turn patterned paper over to backside and draw an X with a pencil from corner to corner, cut along all four lines about half way towards the center of the X (see picture below)
-turn cut patterned paper over and apply a glue dot in the center, fold down every other point and adhere in the middle (see photo below)
-tie string through button holes and adhere button to middle of pin wheel
-glue stick to center of card
-apply foam squares to back of pin wheel and adhere to card front on top of stick
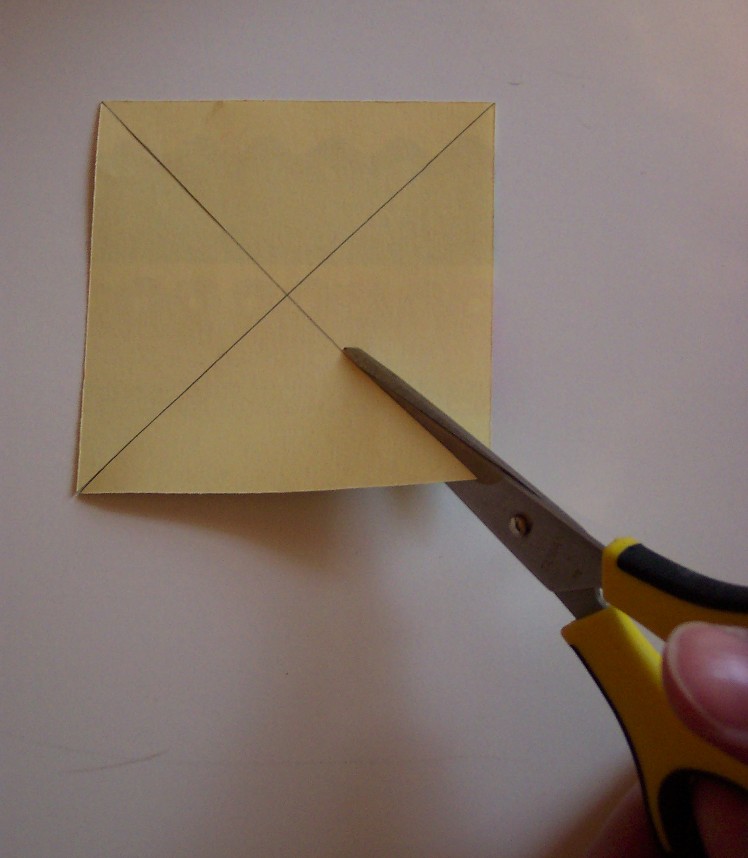
 
image by Heather Holbrook
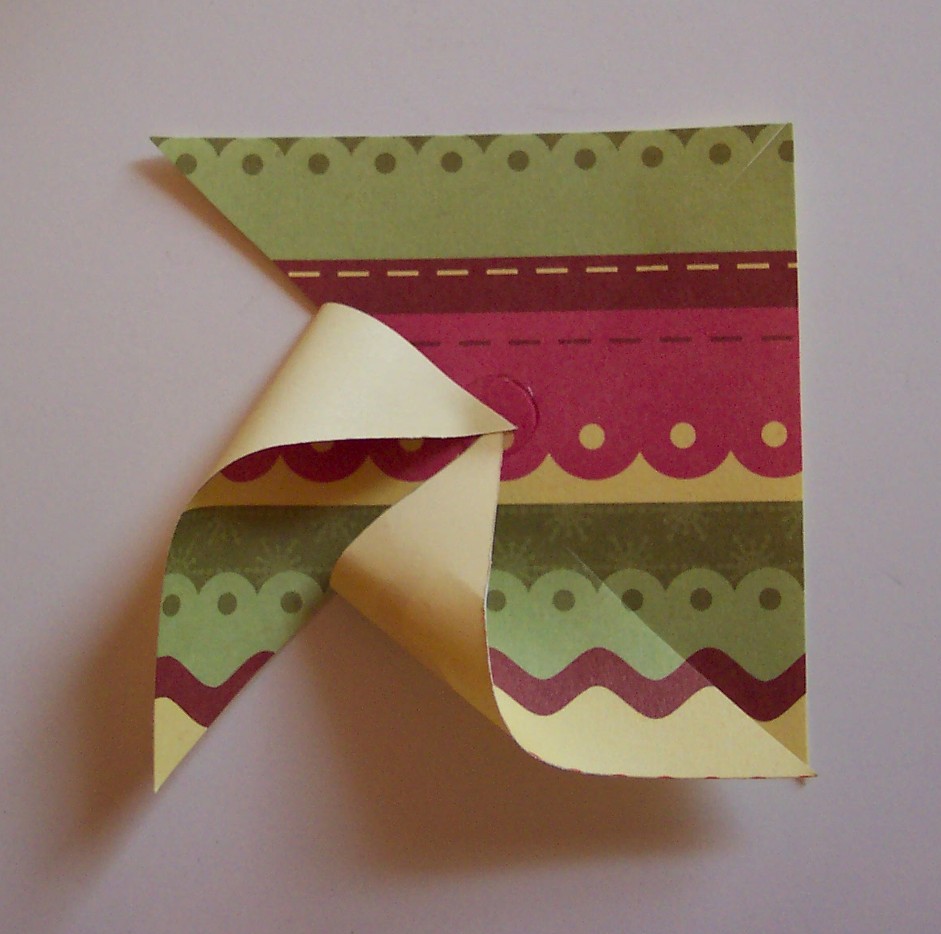
image by Heather Holbrook

image by Heather Holbrook

image by Heather Holbrookimage by Heather Holbrook
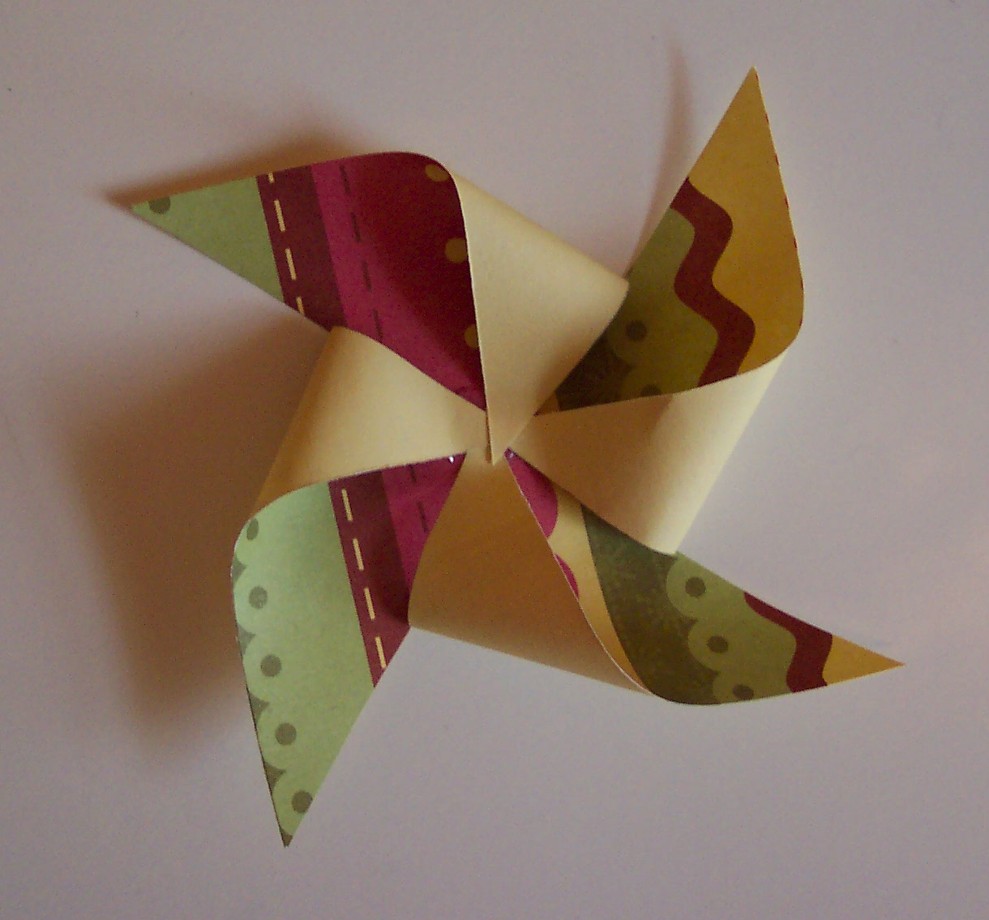
 

image by Heather Holbrook

image by Heather Holbrook

Hope you try out this fun card for yourself!
-Heather
«
»

Have you read?

How to Make a Cozy Coffee Gift Card Holder

How to Make a Cozy Coffee Gift Card Holder

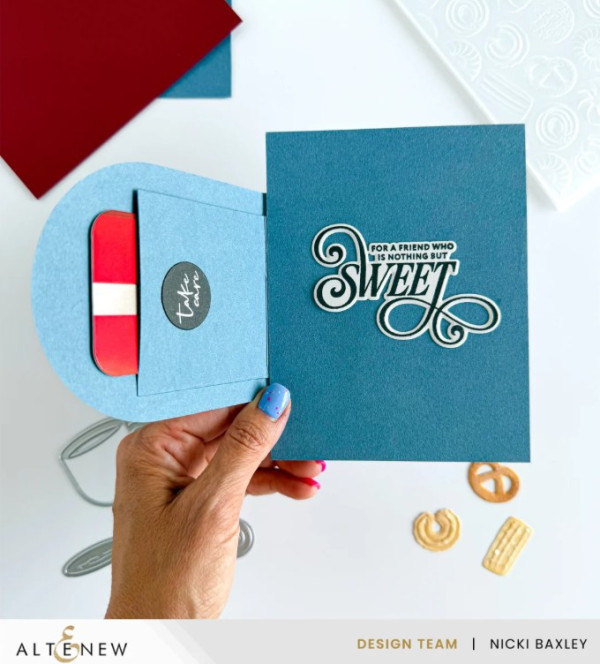
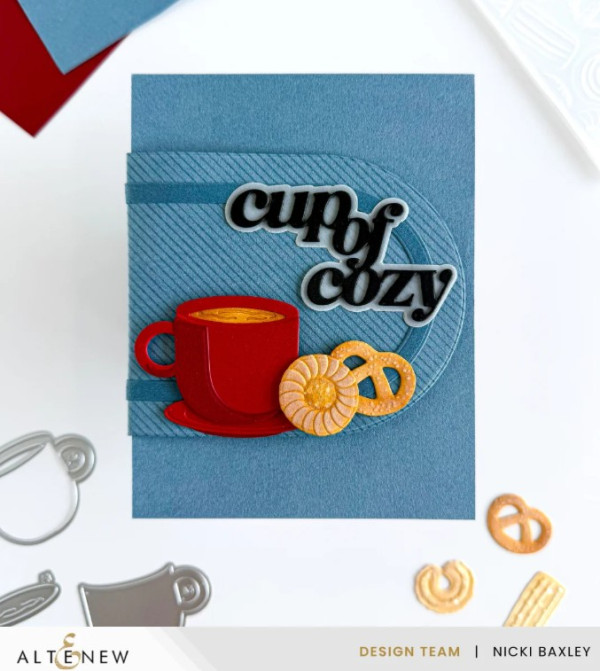
If you’re gift giving to a coffee lover give them a gift card to their favorite coffee shop in a handmade coffee themed gift card holder. Nicki created this delicious and cozy card with a rounded flap that has a die cut Cup of Joe and some tasty cookies.  For the cookies she die cut and dry embossed them, adding some white pigment ink for color and texture and glitter for sugar. I love how the bold red mug pops on the blue card base!

How to Make a Cozy Coffee Gift Card Holder

Inside on the flap is a pocket for the gift card and a sweet stamped and die cut sentiment.

Visit the Altenew blog to watch her video tutorial.

-Heather


RSS feed: More Articles More Articles

  • Free Animal Person Embroidery Design Review
  • DIY Halloween Sock Pumpkins: Easy Fuzzy Pumpkins With Ghosts, Stripes and Witch Hats
  • Free Felting Tutorial Friday: Felt Into Autumn with Heidi Feathers
  • Knit a Classic Aran Cardigan with this Free Knitting Pattern
  • Printable Letter Books for Preschoolers
  • How to Make an Interactive Halloween Mini Scrapbook Album
  • 10 Ice Cubes That Instantly Elevate Champagne
  • Setting Up a Beginner Craft Space? A Practical Shopping List
  • Thrift Store Upcycling: Rustic Pumpkin Decorations From Glass Bowls
  • Mini Pumpkins and Jack o’Lanterns to Cross Stitch

Pick Your Blog

  • Sewing
  • Knitting
  • Quilting
  • Crochet
  • Home & Garden
  • Recycled Crafts
  • Scrapbooking
  • Card Making
  • Polymer Clay
  • Cross-Stitch
  • Edible Crafts
  • Felting
  • Glass Art
  • Indie Crafts
  • Kids Crafts
  • Jewelry Making
  • Lesson Plans
  • Needlework
  • Bath & Body
  • Party Ideas
  • Candle Making
  • DIY Weddings
  • Not Craft
  • Free Craft Projects

Copyright © 2026 · CraftGossip | Start Here | Contact Us | Link to Us | Your Editors | Privacy and affiliate policy