• Home
  • Suggest A Craft
  • DIY Newsletter

Craft Gossip

The largest independent craft review site since 2007

  • About CraftGossip
  • Our Network
    • Bath & Body Crafts
    • Candle Making Ideas
    • Crochet Ideas
    • Cross Stitch
    • Edible Crafts
    • Felting Patterns
    • Glass Art
    • Home & Garden Ideas
    • Indie Crafts
    • Jewelry Making
    • Kids Crafts
    • Knitting Patterns
    • Lesson Plans
    • Needlework
    • Party Ideas
    • Polymer Clay
    • Quilting Ideas
    • Recycled Crafts
    • Scrapbooking
    • Sewing Patterns
    • Card Making
    • DIY Weddings
    • Not Craft Ideas
  • Giveaways
  • Roundups
  • Store
  • Search

Poison Ivy soap recipe

May 14, 2009 by jessica neaves

soap-main_thumbHow to Make a Natural Poison Ivy Soap
By JuDea Bentley from eHow.com

This is a very easy recipe for homemade soap that can be used for poison ivy or other uncomfortable rashes. This soap is also great for sensitive skin.

Difficulty: Moderate

Ingredients:
2 cups melt and pour soap or re-batched soap. Or you can use  store bought soap.
4 tablespoons calamine lotion
4 tablespoons liquid glycerin
4 tablespoons finely ground oatmeal
microwave
plastic juice pitcher that fits in the microwave
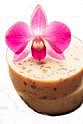
A mold to use for the soap. I usually look around the house and see what I can find. A frosting can makes a nice round soap like in the picture.
Vegetable spray for mold
40 drops of rosemary essential oil

1. Cut the soap into small pieces. Place them in the pitcher. Heat on high for 20 to 30 seconds. Stir every 5 seconds. Repeat until all the soap is melted. This will be very hot when taken out of the microwave, so please use caution.

2. Allow the soap to cool slightly. Then stir in the glycerin, calamine lotion, and oatmeal. Then place the rosemary essential oil into the soap. This is a good preservative.

3. Next spray you mold with vegetable spray. I use a lot of household items for molds. The silicon cake pans are great for mold. The cake rosette silicon pan make adorable soaps. For the round soaps I just use a 16oz frosting plastic tub.

4.  After you spray the containers pour the soap in slowly. Let the soap sit until hard. What I like to do is to put the mold in the freezer for a few hours before I pop it out of the mold. If you should decide to us a frosting tub you can always cut the tub if you cannot get it to pop out. Then cut the soap into 1 inch thick pieces. Happy Soap Making!

Read These Next

  • 15 Melt and Pour Goat's Milk Soap
  • 18 Oatmeal Bath And Body Recipes To Nourish and…
«
»

Have you read?

Sun Activities for Kids

With summer coming soon in the Northern Hemisphere, it’s a fun time to incorporate activities and crafts with a sunny theme. Take some time to learn about the sun (this post from National Geographic Kids is a good one) and then do some sun activities.

Sun prints are a classic summer activity, and there are lots of ways to do them, from placing objects on construction paper (like in this craft from MomBrite) or by using sun print paper (aka cyanotype paper).

Practice threading, counting, color sorting and other skills with this easy sun threading activity from Taming Little Monsters.

Lessons 4 Little Ones has a great blog post full of ideas for science experiments using the sun, such as melting crayons, looking at shadows, making a sun dial and trying a solar oven. Printables to go with the lessons are available for purchase or you can just talk through the students’ hypotheses about what will happen and draw or otherwise record the results.

This updraft tower from Almost Unschoolers is a cool way to illustrate that the heat of the sun causes an updraft, which makes the pinwheel spin. This is a good one to do inside near a sunny window so you don’t have wind spinning the pinwheel instead.

You’ll want to get out in the sun to try this experiment form Life with Moore Babies to see what kinds of things the sun can melt. Using different kinds of sweets you can see how the sun melts things by itself and how you can concentrate the power of the sun with a magnifying glass.

Playing with shadows is fun for kids of all ages, and you can track a shadow through the day with this experiment from Science Sparks. If you’re working with multiple kids they can each choose an object to shadow (ha!) and at the end of the day you can see how different their shadows looked. 

And of course you’ll want to make a sun themed suncatcher craft, right? This one from Fox Farm Home uses all the pretty flowers you collect on your nature walk and puts them in a sun-shaped frame.


RSS More Articles

  • How to Stitch with Variegated Floss
  • Sun Activities for Kids
  • 12 Scrapbook Layout Ideas That Use Tags
  • Knits with Sheep
  • Unlock Your Crafting Potential with the Must-Have Yarn Gauge! Find Out Why Crafters Everywhere Are Obsessed
  • Sew Your Own Dolman T-Shirt – Free and Easy Sewing Pattern
  • Learn about Chile for Kids
  • Handmade with a Past: Tuesday’s Top Recycled Etsy Find
  • 12 Handmade Cards with Ink Blending Techniques
  • How to Make a DIY Moss Bunny Wreath for Easter

Pick Your Blog

  • Sewing
  • Knitting
  • Quilting
  • Crochet
  • Home & Garden
  • Recycled Crafts
  • Scrapbooking
  • Card Making
  • Polymer Clay
  • Cross-Stitch
  • Edible Crafts
  • Felting
  • Glass Art
  • Indie Crafts
  • Kids Crafts
  • Jewelry Making
  • Lesson Plans
  • Needlework
  • Bath & Body
  • Party Ideas
  • Candle Making
  • DIY Weddings
  • Not Craft
  • Free Craft Projects

Copyright © 2025 · CraftGossip | Start Here | Contact Us | Link to Us | Your Editors | Privacy and affiliate policy