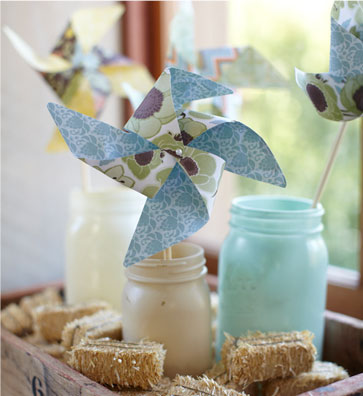
Pottery Barn Kids had a whole Easter Celebration all laid out for us. I want to show you some of my favorite pieces. These sweet pinwheels are one of the featured table decorations. They give us a step by step tutorial so that we are assured success with ours at home. Go here for the specific tutorial. Or go look at Pottery Barn Kids for all of their great ideas!
Have you read?
Easy Ways to Make Your Cross Stitch Better
The post over at The Crafty Mummy has the click-baity title of “Is there a right or wrong way to cross stitch?” Of course the answer is no. As with any other craft, as long as you are happy with the results you’re doing it right and no one should try to convince you otherwise.
That said, there are things that you can do to make your cross stitch a little better if you aren’t totally happy with the way your projects are looking. They might not be considered the “right way,” but they are important things to think about and if you want to deviate from these “rules” at least you’ll know that you’re doing it.
You can head over there to read all the tips, but it’s things like making sure your stitches are all going in the same direction (meaning you stitch the bottom legs of a row all in the same direction, then work back and stitch all the top legs in the same direction). You wouldn’t think something like that would make a huge difference until you don’t do it and then you can’t unsee it.
Most of things things aren’t rules so much as they are reminders to be consistent in what you are doing as you work a project. So however you start doing things like stitch direction or the number of strands of floss (I might even add using a hoop versus not, since the hoop can stretch the fabric and change the tension of the stitches a bit) you should continue in that way throughout the project in order for it to look its best.
Head over to The Crafty Mummy to read the rest of her list, then come back here if you have something to add. I’d love to hear your thoughts!
[Photo: The Crafty Mummy]