• Home
  • Suggest A Craft
  • DIY Newsletter

Craft Gossip

The largest independent craft review site since 2007

  • About CraftGossip
  • Our Network
    • Bath & Body Crafts
    • Candle Making Ideas
    • Crochet Ideas
    • Cross Stitch
    • Edible Crafts
    • Felting Patterns
    • Glass Art
    • Home & Garden Ideas
    • Indie Crafts
    • Jewelry Making
    • Kids Crafts
    • Knitting Patterns
    • Lesson Plans
    • Needlework
    • Party Ideas
    • Polymer Clay
    • Quilting Ideas
    • Recycled Crafts
    • Scrapbooking
    • Sewing Patterns
    • Card Making
    • DIY Weddings
    • Not Craft Ideas
  • Giveaways
  • Roundups
  • Store
  • Search

Pallet Housing that Survived a Cyclone

February 28, 2015 by Vikram Goyal

Pallet-house-cyclone

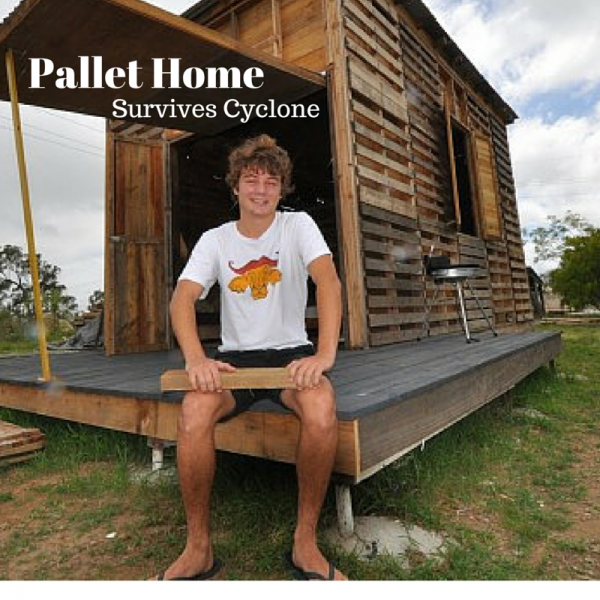
A prototype Pallet home, that was originally designed as a glorious, cheap, and fast student accommodation, has survived a devastating Cyclone that recently hit parts of Australia.

The Pallet home project, called “The Shelter Project” was designed by three students at a university in Queensland, Australia.

It was designed as part of a competition, and no surprises, actually won that competition.

CQUniversity students Angus Hughes, Mattison Rose and Jessica Kahl came up with the idea to provide temporary housing relief in the form of ‘pallet home’ flat-packs.

Take a tour around the house here:

By using recycled wood pallets the trio aim to distribute these homes to those who lost their own homes in natural disasters. The fact that it withstood a Category 5 cyclone, means that it might work well!

What a great idea. What do you think?

Read These Next

  • 15 Desks You Can Make From Upcycled Wood Pallets
  • 45 Christmas Tree Ornaments Made From Wood Slices
«
»

Comments

  1. pr46ct says

    February 28, 2015 at 3:10 pm

    I think that you have a great idea of making something out of scrap ,also I don’t know about where you live but in the USA there is way to much “Homeless People “. Wouldn’t it be nice to help the ones that want to be helped . Pat USA

Have you read?

Bluey Hexi Cardigan Free Crochet Patttern

If you’ve ever wanted to crochet a cozy, colorful cardigan for a little one – this might just be the most fun you’ll ever have with a hook and some yarn! This hexagon-style hoodie cardigan is bursting with character, warmth, and just a hint of playful magic, inspired by two beloved animated siblings (you know the ones!). It’s perfect for toddlers who love to twirl, crawl, and snuggle.

The best part? You don’t need a formal pattern – just a few basic shapes, some stash yarn, and a little creative flair.

This Bluey cardigan is based on the classic crochet hexagon cardigan structure. You’ll create two large granny-style hexagons, fold them to form the body and sleeves, and then customize the rest – hood, border, cuffs, and even those cute little ears!

The real magic lies in the Bluey color blocking. One side features warm honeyed tones (think copper, gold, and cream), while the other shifts through cool, calming blues. The result? A unique, reversible-style cardi that feels like two characters came to life in yarn form.

Sandy Warm Side (Golden tones):

  • Create Aran (Wool Warehouse): Cream, Mustard, Antique Gold, Copper

Bluey Cool Side (Blue tones):

  • Ombre Yarn (HomeBargains)
  • Red Heart Super Saver: Light Blue, Light Periwinkle

You can easily substitute with any worsted weight/Aran yarn – just keep the tones distinct to mimic the split-style effect.

Materials:

  • DK weight yarn (or any weight yarn of your choice, as this pattern is made to measure).

  • Hook Size: 4.5mm for the main body, 3.5mm for rib edging.

  • Buttons: Four 20mm buttons.

Note: Use a hook size that suits the yarn you’re using. The cardigan will have approximately 2” of positive ease when finished.

Abbreviations:

  • sc = Single Crochet (UK: Double Crochet)

  • dc = Double Crochet (UK: Treble Crochet)

  • sdc = Spike Double Crochet (UK: Double Treble)

  • ssc = Spike Single Crochet (UK: Double Crochet)

  • cluster = (3 dc / 3 treble UK)

  • slst = Slip Stitch

  • blo = Back Loop Only

Gauge:

  • For DK weight yarn with 4.5mm hook:

    • 9 dc x 4 rows = 2” x 2”

    • 3 clusters x 4 rows = 2” x 2”

Pattern Notes:

The cardigan is made with two hexagons, which are stitched together to form the shape. The granny spike stitch creates a unique texture.

Hexagon (Make 2):

Round 1:

  • Start with a magic circle.

  • Ch3, 2 dc, ch1, 3 dc, ch1 x 5.

  • Slst to the first stitch, slst to ch1 corner. (18 stitches)

Round 2:

  • [Ch3, 2 dc, ch1, 3 dc] in the first corner.

  • [3 dc, ch1, 3 dc] in each ch1 space, slst to the first stitch.

  • Slst to the ch1 corner space. (36 stitches)

Round 3:

  • [Ch3, 2 dc, ch1, 3 dc] in the first corner.

  • [dc, sdc, dc] between the clusters, [3 dc, ch1, 3 dc] in the ch1 corner, [dc, sdc, dc] between the clusters.

  • Repeat to the end, slst to first stitch. (54 stitches)

Round 4:

  • [Ch3, 2 dc, ch1, 3 dc] in the first corner.

  • [dc, sdc, dc] between the next 2 clusters, [3 dc, ch1, 3 dc] in the ch1 corner, [dc, sdc, dc] between the next clusters.

  • Repeat to the end, slst to first stitch. (72 stitches)

Repeat Round 4 until the hexagon measures the required size. For toddler size, aim for 5”.

Seaming the Sleeves:

  • For Side 1: Sc in the corner, sc 2, ssc in the center of the cluster 2 rows below, sc 2 repeat to the corner, sc in the corner space.

  • Side 3: Repeat as above.

Slst the seams together (or sew if preferred).

Adding Length to the Body:

  • Row 1: Ch3, dc, sdc, dc between each cluster.

  • Row 2: Ch3, dc, sdc, dc, turn.

  • Repeat rows 1 and 2 to the required length.

Adding the Cuffs:

  • For Cuffs, use a smaller hook:

    • Row 1: Ch7, sc in 2nd ch from hook, sc 5, slst 2 stitches at the sleeve’s edge.

    • Row 2: Ch1, sc in blo for all stitches, turn.

    • Row 3: Ch1, sc 6, slst 2 at sleeve’s edge.

Repeat until cuffs reach desired size.

Final Edging:

  • Work a row of sc around the entire cardigan, adding a button band if necessary.

Note: Always refer to the size chart for specific measurements. The cardigan can be customized to your needs by adjusting the number of rows and adding extra length to the body or sleeves.

This pattern is made to measure, so feel free to adjust it to fit your toddler’s size.

To adjust the Hexagon Cardi to suit your child’s size, follow these steps:

  1. Measure Your Child:

    • Take measurements of the chest, length from shoulder to desired bottom edge, and sleeve length.

  2. Determine Hexagon Size:

    • Make the hexagon large enough to fit your child’s chest measurement, adding a couple of inches for positive ease (about 2 inches is typical for comfort).

    • Measure the side of the hexagon from the center to ensure it matches the required length.

  3. Add Rows to the Hexagon:

    • If the standard size doesn’t fit, add additional rounds to the hexagon to increase its size.

    • Add a round to the bottom and sleeves, adjusting as necessary for length.

  4. Adjust the Sleeves:

    • For the sleeves, you can stop adding rounds when the sleeve is wide enough to fit your child’s arm comfortably. You may want to make the armholes smaller by joining the hexagon earlier or adding fewer rounds.

  5. Shape the Body:

    • To change the length of the cardigan, continue adding rounds to the body part of the hexagon until it matches the desired length from the top of the shoulders to the bottom.

  6. Test Fit:

    • After completing the hexagons and before seaming, check the fit by holding the pieces up to your child and adjusting as needed.

By following these steps, you can create a cardigan that is tailored perfectly to your child’s measurements.

RSS More Articles

  • Teaching Kids About Recycling: Fun Activities to Build Eco-Friendly Habits
  • Bluey Hexi Cardigan Free Crochet Patttern
  • You Won’t Believe These Easy Air Fryer Recipes Are Kid-Approved AND Healthy
  • Patriotic Cross Stitch Patterns
  • The Royal School of Needlework Wall Calendar 2025 – A Year of Pure Stitching Joy
  • Book Review: Rise Up!
  • DIY Quilting on a Budget: Tips for Frugal Fabric Shopping
  • Handmade with a Past: Tuesday’s Top Recycled Etsy Find
  • Lotus Flower Totem Fan Crochet Kit
  • 12 Handmade Wedding Card Ideas using a Variety of Techniques

Pick Your Blog

  • Sewing
  • Knitting
  • Quilting
  • Crochet
  • Home & Garden
  • Recycled Crafts
  • Scrapbooking
  • Card Making
  • Polymer Clay
  • Cross-Stitch
  • Edible Crafts
  • Felting
  • Glass Art
  • Indie Crafts
  • Kids Crafts
  • Jewelry Making
  • Lesson Plans
  • Needlework
  • Bath & Body
  • Party Ideas
  • Candle Making
  • DIY Weddings
  • Not Craft
  • Free Craft Projects

Copyright © 2025 · CraftGossip | Start Here | Contact Us | Link to Us | Your Editors | Privacy and affiliate policy