• Home
  • Suggest A DIY
  • DIY Newsletter

Craft Gossip

Independent craft blog since 2007

  • About CraftGossip
  • Our Network
    • Bath & Body Crafts
    • Candle Making Ideas
    • Crochet Ideas
    • Cross Stitch
    • Edible Crafts
    • Felting Patterns
    • Glass Art
    • Home & Garden Ideas
    • Indie Crafts
    • Jewelry Making
    • Kids Crafts
    • Knitting Patterns
    • Lesson Plans
    • Needlework
    • Party Ideas
    • Polymer Clay
    • Quilting Ideas
    • Recycled Crafts
    • Scrapbooking
    • Sewing Patterns
    • Card Making
    • DIY Weddings
    • Not Craft Ideas
  • Giveaways
  • Roundups
  • Store
  • Search

Olive Oil And Lemon Oil Lamp

June 14, 2016 by Shellie Wilson

dsc00932

If you’re looking for a unique and natural way to light up your home, try making your own olive oil and lemon oil lamp. Not only does it provide a soft and warm glow, but the aroma is simply delightful. This DIY project is easy to do and requires only a few basic materials that you probably already have at home.

To start, you’ll need a fresh lemon, olive oil, and a wick. You can purchase a pre-made wick, or make your own by braiding cotton string and soaking it in olive oil for several hours. It’s also important to have a small dish or container to hold the oil and lemon.

Begin by cutting the top off the lemon and scooping out the flesh, leaving the white pith intact. This will serve as the base for your lamp. Next, fill the lemon with olive oil until it is about three-quarters full. Insert your wick into the oil, making sure it is securely in place. You may need to use a small piece of wire to hold the wick in place at the top of the lemon.

To light your lamp, simply ignite the wick with a lighter or match. The oil will slowly burn, providing a gentle and relaxing ambiance. The lemon acts as a natural diffuser, releasing the sweet and tangy scent of fresh citrus into the air.

It’s important to note that while olive oil and lemon oil lamps are safe to use, they should always be supervised while burning. The jar can become quite hot, so it’s important to keep the lamp on a stable surface and out of reach of children or pets.

If you’re feeling creative, there are many variations you can try with this simple recipe. For example, you can add a few drops of essential oil to the olive oil for a personalized scent. You can also experiment with different types of citrus, such as oranges or grapefruits, for a slightly different fragrance.

Olive oil and lemon lamps also make great centerpieces for outdoor gatherings, such as backyard barbecues or garden parties. They provide a unique and charming touch to any event, and the aroma is sure to be a hit with your guests.
Lemon & Olive Oil Candle.


«
»

Have you read?

Witch Themed Math Activities

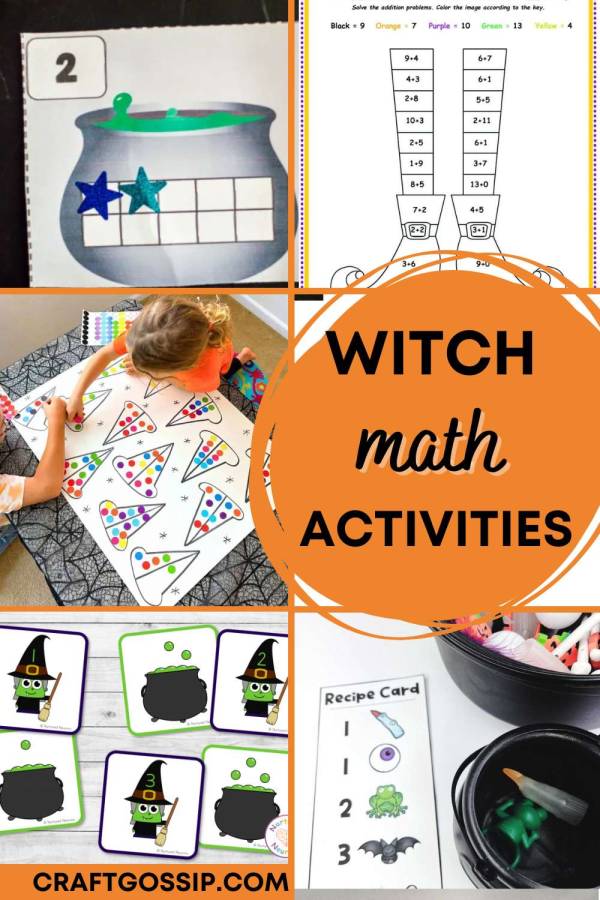
It’s the time of the year to start bringing a little Halloween fun into every lesson plan you can, so here are some ideas for witch themed math activities your kids are sure to love. 

Practice symmetry skills with this witch hat counting game from Friends Art Lab. Kids can stick stickers of the same type on each side of the hat, then count how many total, how many of each type, etc. And you end up with a cute piece of art to boot. 

Frugal Mom Eh has a number of witch themed worksheets including a connect the dots, label the witch and Halloween themed scattergories. But the one that caught my eye was the witch’s leg coloring page, which is a color by the answer to the math problem. 

Nurtured Neurons has a cute witch counting came where you match the witch to the number of bubbles coming out of her cauldron. This one requires membership in their community but you might be able to get a free preview. 

The witches brew on a ten frame activity from Miniature Masterminds is a cute one to work on one to one correspondence. Use little erasers or buttons if you want to reuse the cards, or add stickers to match the number on the card, which adds a fine motor skill component.

The Teacher Bag has a cute Halloween counting game kids can use to make their own potion in a little cauldron. You could make your own version with all the little Halloween themed bits you have handy, and either make a spinner like theirs or just write out some recipes and have kids go through the bigger cauldron to find all the ingredients they need. Then count them up! This post from Pocket of Preschool has a similar idea you can use with their printable or make your own with whatever items you have on hand. 

RSS feed: More Articles More Articles

  • 12 Cozy Fall Handmade Cards
  • Small Halloween Cross Stitch Patterns
  • 14 Halloween Bat Sewing Projects To Make This October
  • Go Back to the ’90s with this Set of Knitting Patterns
  • Inspired by the Stolen Neighbors Quilt? How to Organise a Community Quilt Project
  • Halloween Book Storage Boxes That Make a Coffee Table Look Spookily Good
  • 20 Kids Crafts That Use Upcycled Toilet Roll Tubes
  • Bundle Halloween ITH Toy Machine Embroidery Designs – Etsy Review
  • Resources for Teaching Cursive to Kids
  • 100 FREE Autumn and Fall SVG Cut Files and Printables

Pick Your Blog

  • Sewing
  • Knitting
  • Quilting
  • Crochet
  • Home & Garden
  • Recycled Crafts
  • Scrapbooking
  • Card Making
  • Polymer Clay
  • Cross-Stitch
  • Edible Crafts
  • Felting
  • Glass Art
  • Indie Crafts
  • Kids Crafts
  • Jewelry Making
  • Lesson Plans
  • Needlework
  • Bath & Body
  • Party Ideas
  • Candle Making
  • DIY Weddings
  • Not Craft
  • Free Craft Projects

Copyright © 2026 · CraftGossip | Start Here | Contact Us | Link to Us | Your Editors | Privacy and affiliate policy