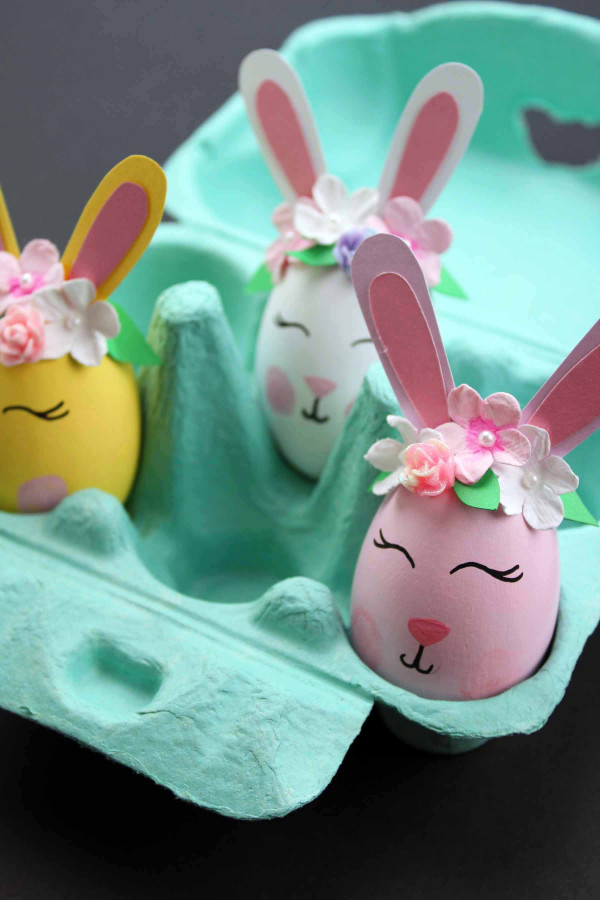
These DIY Easter Bunny eggs are a fun and creative way to get into the Easter spirit. Perfect for decorating your home or as gifts for friends and family, these eggs are easy to make and will bring a smile to everyone’s face.
To make these cute bunny eggs, you’ll need a few supplies:
Wooden or paper mache eggs, acrylic paint, a paintbrush, cardstock, glue, hot glue, a pencil, a black paint pen or permanent marker, scissors, paper and plastic flowers, mini pom poms, and a template.
The template, which you can download from the website, will provide you with the necessary pieces to make the bunny’s ears and head.

Mini Pom Poms Egg Instructions
Once you have your wooden or paper mache eggs, you can start painting them with acrylic paint. Make sure to use enough paint so that the eggs are completely covered.
To achieve a smooth and even finish, it’s best to give each egg 2 to 3 coats of paint.
Allow each coat to dry completely before applying the next one

Download the template and print it out.
Once the paint on the wooden eggs is completely dry, it’s time to move on to the next step of the project.
First, download the free printable bunny template from the website and print it out on a sturdy piece of cardstock.
After that, use scissors to cut out the template. Then, take the cut-out template and trace it onto the cardstock.
Use a pencil to do this so that it’s easy to erase any mistakes.
Once you have traced the template, use scissors to cut out each of the individual pieces for the bunny’s ears, head, and other parts.

Next, you will glue the pieces of the bunny ears together to create the complete ear structure. Then, you will glue these completed ears onto the bunny’s head. These steps are crucial in creating the cute appearance of your DIY Easter Bunny eggs.
It’s important to use the right type of glue and we recommend using a strong adhesive like hot glue to ensure that the ears stay in place and don’t come apart during use or handling.
Before gluing the ears, it’s also a good idea to test fit them to the head to make sure they look the way you want them to.
Once you’re happy with the placement, apply a thin layer of glue to the back of each ear and attach them to the head. Hold the ears in place for a few seconds to make sure the glue has set properly.

To add even more cuteness to your bunny, you can also glue cardstock leaves, paper, and plastic flowers onto the bunny. This will give the bunny a more lively and colorful appearance.
You can arrange the flowers in any way you’d like to make each bunny unique. Use hot glue to secure the flowers in place and make sure to allow enough drying time before handling your bunny.

Once you have painted the nose on each rabbit using a small paintbrush, it’s time to add some life to their cheeks. To do this, dip your pinky finger into the pink paint and gently dab it onto each rabbit’s cheeks. This will give them a rosy appearance and bring some color to their faces.
Next, use a pencil to draw the eyes and a mouth onto each egg. Take your time with this step, as it will give each bunny its own unique personality. Once you are satisfied with the way the eyes and mouth look, trace over them with a black paint pen or permanent marker.
Finally, to complete the Easter Bunny egg, glue a mini pom pom onto the back of each egg to serve as a cute and fluffy tail. With this step, your DIY Easter Bunny eggs are now complete and ready to be displayed as decorations or given as gifts.


Your eggs are finished!
