 I love Mimi Kirchner’s tattooed-man dolls with passion. But now…at last…Mimi presents a tattooed woman! I’m swooning. See more photos on Mimi’s blog, Doll.
Have you read?
DIY Air Dry Clay Magnets – Easy Stamped Clay Craft
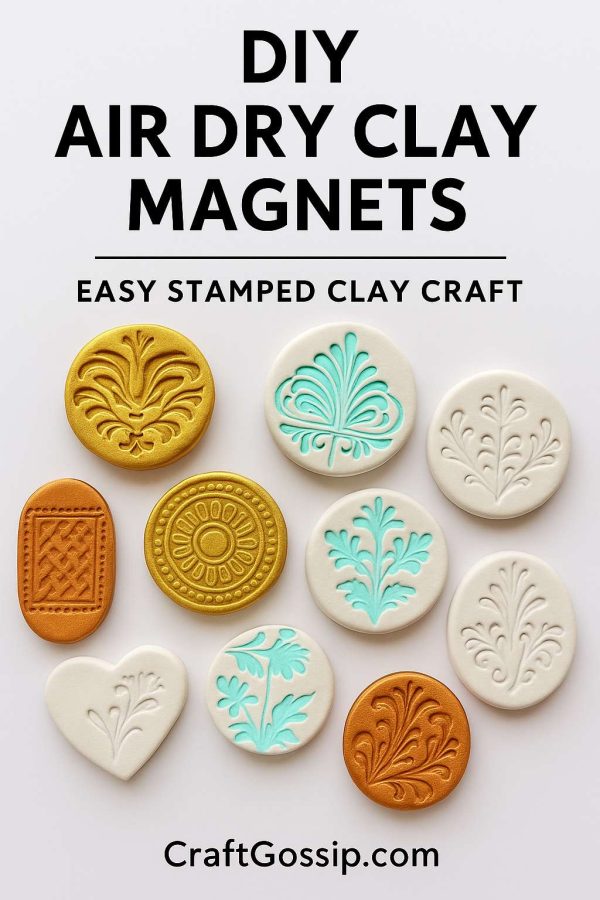
There’s something wonderfully nostalgic about clay crafts, isn’t there? The cool, smooth texture in your hands, the way it slowly transforms with just a little pressure and imagination—it’s both soothing and creative. Today, we’re making DIY air dry clay magnets that are stamped, painted, and perfect for adding a handmade touch to your fridge or craft room.
This project is simple, relaxing, and looks far more “designer” than it really is. Think of it as pottery without the kiln—no fancy equipment needed!
Why You’ll Love This Project
- Uses air dry clay – no oven or kiln.
- Great for leftover clay scraps.
- Endless possibilities with different stamps, textures, and paints.
- Makes thoughtful handmade gifts (great for teachers, neighbors, or stocking stuffers).
- Works as a fun craft session with teens or grandkids.
Supplies You’ll Need
- Air dry clay (white works best for stamping)
- Rubber stamps or textured items (lace, doilies, leaves, even buttons!)
- Acrylic paint or ink pads
- Rolling pin (or just grab a glass bottle)
- Circle cookie cutter (or jar lid)
- Magnets (strong flat-backed ones work best)
- Strong craft glue or hot glue gun
- Sealer (optional: Mod Podge or matte varnish)
Step-by-Step Tutorial
Step 1 – Roll Out Your Clay
Start with a small ball of clay and roll it out to about ¼ inch thick. Not too thin, or it’ll crack while drying, and not too chunky, or your magnets will be too heavy.
Step 2 – Stamp and Texture
Press your chosen rubber stamp or textured object firmly into the clay. Don’t worry about perfection—slight variations give that handmade charm.
Tip: If you’re using an ink pad, you can ink the stamp before pressing to add instant color to the impression.
Step 3 – Cut Out Shapes
Use a cookie cutter, jar lid, or knife to cut neat circles (or any shape you like—hearts, squares, even freeform ovals).
Step 4 – Smooth Edges
Gently smooth the edges with damp fingers or a bit of water. This gives a polished finish.
Step 5 – Dry
Place your pieces on baking paper and allow them to dry for 24–48 hours. Flip halfway through to prevent curling.
Step 6 – Paint or Highlight
Once dry, you can leave them natural or lightly brush paint over the raised designs to highlight the texture. Metallics (gold, silver, copper) look stunning, but even soft pastels give a pretty effect.
Step 7 – Seal (Optional)
If you want extra durability, brush on a thin coat of Mod Podge or varnish.
Step 8 – Attach Magnets
Finally, glue a magnet to the back of each piece. Let the glue cure fully before sticking them on your fridge.
Variations to Try
- Rustic farmhouse look: Use lace or burlap for stamping and paint with a whitewash effect.
- Modern boho: Try geometric stamps and metallic paint accents.
- Seasonal magnets: Use themed stamps (snowflakes, flowers, leaves) for year-round sets.
- Kids’ art version: Let the kids press buttons, Lego bricks, or small toys into the clay for fun patterns.
Tips
These don’t just work as magnets—you can glue them onto gift tags, turn them into brooches, or even make them into pendants for necklaces. Once you start, you’ll be stamping everything in sight (don’t say I didn’t warn you!).
Handmade doesn’t have to be complicated or expensive. These DIY air dry clay magnets prove just that—simple materials, a little creativity, and you’ve got a set of unique, functional mini artworks. Perfect for gifting, decorating, or just adding a bit of joy to the everyday.