
Check out all the latest trendy stuff for kids by reading the Handmade Kids. blog. This website find and highlights all the fun stuff you wish you could have.
The largest independent craft review site since 2007
Check out all the latest trendy stuff for kids by reading the Handmade Kids. blog. This website find and highlights all the fun stuff you wish you could have.
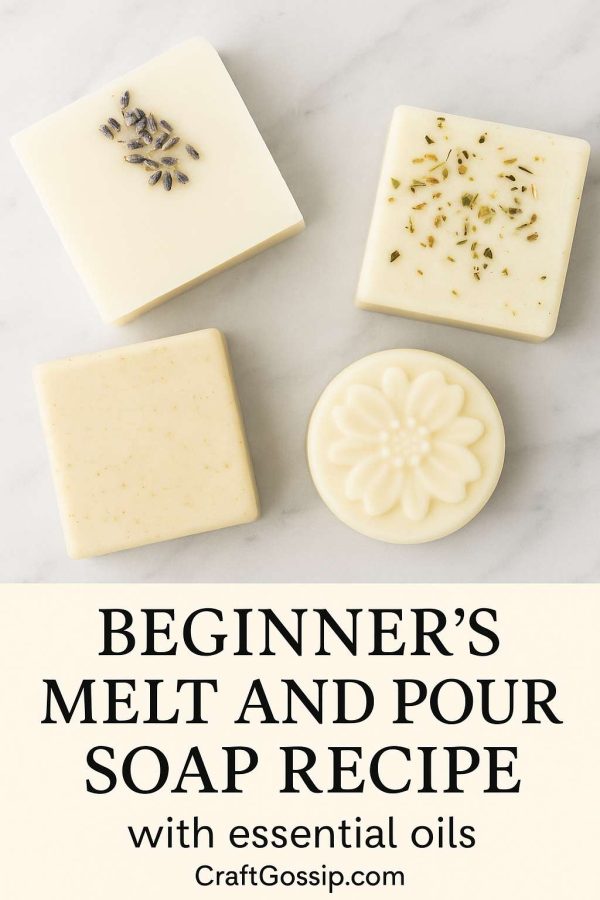
If you’ve been dreaming of making your own soap but feel intimidated by lye and lab goggles—breathe easy. This melt and pour soap recipe is beginner-approved, mum-tested, and totally lye-free. It’s one of the easiest ways to dip your toes into natural skincare crafting without needing a chemistry degree (or a hazmat suit!).
This tutorial walks you through a gorgeous base soap recipe and shows you how to customise it with essential oils, dried herbs, skin-loving add-ins, and creative molds. Whether you’re making handmade gifts, stocking your own bathroom, or just craving a cozy afternoon project, this one is a winner.
Melt and pour soap bases are pre-made, which means the saponification process (that whole lye-and-fat chemistry bit) has already been done for you. All you have to do is melt it down, add your goodies, and pour it into a mold. The result? A professional-looking, totally customizable bar of soap without the fuss.
Step 1: Cut the Base
Chop your melt and pour soap into small cubes. This helps it melt evenly and quickly.
Step 2: Melt Gently
Place cubes in a microwave-safe jug or double boiler. Heat in 20-30 second bursts, stirring between each until completely liquid. Avoid boiling.
Step 3: Customize Your Soap
Once melted, stir in your carrier oil, essential oils, and botanicals. Work quickly but gently—over-stirring creates bubbles.
Step 4: Pour Into Molds
Pour the liquid soap into your silicone molds. Spritz the tops with rubbing alcohol to pop bubbles and create a smooth finish.
Step 5: Let Set
Allow to cool and harden for at least 2 hours at room temperature (or pop in the fridge for a quicker set). Gently pop them out of the molds once solid.
| Mood | Blend Recipe |
| Relaxing Spa | 10 drops lavender, 5 drops cedarwood, 3 drops ylang ylang |
| Zesty Wakeup | 8 drops lemon, 6 drops peppermint, 4 drops rosemary |
| Skin Soothing | 10 drops chamomile, 6 drops frankincense |
| Autumn Comfort | 8 drops sweet orange, 4 drops cinnamon leaf, 2 drops clove |
Store your finished bars in a cool, dry place or wrap them in cling wrap to prevent sweating (glycerin bases tend to draw moisture from the air). Use within 3–6 months for best results.
Why is my soap sweating?
That’s just glycerin doing its job—pulling moisture from the air. Wrap in plastic wrap and store in a sealed container.
Can I use fresh fruit or juice?
Not recommended. Fresh ingredients can cause mold or spoilage. Stick to dried or powdered botanicals.
How do I color my soap naturally?
Try turmeric (yellow), spirulina (green), beetroot powder (pink), or cocoa powder (brown). Go light to avoid staining.
Once you try making melt and pour soap, there’s a good chance you’ll never go back to store-bought again. It’s fast, fun, and endlessly customizable. Best of all, you get to create something beautiful and useful with your own hands—whether it’s for self-care, gifting, or even starting a little soap side hustle.
So grab your jug, heat up that soap base, and let your creativity pour.
Want more melt and pour soap recipes? Try these: