• Home
  • Suggest A Craft
  • DIY Newsletter

Craft Gossip

The largest independent craft review site since 2007

  • About CraftGossip
  • Our Network
    • Bath & Body Crafts
    • Candle Making Ideas
    • Crochet Ideas
    • Cross Stitch
    • Edible Crafts
    • Felting Patterns
    • Glass Art
    • Home & Garden Ideas
    • Indie Crafts
    • Jewelry Making
    • Kids Crafts
    • Knitting Patterns
    • Lesson Plans
    • Needlework
    • Party Ideas
    • Polymer Clay
    • Quilting Ideas
    • Recycled Crafts
    • Scrapbooking
    • Sewing Patterns
    • Card Making
    • DIY Weddings
    • Not Craft Ideas
  • Giveaways
  • Roundups
  • Store
  • Search

Graduation Party Drinks

April 28, 2014 by Shellie Wilson

graduation-party-ideas

If you are planning a Graduation party or even a simple graduation dinner at home then these adorable drinks are sure to bring a smile to your face. The little graduation hat’s finish off the black and white straws. You could add these to plain bottles or even store-bought drinks for a fast themed idea. Graduation Drinks. 

These glass bottle drink holders are available in most discount stores, they are so versatile that they make a great addition to your party supplies cupboard.

Here are some other great ways to serve drinks.

Punch bowl – It’s a little 80’s but get’s the job done.

Inflatable Ice trough – If you are serving individual drinks this is great for keeping them cool

Drink Dispenser with tap – Allows you to make your own drink recipes

 Vintage Drink Dispenser – Decorative and saves the environment on the packaging.

Mason jars with straws – Great for on the go smoothies for school too.

Lighted Punch bowl – I have this exact same one and it is lot’s of fun, we use it for different occasions.
Read These Next

  • 33 Easter Themed Punch Needle Patterns For Spring
  • 25 DIY Crafts Made From Soda Bottles
«
»

Have you read?

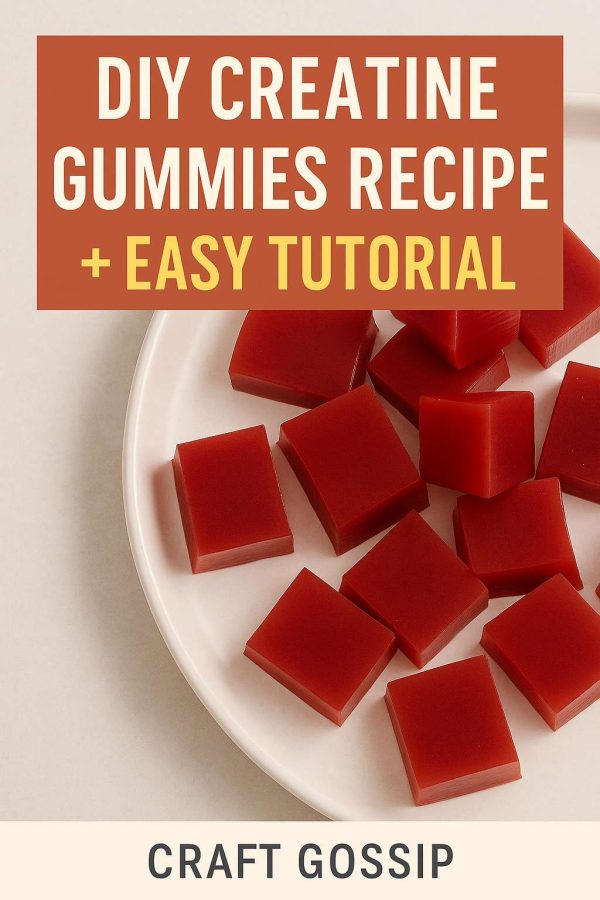
How to Make Creatine Gummies at Home – A Fun and Tasty DIY Recipe

Creatine has been a staple in the fitness world for decades, but let’s be honest—scooping white powder into water every morning isn’t exactly exciting. That’s where creatine gummies come in. These chewy, fruity bites turn a simple supplement into something you’ll actually look forward to taking. The best part? You can make them at home with just a few ingredients.

If you’ve ever made Jell-O or gummy bears, you’ve got all the skills you need. Below, I’ll walk you through why homemade creatine gummies are worth it, how to customize them, and a simple recipe that works every time.

Why Make Your Own Creatine Gummies?

Sure, you could buy a bottle of premade gummies—but DIY has some major perks:

  • Save money: Buying creatine powder in bulk is far cheaper than branded gummies.

  • Custom flavors: Mango, cherry, strawberry-kiwi—choose your favorite juices instead of being stuck with “mixed berry.”

  • Control your dosage: Perfect for tailoring to your fitness goals.

  • Cleaner ingredients: No mystery fillers, dyes, or artificial sweeteners unless you want them.

  • Fun to make: Honestly, it feels a bit like kitchen crafting.

Ingredients You’ll Need

Here’s the base recipe. Think of it as your “blank canvas”—you can play with flavors and sweeteners.

IngredientPurpose
1 cup fruit juice (orange, grape, apple, cherry, etc.)Flavor & liquid base
4 TBSP unflavored gelatin (or agar-agar for vegan version)Sets the gummies
1–2 TBSP honey, maple syrup, or stevia (optional)Sweetness
Creatine monohydrate powder (amount depends on your batch size & dosage needs)The muscle-boosting star
Silicone gummy molds (bears, squares, or any fun shape)Easy portioning

Step-by-Step Instructions

  1. Warm your juice
    Pour the fruit juice into a small saucepan and warm gently over low heat. Don’t let it boil—you just want it warm enough to dissolve gelatin.

  2. Add sweetener
    Stir in honey or another sweetener if you’d like a sweeter gummy.

  3. Sprinkle in gelatin
    Slowly sprinkle gelatin powder over the warm juice, whisking constantly until completely dissolved. (If using agar-agar, follow packet instructions, as it sets differently.)

  4. Cool slightly & add creatine
    Take the pan off the heat and let it sit for a minute or two. This is important—high heat can damage creatine. Stir in your creatine powder once the liquid is warm but not hot.

  5. Pour into molds
    Use a dropper or spoon to fill your silicone molds.

  6. Chill & set
    Place molds in the fridge for at least 2 hours, or until firm.

  7. Unmold & store
    Pop gummies out and store in an airtight container in the fridge. They’ll last up to 2 weeks.

How to Calculate Dosage

This is where DIY shines—you can control exactly how much creatine goes into each gummy.

Example:

  • You add 10 grams of creatine to your gummy mixture.

  • You fill 20 molds.

  • Each gummy = 0.5 grams creatine.

If your goal is 3–5 g per day, you’ll know exactly how many gummies to take.

Pro Tips for Perfect Gummies

  • Temperature is everything: Always add creatine after removing the liquid from heat.

  • No molds? No problem: Pour into a glass dish, refrigerate, then cut into squares.

  • Keep them cool: These gummies are best stored in the fridge to stay firm.

  • Vegan version: Swap gelatin for agar-agar, but expect a firmer, jelly-like texture.

  • Flavor combos to try:

    • Pineapple + lime

    • Strawberry + kiwi

    • Grape + blueberry

Frequently Asked Questions

Will creatine still work in gummies?
Yes! As long as you don’t add it to boiling liquid, creatine remains just as effective.

Can I travel with them?
Yes, but keep them cool. A small insulated container works great.

Do they taste chalky?
Not if you dissolve creatine properly. The juice masks any taste.

How many should I eat a day?
That depends on your dosage. Most people aim for 3–5 g daily. Adjust based on how you portioned your gummies.

Why You’ll Love These

Making your own creatine gummies takes less than 20 minutes of hands-on time, and the reward is a jar of chewy, fruity supplements that feel more like a treat than a chore. They’re customizable, cost-effective, and a clever way to stay consistent with your routine.

If you’ve been skipping your daily creatine because you hate mixing powder, this DIY recipe might be the nudge you need to stay on track.


RSS More Articles

  • Free Crochet Pattern – Dot Baby Blanket
  • How to Make Creatine Gummies at Home – A Fun and Tasty DIY Recipe
  • 19 FREE Disney Princess Back to School Coloring Pages
  • How to Make Handmade Pottery Ceramic Wind Chimes
  • My Honest Take on Sewing the Nina Jumpsuit from Creativebug
  • 12 Road Trip Travel Scrapbook Layout Ideas
  • Use LEGOs to Build Landmarks from Around the World
  • Get Your Fruits by Knitting the Fruit Salad Vest
  • Why Do Your Kids Play with the Box? An Interview with Child Psychologist Dr. Lucy Harper
  • Ottomania- Free Crochet Pattern

Pick Your Blog

  • Sewing
  • Knitting
  • Quilting
  • Crochet
  • Home & Garden
  • Recycled Crafts
  • Scrapbooking
  • Card Making
  • Polymer Clay
  • Cross-Stitch
  • Edible Crafts
  • Felting
  • Glass Art
  • Indie Crafts
  • Kids Crafts
  • Jewelry Making
  • Lesson Plans
  • Needlework
  • Bath & Body
  • Party Ideas
  • Candle Making
  • DIY Weddings
  • Not Craft
  • Free Craft Projects

Copyright © 2025 · CraftGossip | Start Here | Contact Us | Link to Us | Your Editors | Privacy and affiliate policy