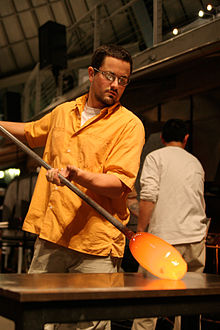
 I’ve been playing with glass blowing lately…mostly with borosilicate glass. I keep getting requests at my studio for classes so I figured I’d better get good at it. I’ve dabbled and played but now I’m actually studying. Don’t I have enough glass techniques to know about? (not really, you can’t get enough glass, can you?) So I thought I’d explore glass blowing here too. A good start is with Wikipedia and traditional glass blowing. I’ve tried that too but don’t have quite the interest since so much equipment is required. Won’t rule it out completely but one thing at a time. Wikipedia does give a bit of information regarding blowing and they always have suggestions for further reading. You Tube is also a fabulous source of information on blowing. Both boro, lots of boro, and off hand. Take your pick. And it’s so much fun to watch!
Have you read?
Fun Owl Crafts for Kids of All Ages
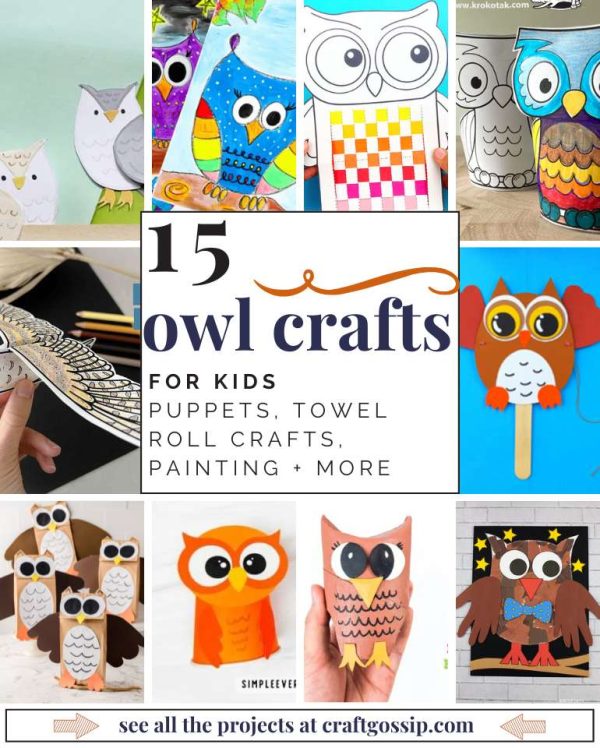 Owls are around all the time, of course, but they feel like a fall animal to me. Maybe that’s because of their association with witches and Halloween, but owls don’t have to be scary, as this cute collection of owl crafts shows.
First you can learn how to draw a simple owl and decorate it with this tutorial from Arty Crafty Kids.
Use different shapes to make an owl with this printable shape owl craft from Kids Craft Room, or see if you can make one with tanagram blocks in the classroom or at home.
Play with paint to make this fun paint splat owl from Glued to My Crafts. It’s like the classic butterfly painting craft with a twist.
Print and color a super cute standing owl with this printable from Krokotak. This one doesn’t use a paper towel roll but it reminds me of cardboard roll owls like the one from Mom Hacks 101 (I also did one where I just drew on the roll to make an owl that you can find on my blog). The Mom Hacks one has a cute twist in that the way the roll is cut allows the owl to perch on your wrist.
While we’re on the subject of upcycling materials to make owls, you can also make an owl from a paper cup, with this printable template from Simple Everyday Mom. Or make a paper bag owl like this one from Kids Activity Zone.
Get hands on (LOL) with your owl crafts with this torn paper owl from Non Toy Gifts, which uses handprints as the wings. So cute!
Preschoolers love crowns and headbands, so why not make owl headbands for everyone with this printable form Simple Everyday Mom.
This flapping owl puppet from My Pre K Box is easy to make with a (looks like it’s free when you enter your email) printable, and involves lots of cutting and gluing to work on those fine motor skills. You can also make an owl with moving eyes with this tutorial from Arty Crafty Kids.
Speaking of fine motor skills, you can use an owl craft to practice weaving paper. This printable from Easy Peasy and Fun makes a cute owl with a woven belly that’s so fun to make!
Older kids will enjoy making these pretty owl corner bookmarks from Easy Crafts for Kids. I also love this 3D owl coloring page from Draw Calm, which would be super fun to make and see if you can make it fly.
4 Owl Coloring Pages [Card Making]