• Home
  • Suggest A DIY
  • DIY Newsletter

Craft Gossip

Independent craft blog since 2007

  • About CraftGossip
  • Our Network
    • Bath & Body Crafts
    • Candle Making Ideas
    • Crochet Ideas
    • Cross Stitch
    • Edible Crafts
    • Felting Patterns
    • Glass Art
    • Home & Garden Ideas
    • Indie Crafts
    • Jewelry Making
    • Kids Crafts
    • Knitting Patterns
    • Lesson Plans
    • Needlework
    • Party Ideas
    • Polymer Clay
    • Quilting Ideas
    • Recycled Crafts
    • Scrapbooking
    • Sewing Patterns
    • Card Making
    • DIY Weddings
    • Not Craft Ideas
  • Giveaways
  • Roundups
  • Store
  • Search

Giveaway: Source Soda Maker and Pop Vintage Icecream Soda Roundup

May 21, 2014 by Shellie Wilson

vintage-icecream-soda-party-ideas-float

Maybe it’s my old age setting in but I love VINTAGE things. I have been collecting this roundup of Vintage icecream soda parties for some time but never getting around to actually post it. But it gets even better because with old age comes patience and with patience came the opportunity to give away this amazing Source Soda Maker and thus I had the perfect reason to share with you this roundup.

(scroll down to the bottom for your chance to win the Source Soda Maker )

Here are some of my favorite links and party ideas. I have to say the vintage icecream van is my favorite but I don’t have one laying around so will probably have to settle for something a little smaller like this. 

Retro-Milkshake-Bar-Unique-Wedding-Ideas-13-600x400

Rockabilly Milkshake bar

YUM Icream party

Vintage icecream van and Cone Cake

Coke-Blog-3

Coke Float Party

Icecream party with a twist

 7092485005_3c422cebb9_k copy

Soda Shop Party

Dads Diner

 Soda Pop Costume

50’s Diner

50s-diner-party

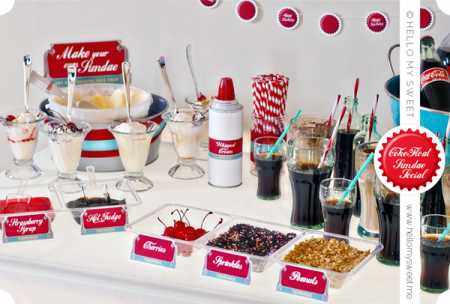
 Printable Vintage Soda Labels for Decoration.

Vintage Hot Dog Machine – You will need something savory.

Cusineart Soft Serve Machine – You need icecream to go with that soda!

Vintage Retro Images – Adorable images you can use for decorations or invitations.

soda-maker

——- WIN ——

For your chance to win the Source Soda Maker comment below and tell us what your favorite Icecream Soda memory is: 

(Please note this prize can not be shipped with the gas/soda cylinder you will need to purchase that from your local stockist before you can use this machine. Cylinder is valued at $20).

Entries are for US residents only and competition closes on the 1st of June. 


LYNNP- You have been selected as the winner. Please email us with your postal address by the 20th of June to claim your prize.

Read These Next

  • DIY CoComelon Party Decorations: Easy Handmade…
  • A Simple WordPress Plugin For Updating Old Etsy…
«
»

Have you read?

How to Wet Felt Using Recycled Wool Scarves

There’s something magical about breathing new life into old wool scarves. Maybe it’s that soft merino one with a tiny moth hole, or a thrift-store find that’s just a bit too itchy to wear — either way, they’re perfect for felting.

If you’ve ever wanted to try wet felting but thought you needed fancy equipment or piles of wool roving, think again. You can create stunning felted textures, accessories, and even art pieces using nothing more than recycled wool scarves, warm water, and a little soap.

This is real felting — hands-on, creative, and beautifully imperfect — and it’s one of the best ways to upcycle something you already have.

Why Use Recycled Wool Scarves for Felting?

Recycled wool scarves are already halfway felted — they’re woven or knitted, made of natural fibers, and soft enough to shrink and fuse under warm water and friction. That makes them ideal for beginners who want to experiment with texture and transformation without investing in new materials.

Bonus: Every scarf tells a story. Maybe it was your grandmother’s, or a flea-market treasure — when you felt it, you’re not just crafting; you’re preserving something in a new form.

What You’ll Need

You probably already have everything you need at home:

  • A 100% wool scarf (check the label — avoid acrylic or polyester blends) 
  • Warm water (not boiling) 
  • A bar of mild soap or dishwashing liquid 
  • Bubble wrap or a bamboo mat (a clean towel works too) 
  • Plastic bag or cling wrap (for rolling) 
  • Old towel (for drying and cleanup) 

Optional: bits of wool roving or yarn scraps if you want to add decorative layers.

Preparing Your Scarf

Before felting, wash your scarf gently in warm water to remove any oils or finishes that might prevent felting. Don’t use fabric softener — it actually stops the fibers from bonding.

If you want a more dramatic transformation, cut your scarf into panels or smaller sections. Thinner wool scarves will felt faster than chunky ones.

Step-by-Step: How to Felt Your Scarf by Hand

1. Set Up Your Workspace

Lay down a towel to protect your surface. Place bubble wrap (bubble side up) or a bamboo mat on top.

2. Wet the Wool

Lay your scarf flat and sprinkle or spray warm, soapy water over it. You want it damp but not dripping.

3. Add Friction

Using your hands, gently rub the surface in small circular motions. You’ll feel the fibers start to tighten. If you’re using a woven scarf, you might see the weave pattern soften and blur — that’s felting magic happening.

Tip: For more even results, roll your scarf inside the bubble wrap or towel, then roll it back and forth 50–100 times, unrolling and rotating it every few minutes.

4. Check the Progress

Unroll your scarf and inspect the texture. You’re looking for shrinkage, soft edges, and a slight fuzziness. If you want more firmness, continue rolling and rubbing.

Each scarf behaves differently depending on the wool type and weave — part of the fun is seeing how it evolves.

5. Rinse and Dry

Once you’re happy with the texture, rinse your felted scarf in cool water until the soap is gone. Press (don’t wring) to remove excess water, then roll it in a towel and lay flat to dry.

Creative Ways to Transform Your Felted Scarf

Once your scarf has been felted, the possibilities are endless. Here are some favorite ways to give it a second life:

  • Cut into felt sheets for crafting – perfect for ornaments, appliqué, or small purses. 
  • Sew into a cozy clutch or zippered pouch. 
  • Turn into wrist cuffs or bookmarks by cutting narrow strips. 
  • Add embroidery or needle-felted designs to the newly textured surface. 
  • Create a wall hanging by layering felted panels together. 

Each piece has its own texture and color pattern, so no two scarves ever felt the same way twice.

Troubleshooting Common Issues

Scarf not felting enough?
Some “wool” scarves are treated to resist shrinkage. Try using hotter water and rougher friction (rub between bubble wrap or against a bamboo mat).

Shrunk too much?
That’s normal! Turn it into something smaller — a patch, coaster, or felted bracelet.

Uneven texture?
Fold your scarf in half, re-wet, and roll again to even out the fibers.

Remember: imperfections add charm. A slightly uneven finish looks beautifully organic.

Why This Project Is Perfect for Beginners

  • No expensive supplies needed. 
  • Uses recycled materials (great for eco-conscious crafters). 
  • Hands-on and meditative — you feel the wool change under your fingers. 
  • Every result is unique — your scarf becomes art, not just fabric. 

This is slow crafting at its best — mindful, sustainable, and creative.

Bonus: Layering for Artistic Texture

If you want to take things up a notch, try laminating pieces of wool roving, silk fibers, or yarn onto your scarf before felting. As the fibers shrink together, they bond permanently — giving a painterly, nuno-felted texture without needing a silk base.

Use thin layers for delicate effects or thicker patches for bold contrast.

Wrap Up

Wet felting with recycled wool scarves is the perfect mix of art and sustainability. You’re reducing waste, saving money, and learning the fundamentals of felting — all while creating something gorgeous and deeply personal.

So next time you find an old wool scarf hiding in your winter drawer, don’t toss it — felt it. With warm water, soap, and a little patience, you’ll turn it into something even better than before.


RSS More Articles

  • Sewing Pattern Saturday – Wide Leg Jumpsuit PDF Sewing Pattern Review
  • Plan This Fun Lego Challenge for a Group of Kids or Just One
  • 10 DIY 4th of July Wreaths To Dress Up Your Front Door
  • Patriotic USA Letters – Free Crochet Pattern
  • How to Make Keto Granola Bars (Low Carb, No Sugar and Actually Delicious)
  • How to add Detailed Stitching to Your Handmade Cards
  • Designer Spotlight: Unique Stitch Crafts
  • Free Dotted Lines Embroidery Pattern Review
  • Peyote Stitch Pendants And Necklaces: 10 Seed Bead Jewelry Projects To Make
  • Choose Your Own Brioche Knitting Adventure with this Shawl Knitting Pattern

Pick Your Blog

  • Sewing
  • Knitting
  • Quilting
  • Crochet
  • Home & Garden
  • Recycled Crafts
  • Scrapbooking
  • Card Making
  • Polymer Clay
  • Cross-Stitch
  • Edible Crafts
  • Felting
  • Glass Art
  • Indie Crafts
  • Kids Crafts
  • Jewelry Making
  • Lesson Plans
  • Needlework
  • Bath & Body
  • Party Ideas
  • Candle Making
  • DIY Weddings
  • Not Craft
  • Free Craft Projects

Copyright © 2026 · CraftGossip | Start Here | Contact Us | Link to Us | Your Editors | Privacy and affiliate policy