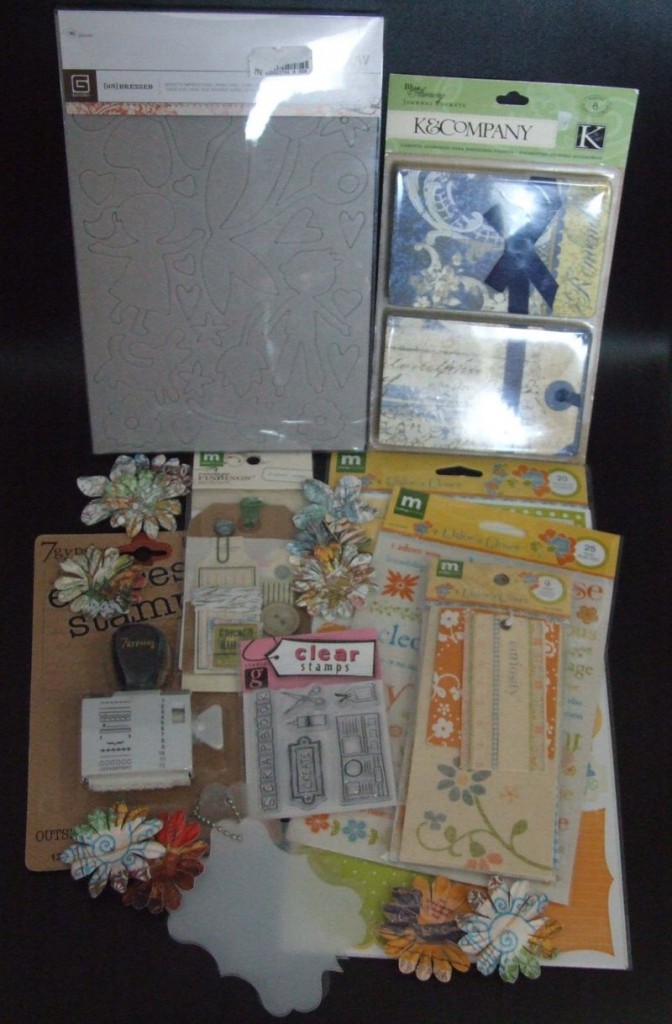
My sister Vernell and I are relaunching our Sister Scrap blog. We started the blog last year as a way for us to scrap “together” since we live on different sides of the Atlantic, me in France and she in the US. As part of our relaunch we are offering up the prize package shown above (plus Vernell will no doubt add more stuff this week!) The giveaway is open until this Friday, the 11th. To enter click the link below to leave a comment on the Sister Scrap blog.
Have you read?
Chain Piecing Stack-N-Whack Blocks: The Ultimate Time-Saving Guide
The first time I made a Stack-N-Whack quilt, I spent more time threading my needle than actually sewing. By block four, I was ready to turn my kaleidoscope dreams into a pile of kindling.
Then I discovered chain piecing—the quilter’s equivalent of finding a $20 bill in last winter’s coat pocket. Suddenly, what took hours now took minutes, and my blocks went from “hot mess” to “hot dang!”
In this guide, you’ll learn:
Exactly how to chain piece Stack-N-Whack blocks (with photos)
3 genius tweaks to prevent mismatched points
The tool that cuts pressing time in half
How to fix mistakes without unraveling your sanity
Why Chain Piecing is a Stack-N-Whack Game-Changer
The Problem With Traditional Piecing
- Wastes time: Threading/rethreading for each unit
- Creates bulk: Thread nests at every start/stop
- Invites errors: More handling = more mismatched seams
The Chain Piecing Advantage
- 75% faster (I timed it: 48 HSTs in 18 minutes vs. 1+ hour)
- Consistent seams (no adjusting tension between units)
- Less thread waste (good for your wallet and the planet)
Step-by-Step: How to Chain Piece Stack-N-Whack Blocks
What You’ll Need:
- Stacked & cut fabric units (the more identical, the better)
- 50wt cotton thread (thinner = less bulk)
- Seam guide (magnetic or adhesive)
- Leader/ender scraps (paper or fabric)
The Process:
- Arrange Units in Assembly-Line Order
- Lay out pairs in sewing order (Photo A)
- Clip together with Wonder Clips (pins distort stacked layers)
- Start With a “Leader”
- Sew onto a scrap first (prevents thread nests)
- Chain Like a Pro
- Sew unit #1 ? don’t lift foot ? feed unit #2 immediately
- Let threads connect units like a train (Photo B)
- Press Smart
- Use a tailor’s clapper to set seams fast
- Press all units in one go (no back-and-forth)
- Clip Apart Later
- Snip chains while watching TV (my “quilty meditation”)
3 Pro Tricks for Flawless Chain Piecing
1. The “No-Twist” Feed Trick
- Stack units right sides together in a shoebox lid
- Grab from the top ? sew ? drop finished unit in another box
Why it works: Eliminates accidental fabric flips.
2. Tension Tweaks for Thick Stacks
- Increase presser foot pressure slightly
- Use a microtex needle (size 70/10)
Test first: Sew two stacked units ? check seam for puckering.
3. The “Oops” Recovery Move
Mismatched points? Don’t unpick!
- Add a contrasting stitch line to create intentional “wonk”
- Embrace it as modern improv
Common Questions (From One Impatient Quilter to Another)
Q: Won’t chain piecing stretch my bias edges?
A: Not if you:
- Starch fabric before cutting
- Use a walking foot (even for piecing)
Q: How do I keep track of unit order?
A: Try my “Deli Ticket” system:
- Number units with sticky notes
- Pin corresponding numbers to design wall
Q: Can I chain piece curved Stack-N-Whack blocks?
A: Yes! But:
- Use more pins than usual
- Sew with the concave side up
My Favorite Chain-Piecing Tools
Tool | Why It’s Magic |
Magnetic seam guide | Perfect 1/4″ seams without tape |
Thread stand | Prevents thread twisting |
Clapper | Sets seams in half the time |
Thread nippers | Faster than scissors for clipping |
Your Turn!
What’s your chain-piecing nemesis? (I still sometimes forget the leader scrap and get those cursed thread nests…)
10 Free Stack-N-Whack Quilt Patterns
Speed Piecing Stack-N-Whack Blocks: 3 Time-Saving Hacks for Impatient Quilters