• Home
  • Suggest A Craft
  • DIY Newsletter

Craft Gossip

The largest independent craft review site since 2007

  • About CraftGossip
  • Our Network
    • Bath & Body Crafts
    • Candle Making Ideas
    • Crochet Ideas
    • Cross Stitch
    • Edible Crafts
    • Felting Patterns
    • Glass Art
    • Home & Garden Ideas
    • Indie Crafts
    • Jewelry Making
    • Kids Crafts
    • Knitting Patterns
    • Lesson Plans
    • Needlework
    • Party Ideas
    • Polymer Clay
    • Quilting Ideas
    • Recycled Crafts
    • Scrapbooking
    • Sewing Patterns
    • Card Making
    • DIY Weddings
    • Not Craft Ideas
  • Giveaways
  • Roundups
  • Store
  • Search

DIY Stamped Shrinky Dink Rainbow Bag Charm

February 27, 2025 by Heather Holbrook

DIY Stamped Shrinky Dink Rainbow Bag Charm

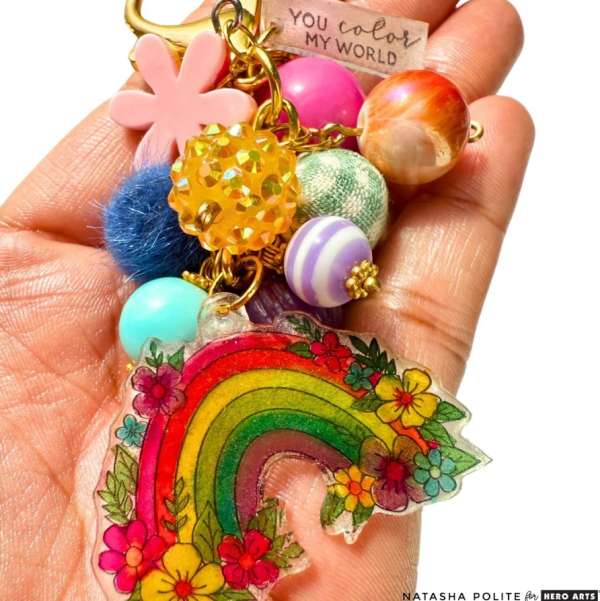
Did you play with Shrinky Dinks as a kid? I did and I love them! Well, now you can play with them as an adult and create projects for yourself like this darling dangling bag charm. Shrink plastic sheets come in different colors like black, white and clear that you can stamp and color on!

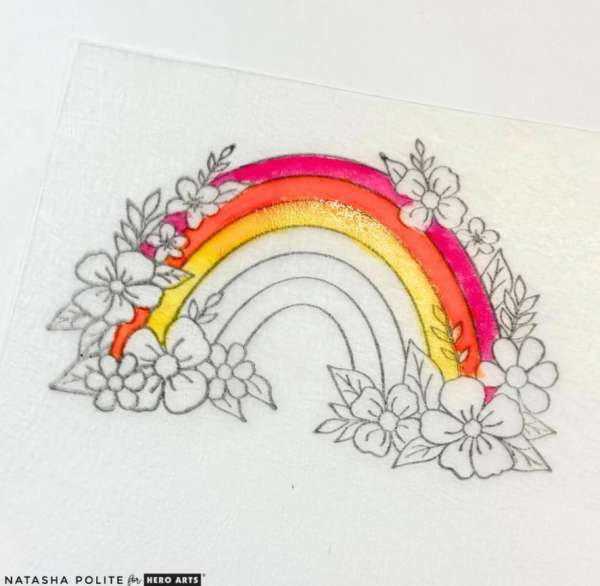
For the bag charm Natsha used a wooden stamp of a rainbow and flowers, stamping it in Intense Black Ink on clear shrink plastic. She used liquid watercolor to color the image in, punched a hole at the top and cut the image out.

DIY Stamped Shrinky Dink Rainbow Bag Charm

She then used her heat embossing gun to shrink the plastic, you can also use an oven like the old days but carefully follow instructions for safety and health details. Once the charm was done she added a jump ring and put it on a clip with a Shrinky Dink sentiment and lots of fun beads and other charms for a wonderful key ring or bag charm.

Find detailed directions at the Hero Arts blog.

-Heather

Read These Next

  • 10+ DIY Shrinky Dink Keychains
  • 50 Father's Day Crafts For Kids To Make
«
»

Have you read?

Add a Touch of Fall to Your Home with This DIY Autumn Leaf Garland

Looking for a creative and charming way to decorate your space for the fall season? This Autumn Origami Accordion-Folded Paper Leaf Garland is just what you need! It’s a simple and fun craft that adds a cozy, festive vibe to any room. With just a few basic supplies like colorful paper and a little folding technique, you can create stunning paper leaves that perfectly capture the essence of autumn.

Whether you’re looking to spruce up your mantel, add some seasonal flair to your windows, or create a beautiful centerpiece for your dining table, this garland is the ideal DIY project for embracing all things fall. 🍁🍂

Get started on your own autumn leaf garland today!
Find the full tutorial here!

Simple fall leaf twinkle light garland
16 DIY Home Decorations Using Pine Cones


RSS More Articles

  • Add a Touch of Fall to Your Home with This DIY Autumn Leaf Garland
  • Quick Tip: How to Keep Cross Stitch Fabric from Fraying
  • Cute Donut Monkey Crochet Kit
  • FREE Beautiful Mermaid Digital Stamp Download
  • Making Popsicle Stick Playing Cards – Surprisingly Fun and Totally Charming!
  • Book Review: Sewing Made Simple: Craft Your Own Clothes with Confidence
  • 12 Scrapbook Layouts with Lots of Layers
  • Cat Themed Learning Activities
  • The Panel Quilting Workshop: 12 Quick-and-Easy Quilting Ideas
  • DIY Beaded Garden Stakes

Pick Your Blog

  • Sewing
  • Knitting
  • Quilting
  • Crochet
  • Home & Garden
  • Recycled Crafts
  • Scrapbooking
  • Card Making
  • Polymer Clay
  • Cross-Stitch
  • Edible Crafts
  • Felting
  • Glass Art
  • Indie Crafts
  • Kids Crafts
  • Jewelry Making
  • Lesson Plans
  • Needlework
  • Bath & Body
  • Party Ideas
  • Candle Making
  • DIY Weddings
  • Not Craft
  • Free Craft Projects

Copyright © 2025 · CraftGossip | Start Here | Contact Us | Link to Us | Your Editors | Privacy and affiliate policy