
Donut walls always draw attention and seem special. But they can be expensive! Make your own for far less with a thrifted frame and a pegboard. Perfect for a dessert table for a wedding, bridal shower or other special day.
Independent craft blog since 2007
Donut walls always draw attention and seem special. But they can be expensive! Make your own for far less with a thrifted frame and a pegboard. Perfect for a dessert table for a wedding, bridal shower or other special day.
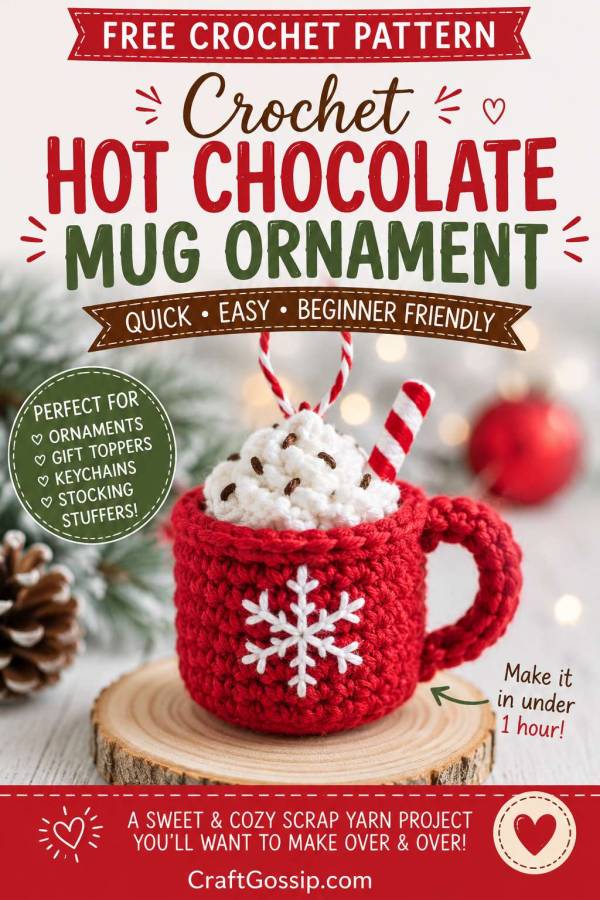
There is something ridiculously charming about tiny crochet Christmas projects, isn’t there? Maybe it’s because they use up those odd little yarn scraps we all pretend we’re going to organise one day, or maybe it’s because anything miniature instantly feels giftable. Either way, this little crochet hot chocolate mug ornament is exactly the sort of quick holiday project that earns its place in the “I’ll just make one more” basket.
This mini crochet mug is designed as a small Christmas ornament, but honestly, you can use it in so many ways. Hang it on the tree, tie it to a wrapped gift, add it to a hot cocoa basket, turn it into a keychain, or make a whole string of them for a festive coffee bar garland. I love projects like this because they feel special without requiring a full weekend, three coffees, and a silent prayer to the yarn gods.
If you enjoy quick seasonal makes, you might also like our roundup of Christmas holiday mug rug crochet patterns for pairing with a real cup of cocoa. And if handmade ornaments are your thing, this sweet little mug would sit nicely alongside other Christmas crochet decorations and gift toppers.
This is a beginner-friendly crochet Christmas ornament pattern using basic stitches, simple shaping, and a little bit of assembly. The whipped cream topping gives it that cosy hot chocolate look, and you can dress it up with a peppermint straw, tiny beads, mini buttons, or a drizzle of brown puff paint.
A small ball of worsted weight yarn is perfect for this project. If you are restocking your crochet basket, Mary Maxim is always worth checking for yarn and seasonal crochet supplies, and Amazon is handy for things like stuffing, tapestry needles, hooks, puff paint, and keychain hardware. For a more boutique look, Etsy can be a lovely place to find tiny Christmas embellishments, miniature candy-cane charms, and handmade stitch markers.
Approx. 2.25–2.75 inches tall, depending on yarn, hook size, and tension.
Beginner to confident beginner.
You should be comfortable with working in the round, single crochet, increasing, sewing small pieces together, and basic finishing.
Worsted weight yarn in:
You will also need:
This crochet mug is worked from the base upward in joined rounds. Join each round with a slip stitch into the first stitch, then chain 1 to begin the next round. The chain 1 does not count as a stitch.
Use a stitch marker if you tend to lose your first stitch. No shame there — tiny crochet pieces have a way of spinning around just when you’re feeling smug.
Do not overstuff the mug. You want it lightly filled so it holds its shape without bulging.
Using your mug colour yarn:
Rnd 1: Work 8 sc into a magic ring. Join with sl st to first sc. Ch 1.
Total: 8 sts
Rnd 2: Inc in each st around. Join. Ch 1.
Total: 16 sts
Rnd 3: Working in BLO, sc in each st around. Join. Ch 1.
Total: 16 sts
This BLO round creates the little edge that helps the mug sit with a nice base shape.
Rnd 4: Sc in next 3 sts, inc in next st, repeat from * to * around. Join. Ch 1.
Total: 20 sts
Rnd 5: Sc in each st around. Join. Ch 1.
Total: 20 sts
Rnd 6: Sc in next 9 sts, inc in next st, sc in next 9 sts, inc in last st. Join. Ch 1.
Total: 22 sts
Rnd 7: Sc in each st around. Join. Ch 1.
Total: 22 sts
Rnd 8: Sc in each st around. Join. Fasten off, leaving a tail for weaving in.
Total: 22 sts
Lightly stuff the mug. It should be firm enough to hold its cup shape, but not so firm that the stitches stretch.
Using the same mug colour:
Row 1: Ch 10.
Row 2: Sc in second ch from hook and in each ch across.
Total: 9 sc
Fasten off, leaving a long tail for sewing.
Curve the strip into a handle shape and sew one end near the upper side of the mug and the other end near the lower side. Keep it slightly rounded so it looks like a real little mug handle.
If you are making a batch of these for craft fairs or gift tags, you can carefully hot glue the handle in place instead of sewing it, but sewing is sturdier if the ornament will be handled a lot.
Using white or cream yarn:
Row 1: Ch 22.
Row 2: Work 3 hdc in the second ch from hook and 3 hdc in each ch across.
The strip will curl as you work, which is exactly what you want.
Fasten off, leaving a long tail.
Coil the curly strip into a whipped cream swirl. Use the yarn tail to stitch through the base of the swirl a few times so it holds together. Shape it until it is wide enough to cover the top opening of the mug.
Place the whipped cream on top of the lightly stuffed mug and sew it around the rim. You can also use a small amount of hot glue if you prefer a quicker finish.
For a chocolate drizzle look, use brown puff paint and add a few small lines over the whipped cream. Let it dry completely before hanging or packing.
You can also use a tiny length of brown yarn and stitch it loosely over the top if you prefer an all-yarn finish.
Cut a toothpick or paper straw to size. Wrap it with red-and-white washi tape or use a ready-made mini candy cane embellishment. Tuck it into the whipped cream and secure with a dab of hot glue.
This is such a small detail, but it really makes the ornament feel like a proper little Christmas hot cocoa mug.
Cut a length of ribbon, twine, or yarn about 6–8 inches long. Thread it through the top of the whipped cream or through the back rim of the mug. Tie securely.
For a keychain version, attach a small jump ring and keychain finding instead of a yarn loop. Amazon is handy for bulk keychain hardware if you’re making these for markets, classroom gifts, or stocking fillers.
You can keep your crochet mug simple, or make it as festive as you like. Try:
This is also a good scrap yarn project. Those odd leftovers from bigger crochet gifts suddenly become useful, which is always satisfying — especially when they’ve been rolling around the bottom of the yarn basket for months.
For more Christmas yarn inspiration, you can browse CraftGossip’s Crochet Christmas patterns or pair this ornament with a handmade gift using our quick crochet project ideas.
This little ornament is more versatile than it first looks. Use it as:
If you sell at holiday markets, these are the sort of small handmade crochet items shoppers love to pick up at the last minute. They feel thoughtful, festive, and affordable, and they are easy to display in a basket or clipped to a little tabletop tree.
If your mug is leaning, check that you didn’t overstuff it. Tiny crochet pieces only need a little filling.
If your handle looks floppy, sew through each end several times and shape it with your fingers.
If the whipped cream looks too tall, flatten the base of the swirl slightly before sewing it on.
If your cup looks too open at the top, add an extra round of single crochet before attaching the topping.
If your stitches look loose, go down a hook size. Or, if your ornament is coming out smaller than expected, go up a hook size or use slightly thicker yarn.
Small crochet ornaments are perfect for busy December crafting because they don’t require a huge yarn commitment. You can make one in an evening, tuck it into a gift basket, or make a dozen while watching Christmas movies.
This pattern also works well for beginners because the shaping is simple and forgiving. The whipped cream hides the top edge, the handle adds instant character, and the embellishments do most of the heavy lifting when it comes to charm.
And really, isn’t that the best kind of holiday crochet project? Quick, cute, useful, and just a little bit addictive.