• Home
  • Suggest A DIY
  • DIY Newsletter

Craft Gossip

Independent craft blog since 2007

  • About CraftGossip
  • Our Network
    • Bath & Body Crafts
    • Candle Making Ideas
    • Crochet Ideas
    • Cross Stitch
    • Edible Crafts
    • Felting Patterns
    • Glass Art
    • Home & Garden Ideas
    • Indie Crafts
    • Jewelry Making
    • Kids Crafts
    • Knitting Patterns
    • Lesson Plans
    • Needlework
    • Party Ideas
    • Polymer Clay
    • Quilting Ideas
    • Recycled Crafts
    • Scrapbooking
    • Sewing Patterns
    • Card Making
    • DIY Weddings
    • Not Craft Ideas
  • Giveaways
  • Roundups
  • Store
  • Search

DIY Bundt Cake Pan Pumpkin – Thrifted Fall Upcycle

October 5, 2025 by Shellie Wilson

If you’ve ever strolled through a thrift store, you’ve probably spotted a lonely bundt pan or two sitting on the shelf. Instead of baking a cake, why not turn one into a gorgeous rustic pumpkin for your fall décor? This upcycled Bundt Cake Pan Pumpkin adds instant autumn charm to your home, porch, or holiday table — and best of all, it costs just a few dollars to make.

This project has that handmade, farmhouse-style feel thanks to a textured paint finish and a topping of faux fall florals. It’s the perfect mix of thrifty and pretty.

Supplies You’ll Need:

  • 1 thrifted Bundt cake pan

  • Orange spray paint (matte or satin finish works best)

  • White school glue (like Elmer’s)

  • Ground cinnamon (or cinnamon mixed with pumpkin spice for extra scent/texture)

  • Brown paper bag or stick (for stem)

  • Faux fall leaves, flowers, or berries

  • Hot glue gun and glue sticks

  • Clear spray sealer (optional, for durability)

Instructions:

1. Prep Your Pan

Wash and dry the Bundt pan thoroughly. Remove any grease or rust spots so the paint adheres properly.

2. Spray Paint the Base

Take your pan outside or to a well-ventilated area. Spray it evenly with orange paint until fully covered. Allow to dry. Two coats may be needed for full coverage.

3. Add Rustic Texture

Mix white glue with a sprinkle of cinnamon. Dab or brush this mixture randomly over the pumpkin. While still tacky, sprinkle a little extra cinnamon on top for that “grubby,” rustic texture. Let dry completely.

(Tip: This not only looks aged and farmhouse-inspired, but it also smells amazing when you’re working on it.)

4. Make the Stem

Twist a strip of brown paper bag into a stem shape and hot glue it to the center opening of the Bundt pan. Alternatively, use a stick from the yard for a natural look.

5. Add Fall Florals

Arrange faux fall flowers, leaves, and berries around the stem. Secure with hot glue until you’re happy with the fullness. Think mums, sunflowers, orange leaves, and even sprigs of faux wheat for texture.

6. Seal (Optional)

If you plan to display your pumpkin outdoors or want it to last through multiple seasons, give it a light coat of clear spray sealer.

Display Ideas

  • Use it as a centerpiece with candles around it.

  • Place on your porch beside mums and real pumpkins.

  • Make a set in different pan sizes for a pumpkin patch effect.

This Bundt Cake Pan Pumpkin project is one of those DIYs that looks like it came from a boutique but costs thrift-store pennies. Every pumpkin turns out unique depending on your paint, texture, and flower choices.
 

«
»

Have you read?

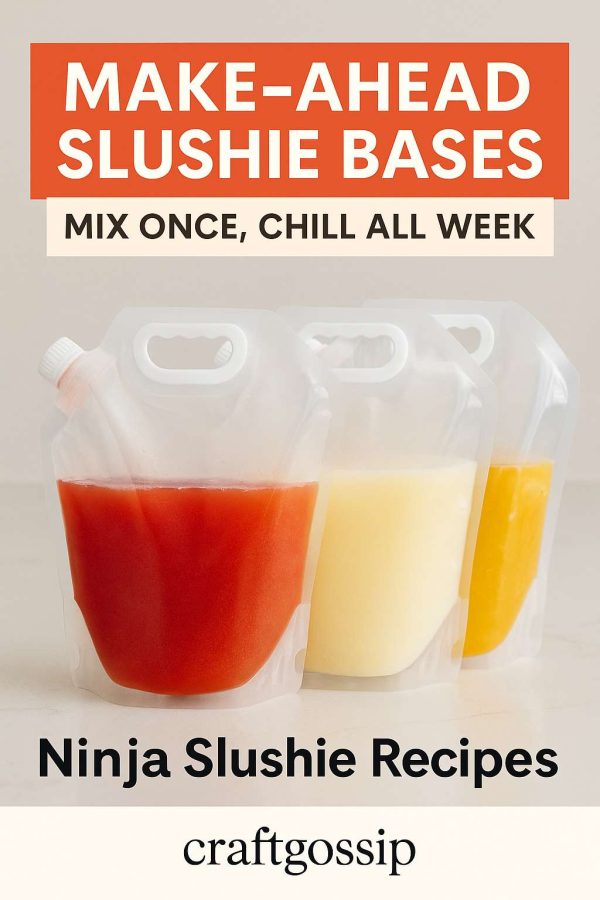
Make-Ahead Slushie Bases: Mix Once, Chill All Week

The easiest way to keep the whole family happy (without living at the kitchen bench)

There are weeks where everyone in the house suddenly becomes obsessed with slushies. The kids want after-school slushies. Your partner wants a “grown-up” slushie after dinner. You want a fruit slushie because it’s hot and you haven’t sat down in seven hours.

And somehow, despite having zero interest in making them, everyone assumes you will magically appear and whip up a fresh slushie every single time.

This is where make-ahead slushie bases save your sanity.

I have to give a shout out to my all time favorite slushie cup these Margarita double wall tumblers are perfect for all cocktail types. I was gifted a pair of these for Christmas and I am in Love and use mine every slushie mix! 

Instead of mixing a new drink every time someone wants one, you simply make a big batch of your favourite slushie base, store it chilled in the fridge, and pour it straight into the Ninja Slushie Maker whenever needed.

No measuring.
No mess.
No last-minute panic.
Just cold, delicious slushies all week long.

It’s honestly a life hack disguised as a recipe.

Why Make-Ahead Slushie Bases Work So Well

The Ninja Slushie Maker only needs one thing from you: cold liquid.
The colder it is, the thicker and smoother your slushie becomes.

So keeping a bag of slushie base in your fridge means you’re always 30 seconds away from something frosty and delicious.

Perfect for:

  • hot summer afternoons 
  • after-school snack time 
  • teenagers who “constantly need a drink” 
  • quick morning smoothie bowls 
  • evening mocktails or cocktails 
  • Christmas week chaos 
  • weekends when everyone is home and thirsty 

It’s the closest thing to having a slushie machine at the local cinema — except cleaner, cheaper, and right there in your kitchen.

How to Make a Slushie Base

(The simple mix-and-chill method)

Every slushie base follows this structure:

1 part strong flavour
1 part liquid base
sweetener to taste
flavour boosters if desired

Mix everything in a jug, give it a taste, chill it until cold, and you’re done.
The Ninja does the rest.

5 Make-Ahead Slushie Bases You Can Store All Week

These keep beautifully for 3–5 days in the fridge.
Just give them a gentle shake before pouring into the Ninja Slushie Maker.

1. Strawberry Lemonade Slushie Base

Sweet, refreshing, and kid-approved.

Ingredients

  • 2 cups strawberry juice or berry cordial 
  • 2 cups water 
  • Juice of 1 lemon 
  • 1–2 tablespoons sugar (optional) 

Flavor Booster

Add fresh basil after blending.

2. Mango Coconut Sunshine Base

Tastes like a holiday in a glass.

Ingredients

  • 2 cups mango nectar 
  • 1 cup coconut water 
  • 1 tablespoon lime juice 
  • Honey to taste 

Flavor Booster

Pinch of chilli for a surprising twist.

3. Apple Cinnamon Slushie Base

A cosy yet refreshing option — perfect for warm Christmas mornings.

Ingredients

  • 2 cups apple juice 
  • 1 cup cloudy apple cider (non-alcoholic or alcoholic) 
  • 1 teaspoon cinnamon syrup 
  • 1 teaspoon lemon juice 
  • Brown sugar (optional) 

Flavor Booster

Add a cinnamon stick to the jug overnight for extra warmth.

4. Creamy Vanilla Milkshake Slushie Base

For kids who want dessert without the ice cream.

Ingredients

  • 2 cups whole milk 
  • 1 cup half-and-half 
  • 2 tablespoons sugar 
  • 2 teaspoons vanilla 
  • Optional: 1 tablespoon vanilla pudding mix for thickness 

Flavor Booster

Crushed cookies added after slushing.

5. Fruit Punch Party Base

Perfect for gatherings or thirsty teens.

Ingredients

  • 1 cup tropical juice 
  • 1 cup cranberry juice 
  • 1 cup lemonade 
  • Squeeze of lime 
  • 1 tablespoon honey (optional) 

Flavor Booster

Fresh mint added after blending.

How to Store Your Slushie Bases

This makes life so much easier.

  • Use large glass jars or drink bottles 
  • Label each flavour (trust me, everything looks the same at 6pm) 
  • Keep them in the coldest part of your fridge 
  • Shake gently before using 
  • Use within 3–5 days for best freshness 

When You’re Ready for a Slushie

Just pour your cold base into the Ninja Slushie Maker, hit the button, and you’re done.

Cold + flavour + Ninja = perfect every time.

Extra Ninja Slushie Tips

Because once you get the hang of it, you’ll never stop experimenting.

  • Add fresh herbs only after blending 
  • Add citrus before blending for chilled brightness 
  • Don’t oversweeten — flavour dulls slightly when cold 
  • For kids, freeze fruit pieces and stir in after blending 
  • For adults, add your spirit after slushing so texture stays thick


RSS feed: More Articles More Articles

  • 10 Gingerbread Cross Stitch Patterns for a Handmade Christmas
  • 8 Christmas Activities for Babies and Infants That Support Development Through Play
  • Vintage Christmas Bell Crochet Pattern – A Festive Make for Holiday Kitchens and Handmade Gift Baskets
  • 10 Old Book Christmas Crafts For Vintage Holiday Decor
  • DIY Christmas Table Centrepieces That Look Expensive but Cost Less
  • From Amateur to Etsy-Worthy: Polymer Clay Tips That Change Everything
  • Clay Studio Series – YouTube Video Review DIY Pottery Christmas Tree Platte
  • Christmas Tree Crochet Scarf – A Fun and Festive Pattern Worth Revisiting
  • Paper Snowflake Art Book Review: 100 Patterns for a Nostalgic Paper Craf
  • 20 Infant Lesson Plan Ideas for Birth to 12 Months

Pick Your Blog

  • Sewing
  • Knitting
  • Quilting
  • Crochet
  • Home & Garden
  • Recycled Crafts
  • Scrapbooking
  • Card Making
  • Polymer Clay
  • Cross-Stitch
  • Edible Crafts
  • Felting
  • Glass Art
  • Indie Crafts
  • Kids Crafts
  • Jewelry Making
  • Lesson Plans
  • Needlework
  • Bath & Body
  • Party Ideas
  • Candle Making
  • DIY Weddings
  • Not Craft
  • Free Craft Projects

Copyright © 2026 · CraftGossip | Start Here | Contact Us | Link to Us | Your Editors | Privacy and affiliate policy