• Home
  • Suggest A DIY
  • DIY Newsletter

Craft Gossip

Independent craft blog since 2007

  • About CraftGossip
  • Our Network
    • Bath & Body Crafts
    • Candle Making Ideas
    • Crochet Ideas
    • Cross Stitch
    • Edible Crafts
    • Felting Patterns
    • Glass Art
    • Home & Garden Ideas
    • Indie Crafts
    • Jewelry Making
    • Kids Crafts
    • Knitting Patterns
    • Lesson Plans
    • Needlework
    • Party Ideas
    • Polymer Clay
    • Quilting Ideas
    • Recycled Crafts
    • Scrapbooking
    • Sewing Patterns
    • Card Making
    • DIY Weddings
    • Not Craft Ideas
  • Giveaways
  • Roundups
  • Store
  • Search

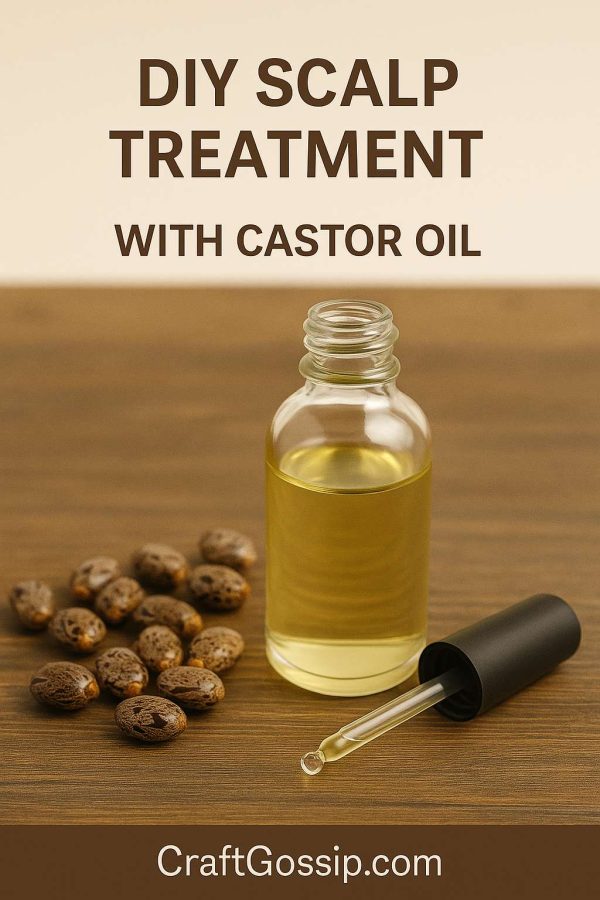
Castor Oil Scalp Treatment for Dryness and Hair Growth

January 7, 2026 by Shellie Wilson

Dry, itchy, flaky scalp. Sound familiar? Mine flared up every change of season—or after stress (aka teenage exam weeks)—and I’d tried all sorts of store-bought “miracles” that left me smelling like menthol and still scratching my head.

Then I gave castor oil a chance. It’s thick, yes—but it’s also deeply hydrating, soothing, and packed with nutrients your scalp actually needs. When you combine it with lighter oils to help it sink in, you’ve got a salon-style scalp rescue for the price of a takeaway coffee.

This is the treatment I use on quiet Sundays while pottering around the house with a messy bun and a podcast playing. My scalp always thanks me.

What You’ll Need:

  • 2 tbsp castor oil

  • 1 tbsp jojoba oil or sweet almond oil (to help spread the castor oil)

  • 3 drops tea tree or rosemary essential oil (optional, for scalp support)

  • Dropper bottle or small dish for mixing

Instructions:

  1. Mix all ingredients in a small bowl or bottle.

  2. Warm the oil blend slightly (10 seconds in microwave or rub bottle between your hands).

  3. Part your hair in sections and use a dropper or fingertips to apply directly to the scalp.

  4. Massage in small circular motions for 5 minutes—this increases circulation and relaxes tension.

  5. Leave on for at least 30 minutes (or overnight under a towel or shower cap).

  6. Rinse out with warm water and double shampoo. Condition if needed.

How Often:

  • Once a week for dry scalp or growth goals

  • Twice a month for maintenance

Benefits:

  • Moisturizes: The rich fatty acids in castor oil soothe dry, itchy patches.

  • Stimulates: Massaging with rosemary oil boosts circulation to the scalp.

  • Balances: Jojoba mimics your scalp’s natural sebum, helping restore balance.

Bonus Mum Tip:

Got teens with dry scalps from too much dry shampoo? This is gentle enough for them too—just test first and use minimal essential oils.
 

«
»

Have you read?

Cross Stitch on Anything with Waste Canvas

Long ago when I was in 4-H, the club made a quilt for our leader when she was having a baby. It was made of green and white blocks and some of the white blocks had four-leaf clovers cross stitched on them. 

That’s the one and only time I remember using waste canvas to cross stitch on fabric, but I think about it a lot when I consider stitching on other fabrics that don’t have built in blocks. 

Using waste canvas allows you to superimpose a grid onto fabric so you can follow a cross stitch pattern and stitch on the fabric, then remove the waste fabric, leaving just the original fabric and the stitching behind. 

It’s relatively easy to use, but it’s great to have a tutorial and some tips to work from the first time you do it. I think we were just winging it honestly but it turned out fine in the end. 

There’s a great post with lots of photos over at Koekoek that shows you how to set yourself up for waste canvas stitching success, how to actually do the stitching and how to remove the waste canvas. They call that part fun but I don’t agree as far as I can remember. I think the tediousness of pulling out the waste canvas threads is a big part of what has kept me from getting more and using it in different projects. 

I’d love to add a bit of cross stitch to some clothing, or to a piece of fabric to then sew into a pillow or another project. (They show a pillow in the blog post, but you could also do this to make cloth napkins, a tablecloth or any number of other projects.) Maybe reading all about it will motivate me to give it another try!

Have you ever worked with waste canvas? I’d love to know how it went. 

[Photo: Koekoek]

RSS feed: More Articles More Articles

  • Fine Motor Task Cards for Kids
  • How to Make a Light Up Halloween Card
  • Designer Spotlight: Cross Stitch with Art
  • Free Foliage Embroidery Pattern Review
  • Easy Knit Baskets to Use All Your Stash
  • How to Make a Simple Fall Accordion Mini Album
  • Pumpkin Spice Hand Balm for Dry, Overwashed Hands
  • Learning about Ghana for Kids
  • Thrifted Quilt Ghost Decorations for Halloween
  • Garage Door Halloween Decorations

Pick Your Blog

  • Sewing
  • Knitting
  • Quilting
  • Crochet
  • Home & Garden
  • Recycled Crafts
  • Scrapbooking
  • Card Making
  • Polymer Clay
  • Cross-Stitch
  • Edible Crafts
  • Felting
  • Glass Art
  • Indie Crafts
  • Kids Crafts
  • Jewelry Making
  • Lesson Plans
  • Needlework
  • Bath & Body
  • Party Ideas
  • Candle Making
  • DIY Weddings
  • Not Craft
  • Free Craft Projects

Copyright © 2026 · CraftGossip | Start Here | Contact Us | Link to Us | Your Editors | Privacy and affiliate policy