 They call it the “Biggest Consumer Bead Show in the World!” That’s a pretty bold statement. It’s The Bead & Button Show! But from what I understand it is. There are classes and demos and beads galore. It’s coming up in Milwaukee, WI and runs from June 1 – 10. The marketplace is June 8-10. Before that is all of the classes. What do you want to learn about? What do you want to buy? I think that if it has anything to do with beads you can buy it or learn how to do it during this 10 days of bead excitement. Go to the web site to see what’s up…there are so many posibilities!
Have you read?
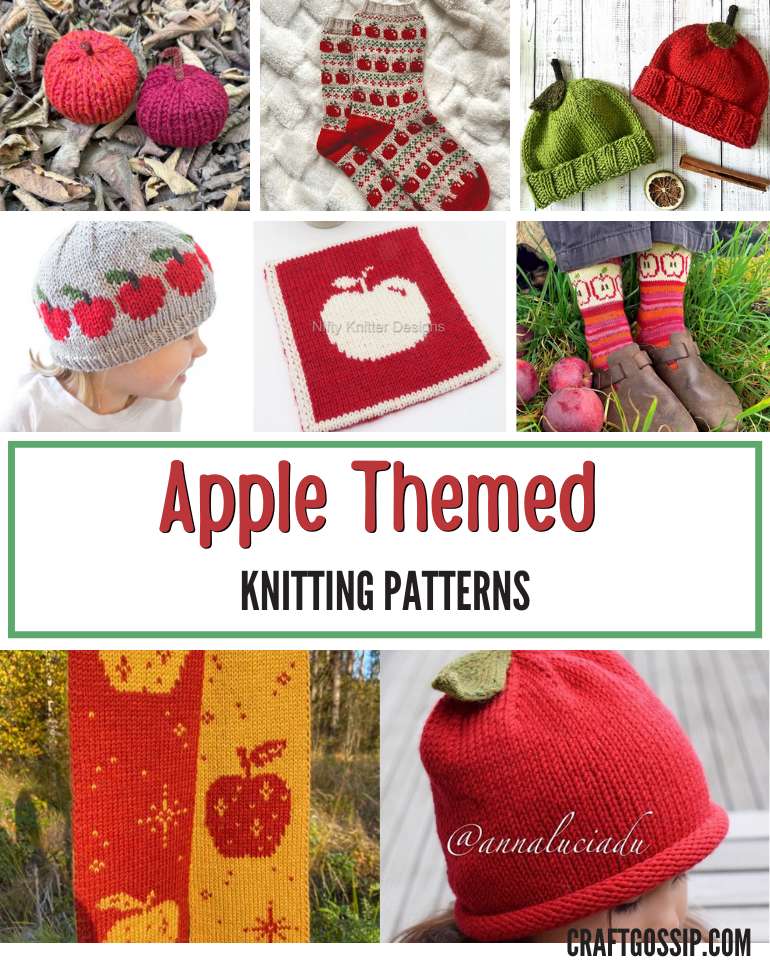
Apple Knitting Patterns for Fall and Back to School
 It feels like it’s too early to be thinking about back to school, but as I write this my daughter has just a couple of weeks of summer left! So let’s get in that school and fall knitting spirit by looking at some apple knitting projects.
If you have a 22 needle circular knitting machine, knitting an apple is one of the easiest things you can do. I have an apple pattern over at Our Daily Craft that will take you just a few minutes to knit and they’re a great addition to your fall decor.
Apple hats are a classic, and whether you want to knit a hat that looks like an apple or one with apples on it, we’ve got you covered. For hats that look like apples check out the rolled brim version from Emma Crochet Design 4 U, which uses worsted weight yarn and comes in sizes for kids of all ages; and the ribbed brim version from Hand Knit Hugs. This one also calls for worsted weight yarn and comes in four kids sizes. Both include a stem and leaf.
If you’d rather have apples on your hat, try the Red Apple Hat from Little Red Window. This one is sized from newborn to 2T and calls for four colors of worsted weight yarn.
How about apple socks? You’ll find Ariel Chang’s Apple Picnic Socks as a free download on Ravelry. These use three colors of sock yarn and come in three sizes. Stone Knits also a pair of stripey apple socks that show the inside of the apple. These also have three sizes but they use six colors total, with the main color being a self-striping yarn.
If you want a little apple accessory for the house, the apple potholder from Nifty Knitter Designs is cute and a great way to practice double knitting. It uses two colors and you’ll find the colors in the reverse on the other side. The pattern only uses about 50 yards of each color of worsted weight yarn, so it’s a great use for odd balls, too.
Once you’ve got your double knitting skills sorted you can also try the double knit apple scarf from Crow and Chai Shop. The Winter Apples scarf is shown in red and gold, but you can use whatever colors you like. There are apples, stars and random stitches in the design, which calls for DK weight yarn. There’s also a matching fingerless glove pattern.