• Home
  • Suggest A DIY
  • DIY Newsletter

Craft Gossip

Independent craft blog since 2007

  • About CraftGossip
  • Our Network
    • Bath & Body Crafts
    • Candle Making Ideas
    • Crochet Ideas
    • Cross Stitch
    • Edible Crafts
    • Felting Patterns
    • Glass Art
    • Home & Garden Ideas
    • Indie Crafts
    • Jewelry Making
    • Kids Crafts
    • Knitting Patterns
    • Lesson Plans
    • Needlework
    • Party Ideas
    • Polymer Clay
    • Quilting Ideas
    • Recycled Crafts
    • Scrapbooking
    • Sewing Patterns
    • Card Making
    • DIY Weddings
    • Not Craft Ideas
  • Giveaways
  • Roundups
  • Store
  • Search

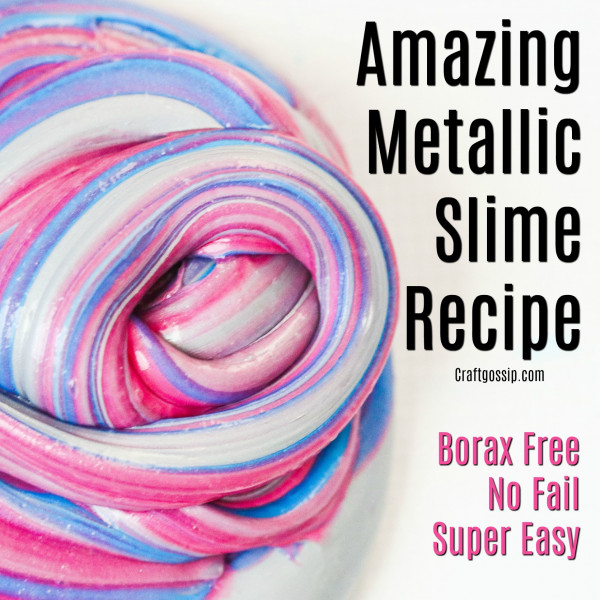
Amazing Metallic Slime Recipe

March 23, 2019 by Shellie Wilson

This DIY Slime is the perfect activity for a party time craft or rainy day activity.
Slime is a great sensory activity for Kids of all ages.
What happens when you make slime?  Apart from a gooey mess I mean. The glue has an ingredient called polyvinyl acetate, (PVA Glue)  which is a liquid polymer. The borax or liquid starch depending on which you use connects the polyvinyl acetate molecules to each other, creating one large conjoined flexible polymer.
What you will need
1/2 cup of water
1 cup of clear glue or 1 cup of white school glue Metallic Acrylic Paints Silver, purple and blue
2 tbs of cake sprinkles.
Disposable Plastic Cups and spoons 1/2 cup of liquid starch (laundry section of Supermarket)
Directions:
Pour the glue evenly into 3 separate plastic cups (one for each color), add a squirt of paint in each and mix well with the spoon.
Add your liquid starch to each cup a teaspoon at a time. Work with one color at a time only.
You need to work fast as the slime will start to form immediately. Stir for about 20 seconds, then take out of the cup and start kneading the mix, it will be sticky at first but will start coming together.
The mixture will start to thicken immediately. If it is still sticky add a few more drops of the liquid starch, keep doing this until it all comes together.
You need to do this for all 3 colors. Then lay out the slime in color strips. Then mix them together to form a stripey slime.
Store in an air-tight container. We have included some free labels you can print off for party favors.
Looking for more DIY Slime recipes? Check out these other Slime posts we wrote.
Slime is a great stress reliever as well as an educational tool, not only does it teach science but it is hands-on , which means children are using their fine motor skills to make and or play with slime.
If you are looking for more Sensory ideas, check out our DIY Sensory Aid Board on Pinterest  Or check out our handpicked sensory toy gift list on Amazon.

Slime is a great stress reliever as well as an educational tool, not only does it teach science but it is hands-on , which means children are using their fine motor skills to make and or play with slime.

Check out our Amazon gift guide for kids who love slime, we basically sourced all the best Slime gifts, Slime kits, Slime supplies and Slime merchandise and crammed it all into one gift guide.  Slime Lovers Gift Guide.
«
»

Have you read?

Knit a Stunning Scarf Studded with Muppets

I guess I’m on a bit of a double knitting tear these days. Just the other day I shared some double knitting potholder patterns, and if you’re ready for a more complex double knitting pattern, I would love to recommend this one to you. 

The Puppet Master Scarf from Katharina Kuntz is a long double knit scarf with a variety of Muppet characters on it. I see Kermit and Ms. Piggy, of course, as well as Fozzie Bear, Gonzo, Beaker, Rowlf the Dog, Rizzo the Rat and Sam Eagle to name a few. The scarf is densely packed with characters who are different colors on each side. 

They’re also potentially different colors from each other, which is shown in the sample here. There are charts in the pattern that show you how to work the whole scarf in two colors or use multiple colors for the different characters. 

As shown the scarf uses 20 colors of fingering weight yarn. You’ll need about 656 yards/600 meters of each if you use two colors, and a range for the different characters if you do them all in different colors, but only a couple of them take more than 50 yards. You could definitely use leftovers from other projects on this one. 

The finished scarf is about 6.4 inches/16.3 cm wide and 72.4 inches or 184 cm long. 

It would definitely be a labor of love but this looks like such a fun project and I’m sure you would get a lot of attention from knitters and non-knitters alike when you wear it!

While this project looks a lot more complicated than those pot holders I just shared, the skills are the same. You just really need to pay attention to the charts to make sure you’re making your characters look how they are supposed to. There are also photos and links to video tutorials to help you along the way. 

You can grab a copy of the pattern on Ravelry. 

[Photo: Katharina Kuntz]

RSS More Articles

  • Easy Halloween Fabric Candy Basket Beginner Sewing Pattern for Trick-or-Treating
  • Book Review: Once in a Blue Moon
  • 12 Scrapbook Layouts with Stenciled Backgrounds
  • Why Brava Yarn Is a Great Choice for Crochet Projects
  • Jelly Roll Gems Quilt Kit Featuring Handmade Sweetness by My Sew Quilty Life
  • Easy Thanksgiving Turkey Finger Painting Craft for Kids
  • I’m The Bomb Bath Bomb Maker T-Shirt Review – A Fun Gift For Bath Bomb Makers
  • Halloween Sampler Cross Stitch Patterns
  • Video Ribbon Embroidery Tutorials for French Knots
  • Book Review: Knits for Little Ones

Pick Your Blog

  • Sewing
  • Knitting
  • Quilting
  • Crochet
  • Home & Garden
  • Recycled Crafts
  • Scrapbooking
  • Card Making
  • Polymer Clay
  • Cross-Stitch
  • Edible Crafts
  • Felting
  • Glass Art
  • Indie Crafts
  • Kids Crafts
  • Jewelry Making
  • Lesson Plans
  • Needlework
  • Bath & Body
  • Party Ideas
  • Candle Making
  • DIY Weddings
  • Not Craft
  • Free Craft Projects

Copyright © 2026 · CraftGossip | Start Here | Contact Us | Link to Us | Your Editors | Privacy and affiliate policy