
• Home
  • Suggest A DIY
  • DIY Newsletter

Craft Gossip

Independent craft blog since 2007

  • About CraftGossip
  • Our Network
    • Bath & Body Crafts
    • Candle Making Ideas
    • Crochet Ideas
    • Cross Stitch
    • Edible Crafts
    • Felting Patterns
    • Glass Art
    • Home & Garden Ideas
    • Indie Crafts
    • Jewelry Making
    • Kids Crafts
    • Knitting Patterns
    • Lesson Plans
    • Needlework
    • Party Ideas
    • Polymer Clay
    • Quilting Ideas
    • Recycled Crafts
    • Scrapbooking
    • Sewing Patterns
    • Card Making
    • DIY Weddings
    • Not Craft Ideas
  • Giveaways
  • Roundups
  • Store
  • Search

20 Lemonade Sweets For The Summer

February 13, 2023 by Shellie Wilson

Lemonade Desserts are perfect for summertime. These recipes are all lemonade inspired. My Favorite pairing with lemon is actually strawberry, I have included my favorite strawberry lemonade recipe below so you can taste test this blend of flavors.

Just in case you don’t know what lemonade is, it is Lemonade is a sweetened lemon-flavored beverage.

Lemonade comes from humble beginnings of pure fresh Lemon juice and a sweetener, traditionally it was sugar cane syrup but now sugar is added in the form of white sugar, brown sugar or sugar syrup.   Sugar syrup is made using this recipe.

Simple syrup is 1 part sugar to 1 part water. boiled to reduce into a syrup-like consistency.

However, now you can get lemonade soda too.  In fact, if you ask for lemonade depending where you are in the world will depend if you get lemon soda or lemon juice.

Pink Lemonade Icebox Pie Squares – Tastes of Lizzy T

Lemonade Pie with a Sugar Cone Crust – Dizzy Busy and Hungry

Raspberry Lemonade Yogurt Popsicles – Cookie Dough and Oven Mitt

Lemonade Poke Cake – An Alli Event

Pink Lemonade Cupcake Truffles – South Your Mouth

Strawberry Lemonade Linzer Cookies – Neighbor Food Blog

Strawberry Lemonade Muffins – The Simple Home Place

Pink Lemonade Fudge – Ruffles and Rain Boots

Pink Lemonade Ice Cream – Well if She Can Do it

Pink Lemonade Mini Cheesecakes – The Soccer Mom Blog

Strawberry Lemonade Cupcakes – Baking Beauty

Instant Pot Raspberry Lemonade Custard – Encouraging Moms at Home

Lemonade Fruit Dip – Cookie Dough and Oven Mitt

Pink Lemonade Cake – Caked by Katie

Strawberry Lemonade Mug Cake – The Monday Box

Pink Lemonade Freezer Bars – Averie Cooks

No Bake Pink Lemonade Cheesecake Parfaits – Homemade Hooplah

Mini Pink Lemonade Baked Donuts – The Missing Lokness

Frozen Lemonade Pie – Love Bakes Good Cakes

Frosted Lemonade – Dessert Now Dinner Later

I wanted to share with you my favorite recipe for homemade Strawberry Lemonade, drink it on its own or add a splash of your favorite Alcohol.

Strawberry Lemonade Recipe

Prep: 10 Minutes
Serves: 2

Ingredients:

1 lemon
4 strawberries
1 bottle simply lemonade
ice
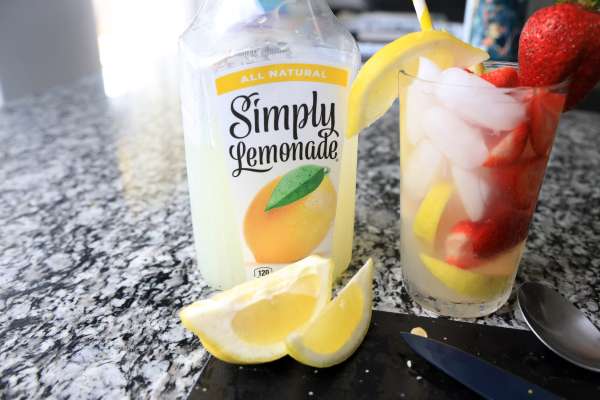
Instructions:

Slice one lemon into slices. Reserves two slices for topping. Place half the remaining into each glass. Slice two of the strawberries. Place one sliced strawberry per glass.
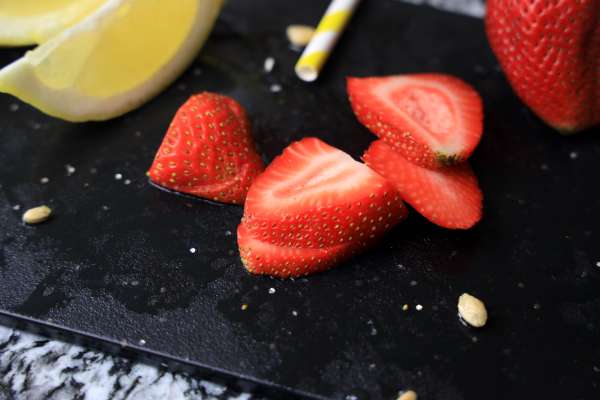
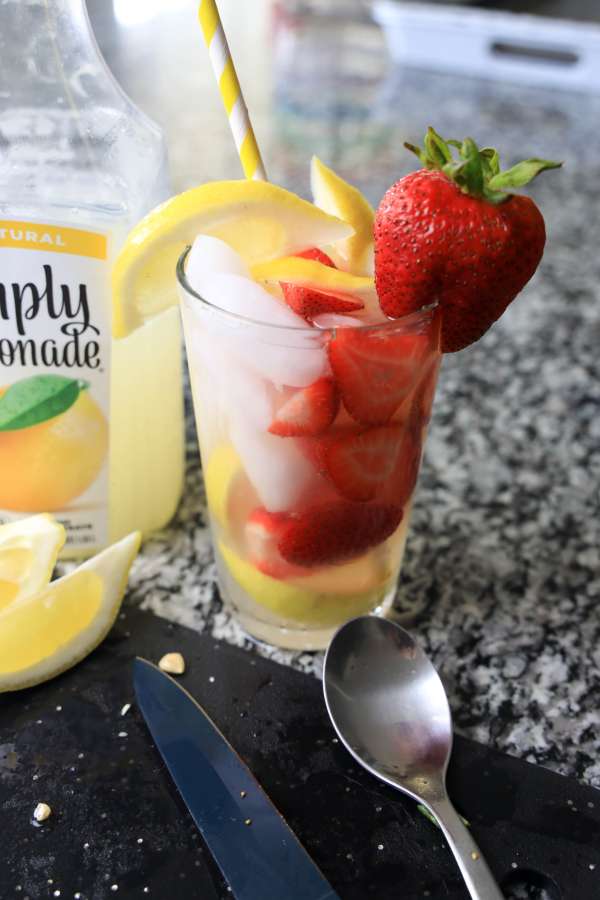
Add ice and pour in the lemonade. Top with one lemon wedge and one whole strawberry per glass.

Serve cold!
So is Lemonade good for you?  Lemonade made with fresh lemon juice, is a great boost to the immune system.

Not only does fresh lemonade it provide us with our daily source of Vitamin C, but the benefits of lemons are also seen in its antioxidizing qualities. Lemons provide antioxidants, keeping us healthy and boosting our immune system.

«
»

Have you read?

How to Make Beautiful Stamped Clay Pots with Air Dry Clay

If you’ve ever wanted to dip your toes into clay crafts without the fuss of a kiln, air dry clay is your new best friend. It’s affordable, easy to work with, and dries beautifully into something that looks much fancier than it really is. These DIY stamped clay pots are the perfect weekend project. They’re practical, pretty, and make wonderful handmade gifts. Think pen holders, plant pots, or even a little bathroom organizer for makeup brushes.

Why You’ll Love This Project

  • No kiln or oven required – just let the clay dry naturally.

  • Endless design possibilities with stamps, lace, or texture mats.

  • A chic way to organize your desk, vanity, or craft room.

  • Great gift idea (fill with treats, pens, or a little succulent).

Supplies You’ll Need

  • Air-dry clay (white or terracotta works best)

  • Rolling pin (or a smooth glass bottle)

  • Stamps, lace, or textured rolling pins for designs

  • Craft knife or clay cutter

  • Water and a small paintbrush (for smoothing seams)

  • Cylinder form (a glass, tin can, or jar to shape the pot)

  • Sandpaper (fine grit, for finishing)

  • Optional: acrylic paints or clear sealant

Step-by-Step Tutorial

Step 1: Roll Out the Clay

Sprinkle a little cornstarch on your surface so the clay doesn’t stick. Roll your clay into a flat slab about ¼ inch thick. Keep it even so your pot doesn’t dry lopsided.

Step 2: Add the Texture

Now for the fun part! Press your stamp, lace, or textured roller firmly into the clay. Don’t worry about perfection—slight variations give it that handmade charm.

Step 3: Cut Your Rectangle

Measure your cylinder (jar, can, or glass) and cut a rectangle of clay that will wrap all the way around it. Cut out a circle of clay for the base.

Step 4: Build the Pot

Wrap the clay rectangle around your form and gently press the seam together. Use a little water and a paintbrush to smooth it out. Attach the circular base with the same water “glue” method, blending the edges for strength.

Step 5: Smooth & Shape

Run damp fingers along the rim and seams to soften rough edges. This is where your pot starts looking polished.

Step 6: Drying Time

Let your pot air dry for 24–48 hours (depending on the clay brand and thickness). Don’t rush this step—if the clay dries too quickly, it can crack.

Step 7: Sand & Finish

Once dry, lightly sand any rough spots. You can leave it raw white for a chic, minimal look, or paint/seal it with acrylic paints and clear varnish for extra durability.

Creative Ideas for Stamped Clay Pots

  • Boho Vibes: Use lace doilies for a soft, romantic texture.

  • Rustic Look: Try a wooden stamp or burlap fabric pressed into the clay.

  • Modern Minimalist: Leave the pot smooth and paint it matte black or terracotta.

  • Giftable Touch: Wrap with twine and tuck in a small succulent.

Tips

  • Keep unused clay wrapped tightly in plastic so it doesn’t dry out.

  • If cracks appear, fill with a little clay slip (clay mixed with water).

  • Don’t make your pots too tall or thin—the clay is stronger in compact shapes.

These DIY air dry clay pots prove that you don’t need a pottery wheel to create beautiful handmade pieces. Whether you use them for storage, décor, or gifting, each one turns out unique—just like handmade should be.


RSS More Articles

  • How to Use a Gel Press for Mixed Media Scrapbook Backgrounds
  • Clay Studio Series – You Tube Video Review – Centering Clay on the Wheel
  • 12 Free Chunky Knit Blanket Patterns for the Cosy Season
  • 9 Best Crochet Hooks For Beginners, Comfortable Crocheting And Every Type Of Yarn
  • 6 DIY Scalp Scrubs For Buildup, Oily Roots And Dry Flaky Scalps
  • It’s Okay If You Can’t Finish Your Quilt Right Now – A Gentle Reminder for Hobby Quilters With Unfinished Projects
  • 15 Junk Journal Spread Ideas You’ll Actually Want to Try
  • Sewing Pattern Saturday: Polly Tea Dress Sewing Pattern Review
  • Easy Outdoor Games to Play with Kids
  • How to Knit Feather and Fan Stitch: Tutorial, Videos and Beautiful Knitting Patterns

Pick Your Blog

  • Sewing
  • Knitting
  • Quilting
  • Crochet
  • Home & Garden
  • Recycled Crafts
  • Scrapbooking
  • Card Making
  • Polymer Clay
  • Cross-Stitch
  • Edible Crafts
  • Felting
  • Glass Art
  • Indie Crafts
  • Kids Crafts
  • Jewelry Making
  • Lesson Plans
  • Needlework
  • Bath & Body
  • Party Ideas
  • Candle Making
  • DIY Weddings
  • Not Craft
  • Free Craft Projects

Copyright © 2026 · CraftGossip | Start Here | Contact Us | Link to Us | Your Editors | Privacy and affiliate policy