• Home
  • Suggest A DIY
  • DIY Newsletter

Craft Gossip

Independent craft blog since 2007

  • About CraftGossip
  • Our Network
    • Bath & Body Crafts
    • Candle Making Ideas
    • Crochet Ideas
    • Cross Stitch
    • Edible Crafts
    • Felting Patterns
    • Glass Art
    • Home & Garden Ideas
    • Indie Crafts
    • Jewelry Making
    • Kids Crafts
    • Knitting Patterns
    • Lesson Plans
    • Needlework
    • Party Ideas
    • Polymer Clay
    • Quilting Ideas
    • Recycled Crafts
    • Scrapbooking
    • Sewing Patterns
    • Card Making
    • DIY Weddings
    • Not Craft Ideas
  • Giveaways
  • Roundups
  • Store
  • Search

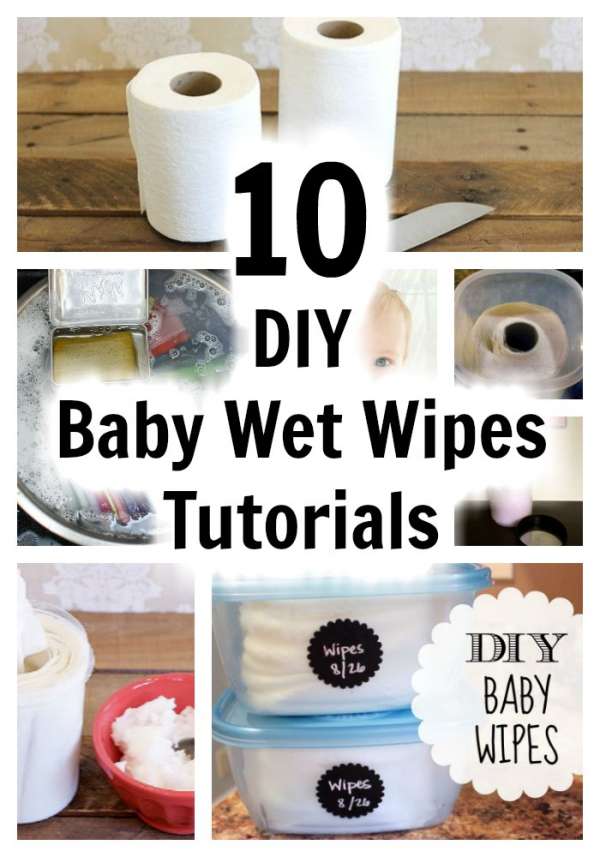
10 Baby Wet Wipes You Can Make At Home

April 12, 2020 by Shellie Wilson

Baby wet wipes are becoming scarce and lots of people are looking for affordable alternatives to them. Making your own is not a new thing. Minimalists and frugal-ists have been doing it for years.

We rounded up a few variations of the DIY recipes or tutorials so that you can find a baby wet wipe tutorial that suits your needs and what you have on hand.

This tutorial is from our sister site Craftbits.com  For this recipe you will need

Paper towel
1 tbs Baby Lotion
1 tbs Baby soap
1 tbs Baby Oil
1 cup Boiling Water

You can see the full tutorial here.

With all of these wet wipe recipes you are making a liquid base and pouring it over disposable paper towel, chux cloths or linen reusable cotton sheets.  If you want to make these wipes using the items you have in home consider ripping up an old cotton bed sheet into squares (make sure they are big enough for your hand to wipe with). You could use them as rags and throw them away, especially if you are only using homemade wipes temporarily (till you get out of isolation or get to the shops).

Instead of paper towels, I have actually become a big fan of bamboo cloths. They still come on a roll but you can rinse and re-use them. They are cheap enough so if you are cleaning up something gross you can throw those ones out.

If you do not have a baby shampoo, look in your cupboard for basic soap flakes, or a gentle shampoo to use diluted in the water. In my experience when making makeup removal wipes, I didn’t need a soap, only the coconut oil so considering omitting it totally. Try it and see what works for your babies butt.

This recipe by Vitacost for wet wipes uses coconut oil. Coconut oil is gentle on the skin and the perfect cleanser. Here is another coconut oil version too.

The Very Well Family shows you how to make throwaway wet wipes and re-usable ones too.  For re-usable wipes I suggest buying cotton cloths in bulk. You can also buy cotton eco packs on Etsy.

Natures Nurture has a tutorial for wet wipes using natural ingredients and paper towel.

Another simple homemade wet wipes recipe is this one by Favfamilyrecipes.

Wellness Mama also has a suitable and easy to follow instructions for making your own wet wipes.

Diynatural.com has a tutorial here

This is one of my favorites and it is a zero waste wet wipes tutorial that you can make at home and save the environment at the same time.

Still looking? Check out this video showing you how to make these:

 

«
»

Have you read?

DIY Giant Eyeball Lanterns – Creepy Halloween Decoration

When it comes to Halloween, bigger is always better—and these giant eyeball lanterns prove it! With nothing more than plain white paper lanterns, a little paint, and some imagination, you can create huge, spooky eyes that look like they’ve popped right out of a monster movie.

They’re perfect for hanging from ceilings, displaying on porches, or grouping together in a corner for an eerie effect. Best of all, paper lanterns are super inexpensive (you can grab them on eBay, Amazon, or even your local dollar store), which makes this a great budget-friendly craft for big impact Halloween décor.

Supplies You’ll Need

  • Large round white paper lanterns (various sizes look best) 
  • Acrylic paints or craft paints in black, brown, green, red, orange, or blue (for irises) 
  • Wide paintbrush for background color 
  • Small paintbrush for details 
  • Black construction paper or cardstock (optional for spiky “lashes” or accents) 
  • Hot glue gun or strong craft glue 
  • String or fishing line (if you want to hang them) 

Step-by-Step Instructions

Step 1: Prep the Lanterns

  1. Assemble your white paper lanterns according to the package directions. 
  2. Make sure they’re fully open and the wire insert is in place so the surface is taut for painting. 

Step 2: Paint the Iris

  1. Using a wide brush, paint a large circle in the center of the lantern to create the iris. 
  2. Choose spooky colors—green, red, orange, or blue work wonderfully. 
  3. Don’t worry about making it perfectly smooth; streaks and uneven textures add to the eerie, organic look. 

Step 3: Add the Pupil

  1. Once the iris paint is dry, use black paint to fill in the pupil at the very center. 
  2. Make it large enough to stand out against the iris. 

Step 4: Detail the Eye

  • Use a smaller brush to add darker or lighter streaks in the iris for a more realistic effect. 
  • You can even add thin vein lines in red around the iris to give it that bloodshot look. 

Step 5: Optional Spiky Lashes

  1. Cut long triangles from black construction paper or cardstock. 
  2. Glue them around one side of the lantern so they stick out like sharp monster eyelashes. 
  3. This makes the eyeballs look even more monstrous and stylized. 

Step 6: Display Your Giant Eyeballs

  • Hanging: Use string or fishing line to suspend them from ceilings, trees, or porch rafters so they look like floating eyeballs. 
  • Stacked: Place them in corners, along stairs, or even grouped on your lawn for a spooky display. 
  • Tabletop: Use them as oversized Halloween party props. 

Tips & Variations

  • Glowing Eyes: Insert battery-powered LED lights into the lanterns so they glow from the inside. 
  • Rainbow Eyes: Mix up the colors and make a whole rainbow of creepy eyes. 
  • Monster Cluster: Group multiple eyeballs together in different sizes for a scarier effect. 

This DIY Giant Eyeball Lantern craft is quick, cheap, and gives you maximum Halloween spook factor with minimal effort. Whether you make one or a whole creepy collection, your haunted house setup will definitely be eye-catching!


RSS More Articles

  • Book Review: Fine Whitework by Jenny Adin-Christie
  • Learning Numbers for Preschoolers
  • 6 Free Celestial Coloring Pages
  • Happy Diwali Kids Elephant T-Shirt
  • Stitch a Colorful Cross Stitch Unicorn
  • Knit a Plaid Cowl with a Built in Pun
  • How To Make Bread Dough Jewellery – Craft Project Review
  • Free Halloween Crochet Patterns You Can Make in a Day
  • Best Chicken Ramen Broth Recipe: Rich, Golden And Full Of Flavour
  • Homemade Jewellery Cleaner Recipes Using Pantry Ingredients

Copyright © 2026 · CraftGossip | Start Here | Contact Us | Link to Us | Your Editors | Privacy and affiliate policy